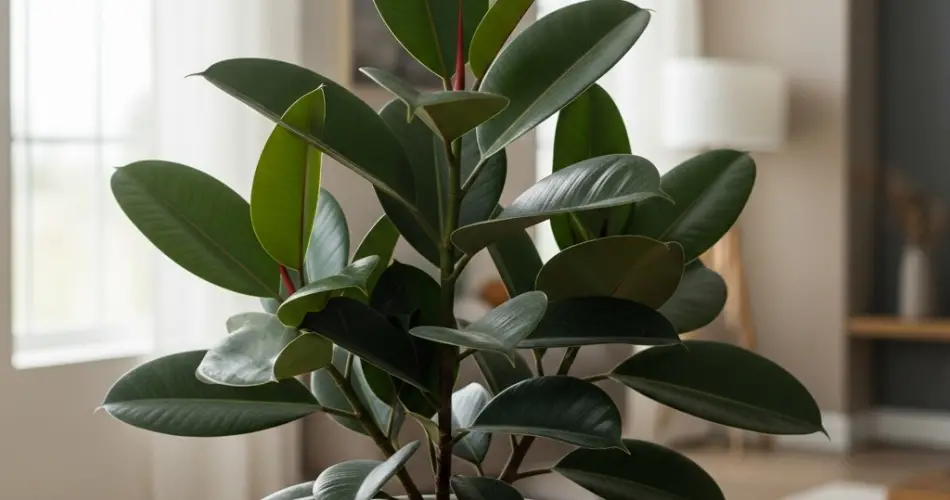
The rubber plant (Ficus elastica) is a striking, low-maintenance houseplant that can add height and a dramatic splash of deep green to any indoor setting. Known for its thick, glossy leaves and sturdy growth habit, the rubber plant thrives in containers and adapts well to the indoor environment when potted correctly.
Whether you’re a beginner or an experienced plant owner, potting your rubber plant properly is key to ensuring long-term health, balanced growth, and vibrant foliage. Here’s a complete guide to potting a rubber plant and keeping it healthy indoors.
Why the Rubber Plant Is Perfect for Indoor Pots
Rubber plants are well-suited for life in containers due to their manageable growth rate and tolerance for indoor conditions. In their natural habitat, they can grow into towering trees, but when grown in pots, their size can be controlled through pruning and proper potting.
Aside from being an attractive focal point in any room, the rubber plant is also known for improving indoor air quality by filtering out toxins such as formaldehyde.
Choosing the Right Pot
Selecting the right container is one of the most important decisions for your rubber plant’s success. Choose a pot with drainage holes at the bottom to prevent water from accumulating, which can lead to root rot. The container should be proportionate to the size of the plant—typically one or two inches larger in diameter than the current root ball.
Avoid oversized pots, as they hold more soil and therefore retain more moisture, which can overwhelm the roots. If you’re repotting, move up only one pot size to avoid overwatering problems.
Decorative outer pots are fine to use, but always ensure that the actual planting pot has adequate drainage and is easy to remove for watering.
Best Soil Mix for Rubber Plants
Rubber plants prefer a well-draining, airy potting mix that retains some moisture without becoming soggy. A good standard indoor plant mix will do, but you can improve it by adding:
-
Perlite or pumice (for drainage)
-
Pine bark or orchid bark (for aeration)
-
A small amount of coco coir or peat moss (for moisture retention)
A suggested mix would be two parts all-purpose potting soil, one part perlite, and one part pine bark. This combination supports root health and helps prevent waterlogging.
When and How to Pot or Repot
Rubber plants should be potted or repotted in the spring or early summer, during their active growing season. This helps minimize stress and allows the plant to establish new roots quickly.
Steps for potting or repotting:
-
Water the plant a day before repotting to make it easier to handle.
-
Remove the plant gently from its current container by tipping the pot and sliding it out. Loosen the root ball carefully.
-
Trim any damaged roots or overly long roots.
-
Place fresh soil at the bottom of the new pot, just enough so that the top of the root ball sits about an inch below the rim.
-
Set the plant in place, then backfill with more soil around the root ball, pressing lightly to remove air pockets.
-
Water thoroughly until water drains out the bottom, ensuring the roots make good contact with the new soil.
Avoid fertilizing immediately after repotting; wait about 4–6 weeks until the plant has settled in its new environment.
Light and Placement Indoors
Rubber plants grow best in bright, indirect light. A spot near a window with filtered sunlight is ideal. Too much direct sun can scorch the leaves, while too little light can cause leaf drop or leggy growth.
If your plant starts leaning toward the light, rotate the pot every few weeks for even growth. Avoid placing it in drafty areas or near heating and cooling vents, as these can stress the plant.
Watering After Potting
After repotting, allow the top 1–2 inches of soil to dry before watering again. Rubber plants don’t like sitting in soggy soil. During the growing season (spring to early fall), water moderately. In winter, reduce watering as the plant enters a slower growth phase.
Yellowing or drooping leaves may be a sign of overwatering. On the other hand, dry, crispy edges may indicate underwatering or low humidity.
Supporting Healthy Growth
Here are a few extra tips to keep your potted rubber plant in top condition:
-
Humidity: While rubber plants tolerate average humidity, they prefer slightly humid environments. Mist the leaves occasionally or use a humidity tray if the air is too dry.
-
Cleaning leaves: Wipe the leaves with a damp cloth to remove dust and improve photosynthesis.
-
Fertilizing: During spring and summer, feed with a balanced liquid houseplant fertilizer every 4–6 weeks.
Final Thoughts
Potting your rubber plant correctly is the first step toward enjoying a lush, upright indoor tree that enhances your home with greenery and style. With the right container, well-draining soil, and thoughtful care, your rubber plant will reward you with strong growth and glossy leaves for years to come. Whether you’re growing it as a statement piece or part of a larger indoor garden, this plant’s resilience and beauty make it a favorite among indoor plant lovers.


