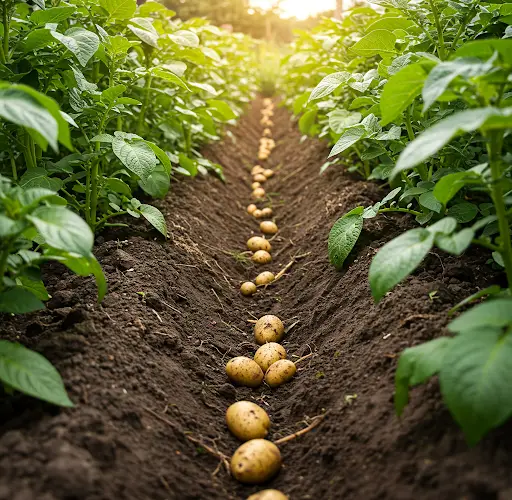
How to Grow Healthy, High-Yield Potatoes in Your Garden: A Step-by-Step Guide
With a little care and attention, growing a bountiful harvest of delicious potatoes at home is easier than you might think. By following a few essential steps, you can ensure your potato plants thrive and reward you with an impressive yield of golden tubers. Here’s a practical guide that outlines everything you need to do to maximize your potato harvest.
1. Weed the Potato Bed
The journey to a successful potato harvest begins with preparing a clean, weed-free bed. While removing weeds may seem like a routine task, it’s one of the most crucial steps in ensuring healthy plant growth. Weeds compete with potato plants for key resources such as sunlight, water, and nutrients. If allowed to remain, they can weaken your potatoes and significantly reduce yields.
By keeping the bed clear of weeds from the beginning and maintaining it regularly, you allow your potato plants to access everything they need to grow vigorously. Think of it as removing roadblocks so your plants can thrive without competition.
2. Hilling: Add Soil to Support Growth
Once your potato plants have sprouted and are a few inches tall, the next step is a process called hilling—the act of piling soil around the base of the plants. This is a key technique in successful potato growing.
Potatoes form underground as tubers, and without enough soil covering them, they can become exposed to sunlight. When this happens, they turn green and produce solanine, a toxic compound unsafe for consumption. Hilling not only shields the tubers from light but also encourages the plant to produce more tubers along its buried stems.
As the potato plants continue to grow, repeat the hilling process every couple of weeks, gradually building up the soil around the base. This also helps to support the plants structurally and protect the developing tubers from temperature extremes and moisture loss.
3. Apply Slow-Releasing Fertilizer
Potatoes are considered heavy feeders, meaning they require a consistent supply of nutrients throughout their growth cycle. To meet these needs, enrich the soil around your plants with a slow-releasing, organic fertilizer mix.
Here’s a nutrient-rich mixture you can easily prepare:
-
50% compost
-
50% loamy soil
-
1 cup of bone meal
-
1 cup of neem cake powder
Bone meal is a fantastic source of phosphorus, which is vital for root and tuber development. Phosphorus encourages potatoes to grow larger and firmer, ensuring a better-quality harvest. Neem cake powder, made from neem seeds, serves multiple roles: it’s a natural insect repellent and an excellent organic soil conditioner that enhances fertility.
Once your mix is ready, apply it generously around the hills of your potato plants. Focus on the root zone, as this is where the nutrients will be absorbed. The compost helps improve soil structure and moisture retention, while the loamy soil ensures proper aeration and drainage.
This balanced soil environment not only promotes healthy root development but also supports the beneficial microbial activity that keeps your soil alive and fertile.
4. Water Wisely
After applying your fertilizer mix, it’s important to maintain consistent soil moisture, especially during dry or hot weather. Potatoes need steady watering to ensure their tubers develop well, but overwatering can be just as harmful as underwatering.
The goal is to keep the soil evenly moist but never soggy. Good drainage is essential to avoid root rot and other fungal issues. Mulching around the base of the plants can help retain moisture and regulate soil temperature.
5. Monitor and Maintain
Throughout the growing season, continue to monitor your plants’ progress. Look for signs of nutrient deficiency, such as yellowing leaves or slow growth. If needed, supplement with organic liquid fertilizers like compost tea to give your plants a mid-season boost.
Pest management is also important. Keep an eye out for common potato pests like Colorado potato beetles or aphids, and address them using organic methods like neem oil or handpicking. Maintaining a healthy garden ecosystem with companion plants like marigolds can also deter pests naturally.
6. Enjoy the Harvest
When your plants start to yellow and die back—typically around 90 to 120 days after planting—it’s a sign that your potatoes are ready to harvest. Carefully dig into the soil with a fork or spade to avoid damaging the tubers, and gently lift them out.
There’s nothing quite like the satisfaction of uncovering fresh, homegrown potatoes from your garden. Whether you roast, mash, or fry them, the flavor and freshness will be well worth the effort you’ve put in.
By following these steps—clearing weeds, hilling properly, enriching your soil, watering wisely, and staying attentive—you can enjoy a rich and healthy potato harvest from your very own backyard. Happy growing!


