Growing peas at home doesn’t require a large backyard or expensive planters. With a few plastic bottles and some basic supplies, you can create an efficient and space-saving system to produce fresh peas right from your balcony, patio, or sunny windowsill. This bottle-growing method works well for both novice and experienced gardeners, offering a sustainable and affordable way to enjoy this nutritious vegetable year-round.
Why Grow Peas in Bottles?
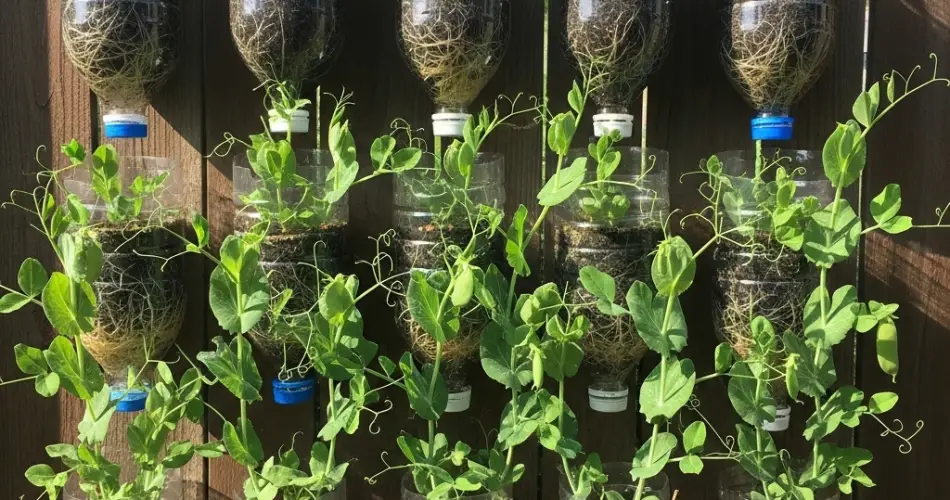
Peas are easy to grow, and they thrive in containers when given the right conditions. Using plastic bottles as planters helps reduce waste, recycles materials you already have, and offers excellent control over watering and soil conditions. Bottles also take up little space, making them ideal for urban gardeners with limited room. The clear sides of a bottle make it easy to monitor root growth, while the narrow design helps keep the soil moist without becoming waterlogged.
Materials You’ll Need
To start your pea bottle garden, gather the following:
-
Large plastic bottles (1.5L to 2L)
-
Scissors or a utility knife
-
Potting mix or a blend of garden soil and compost
-
Pea seeds (choose dwarf or bush varieties for limited space)
-
A small watering can or spray bottle
-
A stake or small trellis for support
Preparing the Bottle Planters
-
Cut the Bottle – Remove the top third of the bottle to create an open container. This gives the plants enough space for air circulation and makes it easier to plant and water them.
-
Add Drainage Holes – Use the knife or scissors to poke several small holes at the bottom to prevent water from pooling.
-
Optional Lining – If you want to prevent soil from spilling out, place a thin layer of stones or pebbles at the base before adding soil.
Planting the Peas
-
Prepare the Soil – Fill the bottle with a nutrient-rich mix, leaving about 3–5 cm from the rim. A combination of potting soil and compost ensures healthy root development.
-
Sow the Seeds – Make small holes about 2–3 cm deep and drop one seed in each. Space them evenly to avoid overcrowding.
-
Cover and Water – Lightly cover the seeds with soil and water gently until the soil is moist but not soggy.
Supporting Your Plants
Peas are climbing plants, so even in bottles, they’ll need some form of support. Insert a thin stake or stick into the bottle, or place the bottle near a small trellis. As the pea plants grow, gently guide their tendrils toward the support so they can climb naturally.
Caring for Pea Plants in Bottles
-
Light – Place the bottles where they will get at least 5–6 hours of sunlight daily.
-
Watering – Keep the soil evenly moist. Bottles can dry out faster than traditional pots, so check the moisture daily.
-
Feeding – Once the seedlings have a few leaves, feed them with a diluted liquid fertilizer every two weeks to encourage strong growth and flowering.
-
Pruning – Remove any yellowing leaves and pinch off tips if the plants become too tall for their supports.
Harvesting Your Peas
Peas are usually ready for harvest about 60–70 days after planting, depending on the variety. Harvest when the pods are plump but before they begin to harden. Picking regularly encourages the plant to produce more pods, giving you a longer harvest season.
Reusing and Replanting
After the season ends, remove old plants and compost the soil. Wash the bottles thoroughly, and you can reuse them for your next planting cycle. With staggered planting every few weeks, you can enjoy fresh peas for much of the year.
Growing peas in bottles is an easy and sustainable gardening method that fits any space. Not only does it provide a fresh supply of healthy vegetables, but it also helps reduce plastic waste by repurposing bottles that might otherwise be discarded. With just a little care and attention, you can turn a few simple materials into a productive mini garden that rewards you with crisp, sweet peas straight from the plant.


