Identifying and Treating Orchid Diseases: Root Rot, Insect Infestations, and Fungal Issues
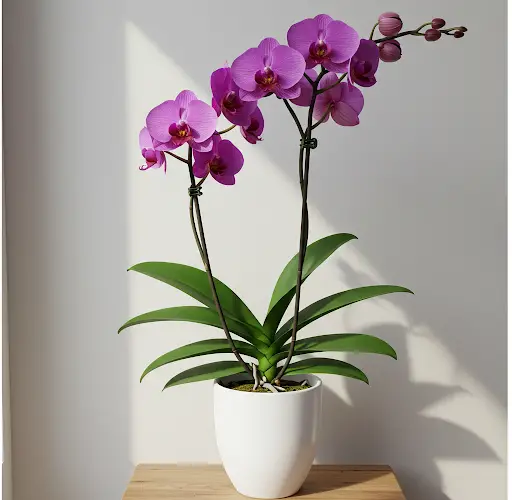
Orchids are beautiful and delicate plants that require meticulous care to thrive. However, they can sometimes suffer from diseases such as root rot, fungal infections, and insect infestations. Detecting and treating these issues early can prevent irreversible damage and help your orchid recover successfully. Today, I will discuss how to identify common orchid diseases, take preventative measures, and treat affected plants effectively.
Recognizing Orchid Infestations and Diseases
A few days ago, I noticed small bugs on my orchid. To confirm their presence, I placed a slice of potato on the soil. After some time, I checked again and saw tiny insects crawling on the potato. These insects are significant indicators of an underlying problem. If left untreated, they can lead to slow orchid decay, root rot, or fungal infections. Even if the orchid continues to bloom initially, the flowers may start falling off prematurely due to the infestation.
At first glance, my orchid appeared healthy. However, upon closer inspection, I realized that the infestation could be causing hidden root issues. That’s why it is essential to regularly check the soil and roots of orchids, as problems may not always be visible on the surface.
Causes of Root Rot and Orchid Decay
One of the leading causes of infestations and root rot is improper watering. I strongly advise against watering orchids at night. Since orchids do not receive adequate light at night, they are unable to absorb excess moisture efficiently. This can lead to fungal growth and root decay. Over time, excessive moisture creates a favorable environment for pests and harmful bacteria, which eventually weaken the plant.
To examine my orchid more closely, I gently removed it from its pot to check its roots. The outermost roots looked green, but as I separated them, I discovered yellowing roots deeper inside. Yellowing and hollow roots are warning signs of decay. To see the damage more clearly, I rinsed the roots under running water. Once cleaned, I could see that many inner roots had turned yellow and become hollow.
Pruning and Treating Rotten Roots
To prevent further decay, I carefully pruned the affected roots. When cutting, it is important to differentiate between roots that are simply yellow and those that are hollow and lifeless. Only the hollow, paper-like roots should be cut because healthy yellow roots can still recover over time.
Before cutting, I sterilized my scissors using lemon juice. It is crucial to use disinfected tools to avoid spreading bacteria or fungal spores. As I trimmed the decayed roots, I observed that some sections had turned completely dry and brittle. These parts were no longer beneficial to the orchid and needed to be removed.
The Connection Between Root Rot and Orchid Leaf Yellowing
One of the major reasons for yellowing leaves and flower shedding in orchids is root decay. When roots start to rot, the plant struggles to absorb nutrients efficiently, causing the leaves to turn yellow and the flowers to fall. Over time, insect infestations occur due to the weakened state of the plant, further accelerating its decline.
To prevent the recurrence of disease, regular soil inspections are necessary. If the soil is infested with bugs, simply pruning the affected roots is not enough. The entire plant needs to be disinfected before repotting.
Disinfecting the Orchid to Eliminate Infections
To ensure my orchid was thoroughly disinfected, I prepared a natural cleansing solution using Arabic soap. I mixed half a tea glass of Arabic soap with two liters of water. Arabic soap is an excellent natural disinfectant that helps eliminate fungal spores, insect eggs, and bacteria lingering on the plant.
Next, I gently wiped the leaves and roots using a cotton ball soaked in the soapy solution. When performing this step, it is crucial to avoid letting water enter the orchid’s crown (the center of the plant), as excess moisture in this area can cause rot.
For the roots, I lightly dipped them into the soapy solution and carefully poured water over them with my hand. This method helps remove any remaining bacteria or insect eggs. If there are difficult-to-reach areas, a soft, clean toothbrush can be used to scrub the roots gently.
Drying and Repotting the Orchid
After disinfection, I allowed my orchid to air-dry for a while. Drying is essential because repotting a wet orchid can trap moisture and lead to further fungal growth.
One of the most important steps in orchid recovery is repotting in fresh soil. Never reuse the old soil or pot without proper disinfection, as any leftover bacteria or fungi can reintroduce the disease. Ideally, use a transparent pot with multiple drainage holes to ensure good air circulation and prevent water accumulation.
If you wish to reuse the previous pot, it must be sterilized thoroughly before use. However, using a brand-new pot is the safest option to prevent reinfection.
Proper Orchid Repotting Techniques
When repotting, the roots should be placed near the surface of the soil to allow better access to light and air. Orchids thrive when their roots are partially exposed, as this mimics their natural growing conditions in the wild. I ensured that my orchid’s roots were visible on the edges of the new pot and then carefully added fresh orchid bark mix.
Preventative Measures for Healthy Orchids
To maintain a healthy orchid and prevent future infestations:
- Check soil regularly – Inspect the roots and soil at least once a month to catch any early signs of infestation or rot.
- Water in the morning – Watering in the morning ensures that excess moisture evaporates throughout the day, reducing the risk of fungal growth.
- Use a well-draining pot – Orchids require pots with good drainage to avoid excess moisture retention.
- Disinfect tools – Always clean pruning tools with alcohol or natural disinfectants like lemon juice before cutting orchid roots.
- Rotate soil occasionally – Refreshing the orchid’s soil every few months helps prevent diseases and maintains optimal root health.
- Provide adequate light and airflow – Placing your orchid in a bright area with good airflow ensures faster drying of the roots and prevents moisture-related issues.
Final Thoughts
Orchid diseases such as root rot, fungal infections, and insect infestations can be devastating if not detected early. However, by taking preventative measures and following proper disinfection techniques, it is possible to restore the health of an affected orchid. Regular maintenance, careful watering, and timely pruning will help your orchid grow stronger and bloom beautifully for years to come. I hope this guide has been helpful in understanding the common diseases affecting orchids and how to treat them effectively.


