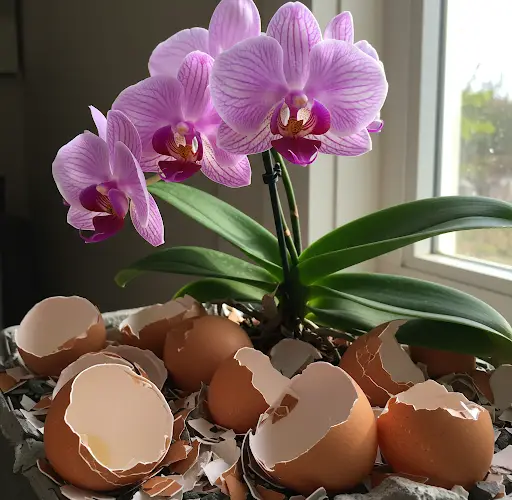
Letting orchids bloom all year round is a topic that many people are curious about. If you look at my orchid garden, you will notice that it always has an abundance of fresh, vibrant flowers growing continuously. This has helped my garden maintain its beauty throughout the year. Today, I will share with you a highly effective organic fertilizer made from eggs that can help your entire orchid garden flourish just like mine.
Using Eggshell Fertilizer to Promote Orchid Growth
When eating eggs, don’t discard the eggshells. They are a valuable source of calcium and essential minerals needed for orchids to grow strong and healthy. Calcium plays a crucial role in strengthening cell walls, improving resistance to diseases, and encouraging robust root growth.
Steps to Prepare Eggshell Fertilizer:
- Dry the eggshells: The first step is to dry them at high temperatures to eliminate any fungi and bacteria that could harm the orchids. This can be done by simmering them for about 5 minutes.
- Crush the shells: Once dried and brittle, grind the eggshells into a fine powder.
- Prepare the solution: Use 2 teaspoons of eggshell powder and mix it with 600ml of boiled water.
- Cooling and Application: Allow the water to cool before using it. Spray this solution on the base of the orchid, the underside, and the top of the leaves. It can even be sprayed directly on flowers to prevent them from falling prematurely.
- Frequency of Application: Apply this fertilizer every two weeks for optimal results.
This natural eggshell fertilizer not only stimulates flower growth but also strengthens the orchid plant, making it resilient against diseases. You should combine this fertilizer with other organic fertilizers for even better results.
Reviving an Orchid Infected with Fungal Rot
If your orchid has been infected with fungal rot, don’t worry! There is still a way to revive it.
Step-by-Step Guide to Reviving an Orchid with Fungal Rot:
- Inspect the Orchid: If all the roots are damaged but there is at least one fresh leaf remaining, the orchid can still be saved.
- Trim the Damaged Roots: Using sterilized scissors, cut off all the infected roots.
- Rinse Thoroughly: Wash the remaining healthy parts with clean water to remove any fungal pathogens.
- Prepare Garlic Water: Garlic peels have strong antiseptic properties and contain nutrients beneficial to orchids. Boil 1 liter of water and add garlic peels. Let the water absorb the nutrients for about an hour.
- Use Rice Water: Rice contains amino acids and essential minerals such as nitrogen, phosphorus, and potassium that help orchids recover. Take 3 tablespoons of rice, soak it in water, and let it sit for an hour.
- Apply the Solution: Use the prepared garlic and rice water to clean the leaves thoroughly, removing any remaining fungi and insects. Then, soak the orchid roots in this water for about 30 minutes to stimulate root growth.
Repotting and Nurturing the Orchid Back to Health
After treating the fungal infection, it’s important to repot the orchid in a way that encourages new growth. Here’s how you can do it:
- Recycle Plastic Cups: Use a small plastic cup or a nursery pot with proper drainage to allow air circulation.
- Use Floral Foam: Floral foam provides support and helps retain moisture while ensuring the roots don’t stay waterlogged.
- Secure the Orchid: Carefully place the orchid in the floral foam and use clips to hold it in place, preventing movement that could damage the roots.
- Watering: Pour water into the pot, but ensure the water level doesn’t reach the orchid’s base.
- Maintain Proper Conditions: Spray the plant with a light mist every three days and keep it in a well-lit, but not directly sunny, location to promote faster growth.
Encouraging Long-lasting Blooms
Once your orchid has regained its strength, regular care is essential to ensure long-lasting and frequent blooms. Here’s what you need to do:
- Water Weak Orchids: Watering weak orchids with rice water or garlic-infused water helps them develop new roots quickly, making them stronger and more resistant to disease.
- Support Blooming Orchids: For orchids that are already in bloom, this method helps prevent flower buds from falling off too soon. It also extends the lifespan of flowers, allowing them to stay on the branch for up to six months before fading.
- Apply Every Two Weeks: Watering your orchids with these natural fertilizers every two weeks ensures continuous nourishment and supports sustainable growth.
Results After One Month
After one month of following this method, you will notice significant improvements:
- New root growth: Strong, healthy roots will develop, allowing the orchid to absorb more nutrients efficiently.
- Young leaves emerging: Orchids will produce new leaves, indicating healthy growth.
- Improved plant resilience: The roots act as the soul of the orchid, ensuring stability and nutrient absorption.
- Outdoor adaptation: Once the orchid is strong enough, it can be transferred to a larger pot and placed in an outdoor environment where it can continue to flourish.
Final Thoughts
With this simple and effective method, you can easily restore and maintain healthy orchids at home. By utilizing natural, organic fertilizers and proper care techniques, your orchids will bloom year-round, adding beauty and freshness to your garden.
Hopefully, this guide has been helpful in improving your orchid care routine. If you found this information valuable, consider sharing it with fellow orchid enthusiasts. Happy gardening!


