Creating the perfect environment for your plants can be a challenge, especially when you want to maintain healthy growth year-round without constant intervention. A DIY greenhouse that largely takes care of itself can be a game changer for both hobby gardeners and those with limited time. This article will guide you through the design, construction, and features of a self-sustaining greenhouse that provides consistent watering, proper ventilation, and ideal growing conditions, helping your plants thrive with minimal effort.
Why Build a DIY Greenhouse?
Greenhouses extend the growing season, protect plants from pests and extreme weather, and provide a controlled environment to optimize growth. However, traditional greenhouses often require regular watering, manual ventilation, and constant monitoring of temperature and humidity.
By designing a greenhouse with self-watering and self-ventilating features, you can significantly reduce the daily maintenance workload, save water, and create a stable environment for plants. This DIY approach is not only cost-effective but also environmentally friendly.
Key Features of a Self-Sustaining Greenhouse
1. Automatic Watering System
Consistent moisture is critical for healthy plant growth. An automatic watering system ensures plants get the right amount of water regularly without over- or under-watering.
A simple and effective homemade drip watering system can be made using recycled cans or containers with small holes punched in the bottom. These cans are filled with water and placed near the plants, allowing water to slowly drip into the soil over time. This slow release keeps the soil consistently moist and reduces water waste.
For larger greenhouses, you can connect these containers with tubing to create a network that waters multiple plants simultaneously. The key is controlling the drip rate to avoid waterlogging.
2. Natural Ventilation
Plants need fresh air to prevent overheating, reduce humidity, and avoid fungal diseases. Automated ventilation can be achieved with clever design elements that respond to temperature changes without electricity.
One popular method is to install roof vents or side windows with hinges and weights or springs that open when the temperature rises. As the air heats up, it expands and triggers these vents to open, allowing hot air to escape and cooler air to enter.
Another simple solution is to use flaps made of lightweight materials like thin plywood or plastic, balanced so they open when warm and close as it cools, maintaining optimal airflow.
3. Efficient Use of Sunlight
A greenhouse should maximize natural sunlight while protecting plants from excessive heat or sunburn. Using transparent or semi-transparent materials like polycarbonate panels or greenhouse-grade polyethylene film allows sunlight to pass through while insulating the interior.
Inside the greenhouse, reflective surfaces or white-painted walls help distribute light evenly, ensuring plants get consistent exposure. Shade cloths can be added during the hottest months to prevent overheating.
Building Your DIY Greenhouse: Step-by-Step
Step 1: Choose the Location
Select a site that receives ample sunlight throughout the day, ideally south-facing in the northern hemisphere. The ground should be level with good drainage to prevent water accumulation.
Step 2: Frame Construction
Use wood or metal for the frame, depending on your budget and preference. Ensure the structure is sturdy enough to withstand wind and snow loads.
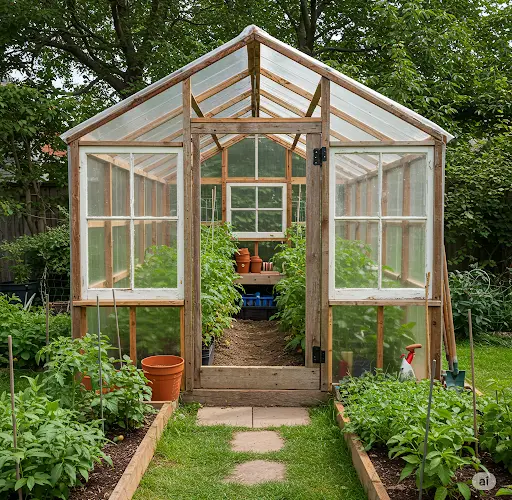
The size depends on your available space and plant needs, but even a small 6×8 foot greenhouse can be very effective.
Step 3: Install Transparent Covering
Attach polycarbonate panels or greenhouse film tightly over the frame, sealing edges to retain heat while allowing light in.
Step 4: Set Up Self-Watering System
Place water containers near each plant or bed. Drill small holes at the base of each container for slow dripping. Fill containers regularly or connect them to a larger water reservoir with a controlled valve system.
Step 5: Build Ventilation Features
Install hinged vents or flaps that open with heat. Test the opening mechanism to ensure smooth operation as temperatures rise and fall.
Step 6: Interior Arrangement
Arrange plants on raised beds or shelves to maximize space and airflow. Paint interior surfaces white or line them with reflective material.
Benefits of a Self-Sustaining Greenhouse
-
Water Efficiency: Slow drip watering minimizes waste and maintains consistent moisture.
-
Reduced Labor: Automated ventilation and watering reduce the need for daily monitoring.
-
Improved Plant Health: Stable environment minimizes stress, pest outbreaks, and diseases.
-
Year-Round Growing: Protects plants from cold weather, enabling off-season cultivation.
-
Cost Savings: Low-tech design means low energy use and affordable materials.
Tips for Success
-
Regularly check water reservoirs and refill as needed.
-
Clean vents and hinges to prevent sticking or failure.
-
Monitor plants for signs of pests or disease despite the controlled environment.
-
Adjust shade and ventilation based on seasonal changes.
-
Experiment with different drip rates to suit various plant species.
Final Thoughts
Building a DIY greenhouse that largely takes care of itself is a rewarding project that pays off in healthier plants, a longer growing season, and less hassle. With a simple homemade watering system, smart natural ventilation, and thoughtful design, your greenhouse will provide ideal growing conditions year-round.
By investing a little time upfront, you can create a low-maintenance oasis for your plants and enjoy fresh vegetables, herbs, and flowers regardless of the season.


