How to Rejuvenate an Old Orchid and Revive It to Grow Strong and Healthy
Orchids are beautiful and delicate plants that require careful attention to thrive. Over time, they may experience root rot, leaf damage, or general weakness, causing them to wilt and stop growing. However, with the right techniques, you can rejuvenate an old orchid and help it take root, sprout new leaves, and bloom again. In this guide, I will share the step-by-step process to revive a struggling orchid and bring it back to life.
Step 1: Removing Damaged Parts
Before starting the rejuvenation process, inspect the orchid carefully. If the plant has wilted leaves or rotting roots, they need to be removed.
- Use a sterilized pair of scissors or pruning shears.
- Cut off any damaged leaves and rotten roots.
- Rinse the remaining healthy parts thoroughly with clean water.
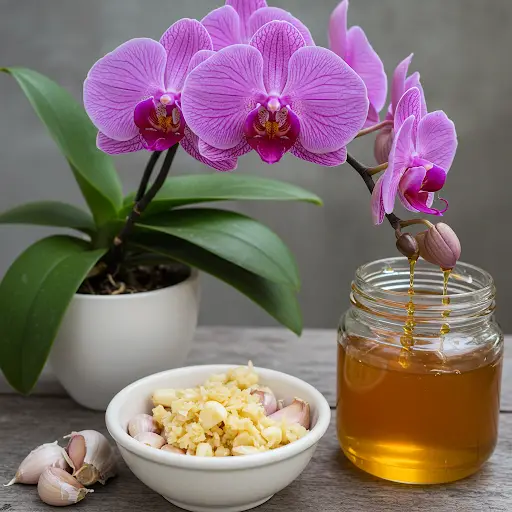
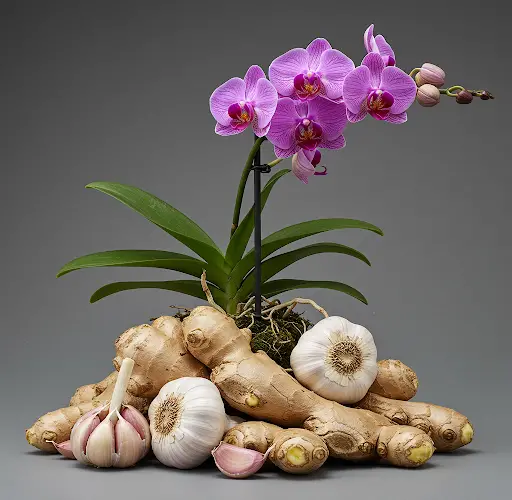
Step 2: Preparing a Natural Root Stimulant
Using natural ingredients like garlic and ginger can significantly stimulate root growth and protect the plant from infections.
Ingredients:
- 1 clove of garlic
- 1 sprig of fresh ginger
- 300ml of filtered water
Instructions:
- Puree the garlic and ginger with 300ml of water.
- Filter out the residue, keeping only the liquid solution.
- Soak the orchid branches in this mixture for 20 minutes.
- After soaking, remove the branches, pat them dry, and allow any cuts to air-dry.
- Dip the cut ends in molten candle wax to seal them and prevent rot.
Step 3: Creating a Mini Greenhouse for Faster Recovery
A controlled environment can speed up the healing and growth process.
- Recycle a plastic container to create a mini greenhouse.
- Place the orchid branches inside the container.
- Pour in a small amount of water, ensuring that it does not reach the orchid’s branches directly.
- Keep the greenhouse in a cool, shaded area with indirect sunlight.
- Water the plant once every two weeks to maintain moisture levels.
Step 4: Observing Growth and Progress
After about five weeks, you should start to notice positive changes in your orchid.
- New sprouts and roots will emerge from the rejuvenated old roots.
- The orchid branch will grow stronger and may even develop new leaves.
- At this stage, it is ready to be planted in a pot and transitioned to an outdoor environment.
Once planted, care for the orchid as you would a healthy plant, providing regular watering and maintaining the right amount of light.
Reviving a Wilted Orchid with Aloe Vera and Candle Wax
If your orchid has severe root rot and only the top part is still fresh, don’t lose hope. Follow these additional steps to revive it.
Steps:
- Dip the damaged cut into molten candle wax to seal it and prevent infection.
- Blend 1 aloe vera leaf with 300ml of water and filter out the residue.
- Soak the orchid branches in aloe vera water for 30 minutes.
- Remove the branches and allow them to dry.
- Place the orchid into a plastic box with floral foam for support.
- Keep the box in a cool, well-lit space (avoid direct sunlight).
- Maintain slight moisture without overwatering.
Observing Results: 45 Days Later
After about 45 days, you should see:
- Strong new roots emerging
- Healthy young leaves growing
- A revived, vibrant orchid ready for planting
Once the roots have sufficiently developed, transfer the orchid into a pot with a layer of moss to retain moisture. Water lightly to maintain a healthy growing environment.
Reviving a Dendrobium Orchid
Dendrobium orchids are known for their stunning colors and fragrance. If you have a weak Dendrobium orchid, follow these steps:
- Trim all old and damaged roots.
- Rinse the orchid thoroughly with clean water.
- Prepare a root stimulant by mixing 5 drops of a rooting solution with 50ml of filtered water.
- Soak the orchid in this solution for 30 minutes.
- Create a mini greenhouse using a plastic container and floral foam.
- Place the orchid inside and maintain moisture levels.
2 Months Later: A Fully Recovered Dendrobium Orchid
After two months, the once-withered Dendrobium orchid should now have:
- Strong, healthy roots
- New leaves and shoots
- A vibrant appearance, ready to be planted in a larger pot
Care for the revived Dendrobium orchid like a normal orchid, ensuring proper watering, light, and fertilization.
1 Year Later: A Beautiful Blooming Orchid
With consistent care, your orchid will continue to grow, producing beautiful, long-lasting flowers. The rejuvenation process takes patience, but with these methods, even the weakest orchids can be revived and bloom again.
Final Tips for Orchid Care
- Use natural stimulants like garlic, ginger, and aloe vera to promote healthy growth.
- Protect cuts with candle wax to prevent infections.
- Create a controlled environment (mini greenhouse) to help weak orchids recover.
- Be patient and monitor progress – orchids take time to rejuvenate but will reward you with stunning blooms.
By following these simple yet effective methods, you can bring even the most damaged orchids back to life, ensuring they continue to grow beautifully for years to come. If you found this guide helpful, don’t forget to share these tips with other orchid enthusiasts!