How to Revive a Withered Orchid: A Step-by-Step Guide
Orchids are delicate and beautiful plants, but they can sometimes wither due to improper watering, excessive sunlight, or a lack of nutrients. If you have a struggling orchid, don’t worry! With the right care and a few simple tricks, you can bring your plant back to life. In this guide, I will share an amazing method to nourish your orchid and help it grow quickly and healthily. Follow these steps carefully to see remarkable results!
Step 1: Identify the Problem and Prepare Aloe Vera Gel
The first step in reviving your orchid is identifying the cause of its decline. If the leaves appear wrinkled and soft, the orchid may not be receiving enough water. If they are scorched or yellow, it may have been exposed to too much direct sunlight. Once you’ve identified the issue, you can begin treatment.
One of the best natural remedies for orchids is aloe vera. Aloe vera contains vitamins A, B, and C, along with essential minerals like nitrogen, phosphorus, and potassium. These nutrients promote healthy root growth, improve moisture retention, and strengthen the plant against disease.
- Take one fresh aloe vera leaf and cut it open.
- Extract the gel and apply it to both the top and bottom surfaces of the orchid leaves.
- Aloe vera gel has a powerful moisturizing effect, which helps rehydrate the leaves and restore their vitality.
Repeat this process every five days and keep the orchid in a cool, shaded area for about three weeks.
Step 2: Create a Nutrient-Rich Solution with Rice Water and Aloe Vera
In addition to topical application, orchids benefit greatly from natural fertilizers. A combination of rice water and aloe vera juice provides a powerful organic boost for plant growth.
How to Make the Rice Water Solution:
- Take 1 liter of warm water and pour it into a bottle.
- Add 1 spoonful of uncooked rice and soak it in the water for 30 minutes.
- During this time, the essential nutrients from the rice, such as carbohydrates, amino acids, and minerals, dissolve into the water.
How to Make Aloe Vera Juice for Fertilization:
- Chop the remaining aloe vera leaf into small pieces.
- Blend it with 300ml of water to create a thick solution.
- Strain out any solid residue.
- Add 2 liters of room-temperature water to dilute the solution.
Combining the Two Solutions:
- After soaking the rice for 30 minutes, strain the rice water.
- Mix the rice water with the aloe vera juice.
- This results in approximately 3 liters of nutrient-rich liquid fertilizer.
Step 3: Apply the Aloe Vera and Rice Water Fertilizer
Now that you have your homemade fertilizer, it’s time to apply it to your orchid:
- Cover the orchid pot with moss to help retain moisture.
- Use the solution to water the orchid every five days.
- Soak the orchid pot in this solution for about two hours to allow the roots to absorb nutrients.
- After soaking, remove the orchid and place it in a cool, shaded area.
Step 4: Observe Growth and Provide Additional Nutrients
Two Weeks Later:
- After two weeks, you should notice fresher and healthier orchid leaves.
- New roots will start to develop, which helps transport water and nutrients more efficiently to the stem and leaves.
- If the leaves receive enough hydration and nutrients, they will become lush and firm again.
One Month Later:
- The orchid’s leaves will appear much healthier.
- A new leaf may emerge, indicating strong growth.
- At this stage, continue following the same care routine to promote further recovery.
Step 5: Address Yellowing Leaves and Boost Nutrient Intake
After Two Months:
- The orchid will begin to develop flower buds.
- However, the lower leaves at the base may turn yellow. This is a natural process, as the plant redirects nutrients from older leaves to support new growth.
- Trim off any yellowing leaves to prevent energy loss and potential rot.
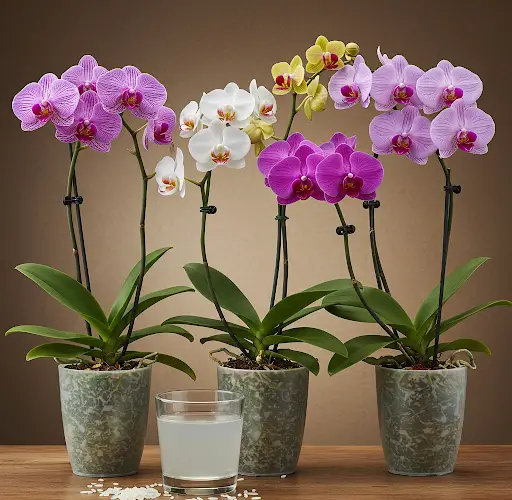
To further supplement the orchid’s nutrition, you can introduce another organic fertilizer using rice water and milk.
How to Prepare the Rice Water and Milk Solution:
- Take 3 spoonfuls of uncooked rice.
- Soak it in 2 liters of room-temperature water for 30 minutes to release its nutrients.
- After 30 minutes, add 3 tablespoons of milk to the solution.
- Rice water provides essential carbohydrates and amino acids, while milk offers proteins and calcium to strengthen the orchid.
Step 6: Apply the Rice Water and Milk Fertilizer
- Water the orchid with this solution once a week.
- Continue this process for at least one month.
- After 3-4 applications, the orchid will develop many new roots, enhancing its ability to absorb water and nutrients efficiently.
Final Results and Ongoing Care
By following this method consistently, your orchid will experience significant improvement in just a few months. The plant will develop healthy roots, vibrant leaves, and even produce beautiful flowers.
To maintain your orchid’s health in the long term:
- Keep the plant in a cool, shaded area with indirect sunlight.
- Water consistently but avoid overwatering, as excess moisture can lead to root rot.
- Continue applying aloe vera gel every five days to keep the leaves hydrated.
- Use the rice water and aloe vera fertilizer regularly to provide essential nutrients.
- Trim yellowing leaves as needed to redirect nutrients to new growth.
Conclusion
Reviving a withered orchid requires patience and proper care, but it is entirely possible with natural and effective methods. By using aloe vera, rice water, and milk, you can provide the necessary hydration and nutrients to help your orchid thrive.
With consistent application, your orchid will recover, develop strong roots, and bloom beautifully once again. Try this method and enjoy the rewards of a healthy, flourishing orchid!


