Orchids are delicate plants that require proper care to thrive, especially when faced with diseases like root rot and leaf wilting. If your orchid has rot disease, it is essential to take the right steps to nurse it back to health. This guide will walk you through an effective method to restore your orchid’s health using natural and organic solutions.
Step 1: Identifying the Problem
When orchid leaves wilt, it is often due to root damage. Damaged roots fail to absorb water and nutrients effectively, leading to dehydration and weak foliage. If you inspect the roots and find them soft, dark, and mushy, they have likely rotted due to excessive moisture and poor drainage.
Step 2: Removing the Rotten Roots
Begin by cutting off all the rotten roots with sterilized scissors or pruning shears. Be sure to remove all decayed portions, as they can spread disease to the healthy parts of the plant. Once the damaged roots are cut away, rinse the remaining roots thoroughly with clean water to remove any lingering bacteria or fungal spores.
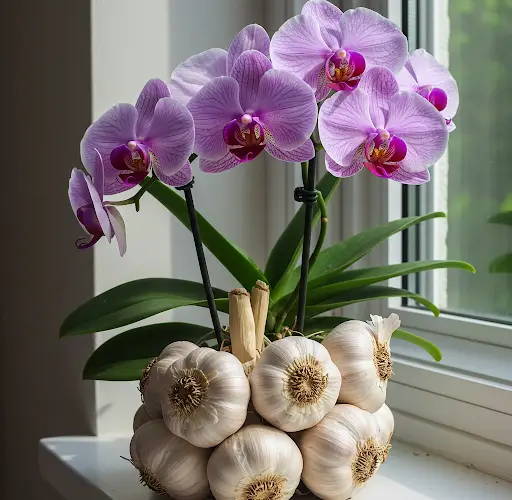
Step 3: Garlic Treatment for Root Disinfection
Garlic has strong antibacterial and antifungal properties that help eliminate harmful pathogens. To create a garlic treatment:
- Take one clove of garlic and crush it.
- Mix the garlic paste with 500ml of water and strain out any solid residues.
- Add more water to make 2 liters of diluted garlic solution.
- Use a clean cloth or sponge to wipe the orchid’s leaves thoroughly with the garlic water. This step helps remove any potential fungal infections or pests from the leaves.
- Soak the remaining orchid roots in the garlic solution for 10 minutes. After soaking, remove the orchid and place it in a jar.
Step 4: Water Level Maintenance
Pour fresh water into the jar, ensuring that only the base of the orchid touches the water. Place the orchid in a well-lit area, such as a windowsill with indirect sunlight or under a sunshade. This environment allows the plant to recover while preventing further rot.
Step 5: Rice Water Nutrient Boost
After one week, prepare a rice water treatment:
- Take 1 liter of water and add one tablespoon of uncooked rice.
- Allow the rice to soak for 20 minutes, extracting its nutrients into the water.
- Soak the orchid’s roots in the rice water for 20 minutes once a week. Rice water is rich in vitamins and minerals that promote root growth and plant resilience.
Continue this rice water treatment weekly. After three weeks, you will notice stronger leaves and an increase in new root growth. The nutrients in rice water enhance the orchid’s ability to absorb water and nutrients, making it more resilient to disease.
Step 6: Long-Term Recovery (3 Months)
Over the next three months, keep soaking the orchid’s roots in rice water weekly. This consistent care will encourage vigorous root growth, strengthen leaves, and promote flowering. By maintaining this routine, the orchid will recover and grow strong, with new roots, leaves, and blooms appearing over time.
Step 7: Reviving Severely Damaged Orchids
If your orchid has only one remaining leaf and is severely weakened, additional steps are needed:
- Trim off all rotten or damaged parts and rinse the plant thoroughly.
- Dissolve one teaspoon of green tea in 1 liter of boiled water and let it cool.
- In a separate container, soak three tablespoons of rice in 1 liter of room-temperature water for one hour.
- Filter both solutions to remove any residue.
Use the green tea solution to wipe down the orchid branches to eliminate pests and bacteria. Then, take dry moss, soak it in the green tea solution for 30 minutes, and press the moss tightly into a basket.
Step 8: Planting the Orchid
- Place the orchid in a jar with water, ensuring the water level stays just below the base.
- Keep the moss humid but not overly wet.
- Spray rice water onto the orchid branches once a week.
- Cover the orchid with a transparent glass jar to maintain humidity and encourage root growth.
After three weeks, the orchid will begin to sprout strong roots, ensuring a quick recovery. Once the roots have developed well, plant the orchid in a pot and expose it to its natural environment.
Step 9: Flower Bloom Stimulation
To encourage flowers to bloom even after the initial blooms have faded:
- Cut off any flower nodes that have already bloomed.
- Sprinkle cinnamon powder on the cut areas to prevent infection and speed up healing.
- Let the plant rest for one day before watering.
Next, prepare a nutrient-rich solution:
- Slice one onion thinly.
- Crush two eggshells, which are rich in calcium and minerals essential for flower growth.
- Add both ingredients to 2 liters of boiling water and let the solution cool.
- Filter out any residue.
How to Use the Nutrient Solution
- Water the orchid roots with this onion and eggshell solution once a week to promote strong root development.
- Spray the leaves once a week to supplement nutrients, enhance leaf health, and repel pests.
- To stimulate flowering, roll cotton onto the unopened flower buds and soak it in the nutrient solution. Leave the cotton on for 30 minutes before removing it.
Step 10: Final Growth and Flowering Results
After one month, the orchid will develop new shoots, and old branches will continue to bloom. This method ensures that the orchid can flower multiple times a year, producing vibrant, long-lasting blooms.
Conclusion
By following these natural and organic methods, you can successfully nurse a rotting orchid back to health, encourage root and leaf growth, and stimulate abundant flowering. Using simple household ingredients like garlic, rice water, green tea, and onion solutions, your orchids will thrive without the need for chemical fertilizers.
If you found these tips helpful, consider sharing them with other orchid enthusiasts. Happy orchid growing!


