How to Transplant Tomato Seedlings Using Toilet Paper Rolls: A Simple, Eco-Friendly Method
Transplanting young tomato plants—often called “picking” or “pricking out”—is a crucial step in producing healthy, vigorous seedlings ready for the garden. This process involves moving seedlings from their nursery tray or starting container into individual growing spaces where they have more room to develop strong roots.
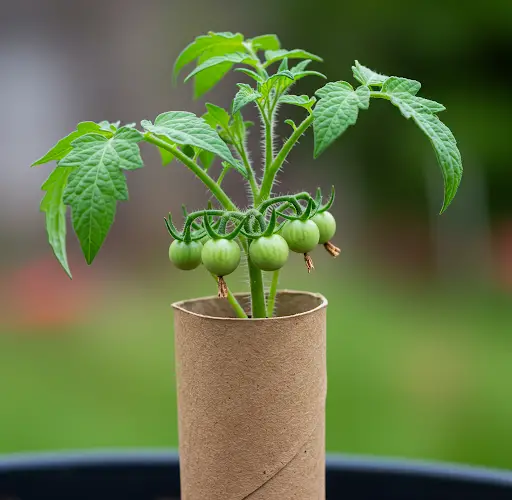
While gardeners often use clay, plastic, or biodegradable pots for transplanting, there’s a low-cost, environmentally friendly alternative that works just as well: toilet paper rolls. These cardboard tubes are biodegradable, easy to handle, and provide an ideal temporary home for young seedlings. Here’s how to use them, along with some expert tips for successful transplanting.
Why Transplanting Is Important
When tomato seeds are first sown, they are usually planted close together in a seed tray or nursery container. As the seedlings grow, space becomes limited, leading to competition for nutrients, light, and water. Transplanting gives each seedling more space to develop a healthy root system and prevents overcrowding-related issues such as stunted growth and disease.
You’ll know it’s time to transplant when:
-
Seedlings have at least two sets of true leaves
-
They are around 3 to 10 cm tall
-
Lower leaves begin to yellow, indicating the need for more space
Preparing Your Toilet Paper Rolls
Instead of discarding empty toilet paper rolls, save them to use as biodegradable planting containers. These tubes will naturally decompose in the soil over time, eliminating transplant shock and making the process more sustainable.
Steps:
-
Cut to Size (Optional): If your seedlings are small, you can shorten the rolls to better fit their root systems.
-
Prepare the Base: Place the rolls upright in a tray, pan, crate, or other flat-bottomed container that will remain stationary until you’re ready to move the plants into the garden.
-
Fill with Substrate: Use a funnel or scoop to fill the rolls with moist seed-starting substrate. This soil mix should be loose and well-draining, not compacted.
-
Make a Hole: Using a pencil or your finger, make a small hole in the center of each roll deep enough to accommodate the seedling’s roots.
Transplanting the Seedlings
Gently lift each seedling from the nursery container, being careful not to damage the fragile roots or bend the stem. Handle the plant by its leaves, not the stem, to avoid bruising.
Place each seedling into a prepared roll, ideally at a depth that reaches just below the cotyledon (seed) leaves. Planting slightly deeper—about 2 to 3 cm deeper than it was growing previously—helps stabilize the plant and encourages stronger root growth along the stem.
Once the seedling is in place:
-
Lightly press the soil around it to secure it without compacting
-
Add a bit more soil if needed, but avoid overfilling beyond the top of the roll
-
Water gently using room-temperature water that has sat for 24 hours in the transplanting room to avoid temperature shock
Post-Transplant Care
After transplanting, keep your seedlings in a bright location with indirect sunlight. Water as needed, ensuring the substrate remains moist but not soggy. Proper airflow and temperature (between 15°C and 20°C) are also essential to prevent disease and ensure steady growth.
To help your seedlings transition to life outdoors, begin the hardening off process about a week before planting them in the garden. This involves gradually exposing the seedlings to natural conditions:
-
Start by placing them outside for a few hours during the day
-
Increase their time outdoors incrementally over several days
-
Protect from direct midday sun and strong wind during the early stages
Planting in the Garden
When it’s time to move the seedlings outdoors, simply plant them directly into the garden with the toilet paper roll still in place. The roll will break down naturally in the soil, allowing the roots to grow freely. This method minimizes transplant shock and saves time by eliminating the need to remove the seedling from its container.
For added organization, consider labeling each roll with the variety of tomato planted. This helps you keep track of your plants, especially if you’re growing multiple types.
A Method That Works for Many Plants
This transplanting technique isn’t limited to tomatoes. It works just as well for cucumbers, peppers, green beans, zucchini, and many other garden vegetables. The key is to observe the plants and provide them with space and nutrients when they show signs of needing it.
By repurposing everyday items like toilet paper rolls, you not only save money but also contribute to a more sustainable gardening practice. This simple, affordable method ensures strong, healthy seedlings and makes transplanting easier for gardeners of all experience levels.


