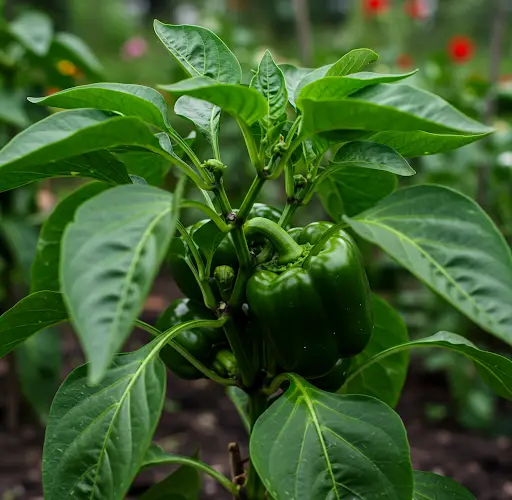
How I Grow Bell Peppers to Eat All Year Round with Just a Few Plastic Containers
Bell peppers are a staple in many kitchens, adding flavor, color, and essential nutrients to countless dishes. Buying them regularly from the store can become costly, especially when their prices fluctuate depending on the season. However, I discovered a simple and highly effective way to grow bell peppers at home using just a few plastic containers. This method ensures I have a continuous supply of fresh, homegrown bell peppers all year round without spending a fortune. If you want to enjoy the same benefits, follow my easy, step-by-step process to cultivate bell peppers successfully in containers.
Choosing the Right Bell Pepper Variety
Before you start growing bell peppers, it’s essential to choose the right variety that suits your needs. Some of the best varieties for container gardening include:
- California Wonder – A classic variety that produces large, sweet peppers.
- Mini Bell Peppers – Small, colorful, and perfect for snacking.
- Gypsy Peppers – Quick to mature and highly productive.
- Jalapeño or Chili Peppers – If you enjoy a bit of heat, these spicy varieties can also thrive in containers.
Selecting a variety that adapts well to container growth ensures a high yield throughout the year.
Preparing the Plastic Containers
One of the biggest advantages of container gardening is that it allows you to control soil quality and plant conditions easily. Here’s how to prepare the containers:
- Choose the Right Size: A 3–5 gallon plastic container is ideal for a single bell pepper plant.
- Ensure Proper Drainage: Drill several small holes at the bottom of the containers to prevent waterlogging.
- Use Quality Potting Mix: Avoid garden soil, as it can become compacted. Instead, use a high-quality potting mix with compost for added nutrients.
If I had known this earlier, I wouldn’t have wasted time trying to grow bell peppers in unsuitable soil or tiny containers that restricted growth.
Planting Bell Peppers in Containers
Once you have your containers ready, it’s time to plant your bell peppers. You can either start from seeds or use young seedlings from a nursery. Here’s the process:
- Starting from Seeds:
- Fill the container with potting mix and moisten it slightly.
- Plant seeds ¼ inch deep and cover lightly with soil.
- Keep the container in a warm location (70–80°F) to encourage germination.
- Once the seedlings have 3–4 leaves, thin them out, leaving the healthiest plant.
- Using Seedlings:
- Transplant the seedling into the center of the container.
- Press the soil gently around the roots and water well.
I used to think that growing from seeds was too complicated, but once I tried it, I realized how much money I could save compared to buying new plants every season.
Providing the Right Growing Conditions
For the best growth and fruit production, bell peppers need the right environmental conditions:
- Sunlight: Place containers where they receive at least 6–8 hours of direct sunlight daily.
- Temperature: Keep them in warm conditions (above 60°F at night and 70–85°F during the day). If temperatures drop, bring them indoors or use grow lights.
- Support: As the plants grow, use small stakes or cages to support the stems and prevent breakage.
When I first started, I underestimated the importance of sunlight. My initial batch of plants was weak and unproductive. Once I moved them to a sunnier spot, the difference was remarkable!
Watering and Fertilizing Bell Peppers
Bell peppers require consistent moisture but dislike being overwatered. Here’s how to get it right:
- Watering: Keep the soil evenly moist but not soggy. Water deeply when the top inch of soil feels dry.
- Mulching: Adding a layer of mulch helps retain moisture and prevents soil from drying out too quickly.
- Fertilizing:
- Use a balanced fertilizer every two weeks.
- Once flowers appear, switch to a low-nitrogen fertilizer to encourage fruit development.
I used to water my plants daily, thinking more water meant better growth. However, overwatering led to root rot. Learning the right balance transformed my harvest.
Dealing with Pests and Diseases
Growing bell peppers in containers reduces the risk of soil-borne diseases, but pests can still be an issue. Here’s how to handle them:
- Aphids & Whiteflies: Spray plants with neem oil or introduce beneficial insects like ladybugs.
- Blossom End Rot: Prevent this by ensuring consistent watering and adding calcium to the soil.
- Fungal Diseases: Avoid overhead watering and ensure good air circulation around plants.
I used to lose many peppers to pests, but once I started using organic pest control methods, I saw a huge improvement in plant health.
Harvesting Bell Peppers for Year-Round Supply
One of the best things about growing bell peppers in containers is that you can harvest them continuously. Here’s how:
- Pick at the Right Time: Green peppers can be harvested earlier, while red, yellow, or orange ones need more time to ripen.
- Regular Harvesting: Picking peppers frequently encourages plants to produce more.
- Overwintering for Year-Round Growth: Move containers indoors during winter and provide artificial lighting to keep plants alive and productive.
Initially, I only harvested once per season, not realizing that regular picking encouraged new growth. Changing this habit gave me a much higher yield.
Conclusion
Growing bell peppers in plastic containers is an incredibly simple yet rewarding method that ensures a fresh supply of peppers all year round. With just a few containers, the right soil, consistent watering, and proper sunlight, you can cultivate bell peppers effortlessly at home. Had I known this method earlier, I wouldn’t have spent so much money on store-bought peppers. If you’re looking for an easy way to enjoy fresh, homegrown produce, give container gardening a try—you won’t regret it!


