How to Revive Rotten Orchids and Make Them Grow Strong Again
Orchids are beautiful and delicate plants, but they can sometimes experience root rot due to improper watering, poor drainage, or fungal infections. Many people throw away their orchids when they see signs of rotting, thinking that the plant is beyond saving. However, if the leaves are still fresh, there is still hope! Even an orchid with completely rotten roots can be revived and encouraged to grow strong, healthy roots again.
In this guide, we will take you through a step-by-step process to save a rotting orchid and help it thrive. By following these simple but effective techniques, you can rescue your orchid and watch it flourish once more.
Step 1: Assess the Condition of Your Orchid
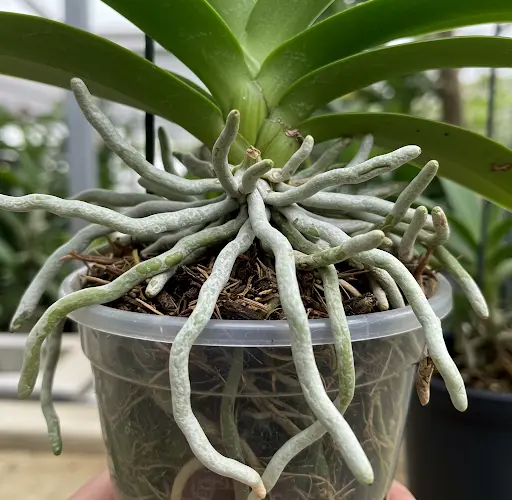
Before starting the revival process, carefully examine the orchid. If the roots are completely rotten but the leaves remain green and healthy, there is still a good chance that the orchid can be saved. Rotten roots appear brown or black, mushy, and may have a foul odor. The first step is to remove all the affected parts.
Step 2: Remove Rotten and Damaged Parts
Using a pair of sterilized scissors or garden shears, carefully trim away all rotten roots. Remove any leaves that have been severely damaged by insect bites or rot. It is crucial to get rid of all infected and decayed tissue to prevent further spreading of disease or bacteria.
After trimming, rinse the remaining healthy parts of the orchid thoroughly with clean water to wash away any residual rot or bacteria.
Step 3: Disinfect the Cuts and Prevent Infections
Once the orchid has been cleaned, sprinkle cinnamon powder on all the cut surfaces. Cinnamon is a natural antifungal agent that helps prevent infections and promotes healing. This step is essential to protect the orchid from further rot and disease while it recovers.
Step 4: Prepare a Vitamin and Okra Solution
A special nutrient solution can greatly enhance the orchid’s chances of recovery. Here’s how to prepare it:
- Take 500ml of clean water.
- Crush and dissolve three Vitamin B1 tablets in the water.
- Take fresh okra and cut it into thin slices.
- Soak the okra slices in the Vitamin B1 water for about 10 minutes. Okra contains natural mucilage, which helps retain moisture and encourages root development.
- After soaking the okra, immerse the orchid branches in the solution for 30 minutes. This will allow the nutrients to penetrate the plant and stimulate root growth.
Step 5: Apply Okra Gel for Moisture Retention
After soaking, remove the orchid from the solution and gently apply the okra gel over the entire plant. The natural gel from okra keeps the orchid moist and helps prevent dehydration, which is crucial for root development. Let the orchid dry naturally in a cool, shaded area before moving to the next step.
Step 6: Create a Humid Environment for Root Growth
One of the best ways to encourage root growth is to provide a humid but well-ventilated environment. Here’s how to set it up:
- Use a recycled plastic container as a makeshift nursery.
- Place industrial cotton or damp moss at the bottom of the container.
- Pour a small amount of water into the container.
- Place the orchid above the water level, ensuring that the leaves do not touch the water. This method helps the orchid absorb moisture without direct contact with water, reducing the risk of further rot.
Step 7: Provide Consistent Moisture and Airflow
To maintain the ideal conditions for root growth:
- Spray a light mist of water on the orchid every five days.
- Keep the container in a cool place with indirect light.
- Ensure that the humidity level remains stable without making the environment too wet.
Step 8: Monitor Progress and Encourage Growth
After about one month, the orchid should begin to develop strong new roots. Check regularly to ensure there is no mold or additional rot. If the roots are growing well, you can proceed to transplant the orchid into a pot.
Step 9: Transplant the Orchid into a Pot
Once the roots are strong enough, it’s time to move the orchid to a more permanent growing medium. Here’s how:
- Choose a pot with good drainage holes.
- Add a layer of aquaponic plastic beads and terracotta pieces at the bottom for aeration.
- Use a mix of pine bark, pumice, and coconut husk to provide a well-ventilated growing medium.
- Spread a thin layer of moss on the surface to help retain moisture.
- Place the orchid gently in the pot and secure it in place.
Step 10: Provide Proper Orchid Care
After transplanting, continue to care for the orchid as usual:
- Water it regularly, but avoid overwatering.
- Provide bright, indirect sunlight.
- Apply organic fertilizer every two weeks to encourage healthy growth and flowering.
- Keep the environment well-ventilated to prevent mold and bacterial growth.
Final Results: A Thriving, Healthy Orchid
With patience and proper care, your once-rotting orchid will regain its strength, develop healthy roots, and eventually produce stunning blooms. By following these steps, you can revive an orchid that many people might have thrown away.
If you found this guide helpful, consider sharing it with other plant lovers so they can also learn how to save their orchids. Happy gardening!


