Maintaining consistent watering is one of the biggest challenges for gardeners, especially during hot, dry periods or when you’re away for extended times. While automated irrigation systems can be expensive and complicated, there’s a simple, low-cost solution you can set up using just a can and a few basic materials. This DIY drip irrigation system can provide steady watering for up to 30 days, keeping your plants healthy and hydrated with minimal effort.
In this guide, you’ll learn how to create an effective drip irrigation system using a common container—such as a bucket or large can—that gently releases water over time, ensuring your garden stays moist even when you’re busy or away.
Why Choose a Drip Irrigation System?
Drip irrigation delivers water slowly and directly to the plant roots, minimizing waste from evaporation or runoff. Compared to watering by hand or sprinklers, drip irrigation uses water more efficiently and reduces the risk of overwatering.
By setting up a gravity-fed drip system using a simple container, you save time, conserve water, and provide steady moisture to your plants without daily attention.
Materials You’ll Need
-
A clean container (a 5-gallon bucket, large can, or plastic bottle with a wide mouth works well)
-
Thin plastic tubing or garden drip irrigation tubing
-
A small drill or nail to make holes
-
A valve or clamp to control water flow (optional but recommended)
-
A stand or platform to elevate the container above your plants
-
A tray or basin to place under plants (optional)
Step 1: Prepare the Water Reservoir
Choose a container that can hold enough water for your garden’s needs—typically 5 gallons or more for a small bed. Clean it thoroughly to avoid algae growth or contamination.
Elevate the container on a sturdy stand or platform about 1 to 3 feet above your plants. This height allows gravity to create enough pressure for water to flow slowly through tubing.
Step 2: Attach the Tubing
Using a small drill bit or a heated nail, carefully make a tiny hole near the bottom of the container. The size of the hole will determine the water flow rate; smaller holes drip more slowly, extending watering duration.
Insert one end of your plastic tubing into the hole. Use waterproof tape or silicone sealant around the connection to prevent leaks.
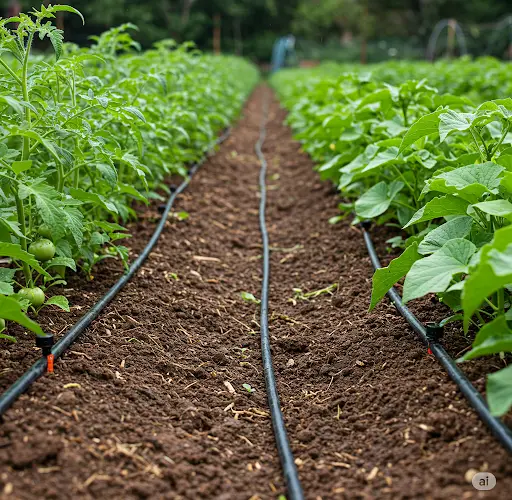
Run the tubing from the container to your plants, arranging it so it reaches all areas that need watering. You can branch off tubing with connectors to cover multiple plants.
Step 3: Create Drip Emitters
At the tubing’s end points or along its length, create small holes or attach commercial drip emitters. These control the release of water to individual plants.
If making your own emitters, poke very small holes with a needle to slow the water flow. Alternatively, use adjustable drip emitters available at garden centers for precise control.
Step 4: Control the Water Flow
To manage how quickly the water drips, install a small valve or clamp near the container’s outlet. This allows you to fine-tune the watering rate and ensure your system lasts as long as possible.
Adjust the valve so water drips at a steady, slow pace—too fast, and you’ll run out early; too slow, and plants might get insufficient moisture.
Step 5: Test and Adjust Your System
Fill the container with water and observe the drip rate at your emitters. Adjust holes or the valve until the drip is slow and steady.
Make sure all plants receive water evenly. You may need to reposition tubing or add emitters to reach plants farther from the container.
Step 6: Maintenance and Refilling
For a 30-day watering cycle, the container must hold enough water for your plants’ needs. Estimate daily water requirements and size the reservoir accordingly.
Place the container in a shaded spot to reduce water evaporation and algae growth. Check your system every few days to ensure tubing isn’t clogged and water is flowing smoothly.
Refill the reservoir as needed, especially during prolonged dry spells.
Advantages of This Simple System
-
Cost-Effective: Uses readily available materials without expensive pumps or timers.
-
Water Efficient: Delivers water slowly to roots, minimizing waste.
-
Low Maintenance: Requires minimal attention once set up.
-
Customizable: Easily adapted for different garden sizes and plant types.
-
Eco-Friendly: Can be combined with rainwater harvesting for sustainable watering.
Tips for Optimizing Your Drip Irrigation
-
Mulch around plants to retain soil moisture longer.
-
Group plants with similar water needs together to simplify irrigation.
-
Regularly flush tubing with clean water to prevent clogging.
-
Consider using a filter at the container outlet if you use rainwater to avoid debris buildup.
-
For larger gardens, multiple containers can be set up at different heights or zones.
Conclusion
Creating a 30-day drip irrigation system with just a can or bucket is a straightforward, budget-friendly way to ensure your plants receive consistent moisture. This method conserves water, reduces labor, and supports healthy growth even during hot, dry periods or when you can’t tend to your garden daily.
With simple materials and basic setup, you can build a reliable self-watering system that keeps your plants thriving and your garden flourishing. Whether you’re a beginner or an experienced gardener, this DIY drip irrigation approach offers an effective, sustainable solution for easy watering.