Growing your own vegetables at home doesn’t require a large garden or even a backyard. With a little creativity, you can start a productive mini-garden right on your balcony, windowsill, or terrace. One excellent crop for small-space gardening is the pea—a cool-season, fast-growing plant that thrives in containers, including recycled plastic bottles.
This guide will walk you through everything you need to know to grow peas in bottles—from selecting the seeds to harvesting fresh pods right from your home.
Why Grow Peas in Bottles?
Peas are an ideal plant for container gardening for several reasons:
-
They grow vertically, saving space.
-
They require minimal maintenance.
-
They grow quickly—many varieties are ready in 60 to 70 days.
-
Their roots enrich the soil by fixing nitrogen, which benefits nearby plants.
Using plastic bottles is also a great way to recycle and reduce waste while keeping gardening costs low.
What You’ll Need
-
Plastic bottles (1.5 to 2-liter size works best)
-
Sharp knife or scissors
-
Pea seeds (choose climbing or dwarf varieties depending on your space)
-
Potting mix (light and well-draining)
-
Compost or organic fertilizer
-
Watering can or spray bottle
-
Wooden sticks or string for support
Step 1: Preparing the Bottles
-
Clean the bottles thoroughly and remove any labels.
-
Cut a large window along one side of the bottle to create an opening for soil and plants.
-
Poke drainage holes in the bottom of the bottle using a heated nail or screwdriver. This is crucial to prevent waterlogging.
-
Place the bottles horizontally or vertically, depending on your available space.
Step 2: Preparing the Soil
Peas need light, loose soil that retains moisture but doesn’t stay soggy. Create a good mix with:
-
60% potting soil
-
30% compost or well-rotted manure
-
10% perlite or sand for drainage
Fill each bottle with soil, leaving about 2 cm (about 1 inch) from the top.
Step 3: Sowing the Seeds
-
Make small holes about 2–3 cm (1 inch) deep and 5 cm (2 inches) apart.
-
Place one seed in each hole and gently cover with soil.
-
Water lightly, just enough to moisten the soil.
Tip: Soaking the seeds in water for 6–8 hours before planting can speed up germination.
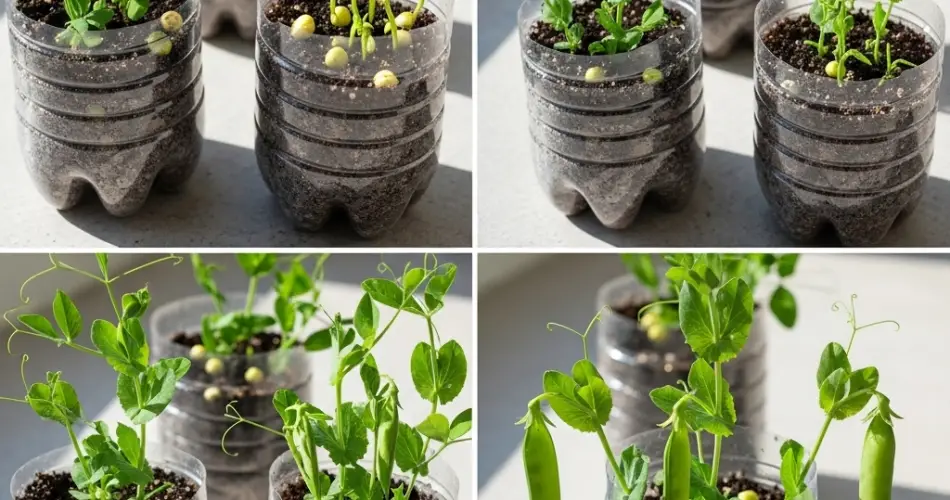
Step 4: Germination and Early Growth
Place your bottles in a sunny location—peas need at least 4 to 6 hours of sunlight daily. You should see sprouts within 7 to 10 days.
Keep the soil moist but not wet. Avoid letting the soil dry out completely, especially during the seedling stage.
Step 5: Providing Support
As the pea plants grow, they’ll need support to climb. Insert small wooden sticks, bamboo stakes, or even string inside or beside the bottles. Gently tie the stems to the support as they grow taller.
For dwarf or bush varieties, minimal support is needed. For climbing peas, vertical space is your friend.
Step 6: Fertilizing
Peas don’t require heavy feeding, but a small dose of organic fertilizer every 2–3 weeks can help increase yields. Avoid nitrogen-rich fertilizers—peas already fix nitrogen naturally and too much can reduce pod production.
A balanced compost tea or diluted fish emulsion works well for container-grown peas.
Step 7: Caring for Your Pea Plants
-
Water regularly, especially during flowering and pod development. Don’t let the soil dry out completely.
-
Remove weeds or competing seedlings from the soil surface.
-
Watch for pests like aphids or whiteflies. You can remove them with a gentle spray of water or use neem oil if needed.
Step 8: Harvesting
Peas are usually ready to harvest 60–70 days after planting, depending on the variety.
-
Snap peas and snow peas should be picked when the pods are still flat but full-sized.
-
Shelling peas should be picked when the pods are plump and the peas inside are round and sweet.
Use scissors or your fingers to pinch the pods off the plant. Regular harvesting encourages more flowering and pod production.
Additional Tips
-
Rotate your crops if you reuse the soil in bottles for other plants.
-
After the harvest, you can leave the roots in the soil to decompose—they add nitrogen to the next planting.
-
Use the bottles again to grow herbs, lettuce, or radishes.
Final Thoughts
Growing peas in plastic bottles is a fun, educational, and eco-friendly way to enjoy fresh produce at home. This compact gardening method is perfect for beginners, children, or anyone working with limited space. With just a few materials and a bit of care, you’ll be harvesting sweet, homegrown peas in no time.
Start today, and your future self—and your meals—will thank you!


