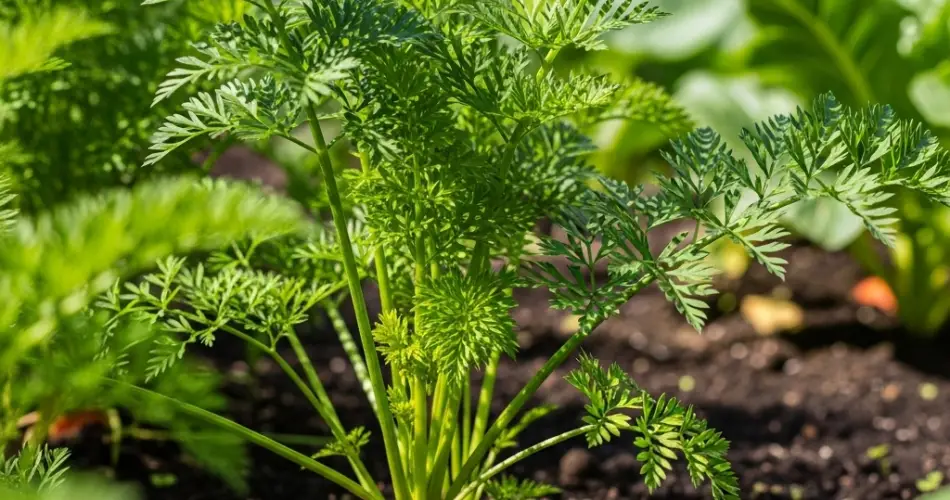
Carrots are a beloved root vegetable, known for their sweet flavor, crunch, and nutritional benefits. Growing carrots in your own garden can be both rewarding and surprisingly simple, especially when you leverage the power of kitchen scraps. Not only does this sustainable approach reduce waste, but it also enriches your garden naturally and promotes healthy carrot growth. This guide will walk you through nurturing carrots with ease using common kitchen scraps, turning your garden into a thriving carrot patch faster than you might expect.
Why Grow Carrots Using Kitchen Scraps?
Using kitchen scraps as a gardening resource offers many advantages. These scraps often contain essential nutrients that improve soil fertility, encourage beneficial microbial activity, and provide a gentle, slow-release source of nourishment for your plants. For carrots, which develop underground and rely heavily on nutrient-rich soil, this method can boost growth and improve flavor and texture without the need for synthetic fertilizers.
Additionally, this approach reduces waste and promotes sustainability by recycling organic material right back into your garden.
Choosing the Right Kitchen Scraps for Carrot Growth
Not all kitchen scraps are created equal when it comes to nurturing carrots. Here are some of the best options to use:
-
Vegetable Peelings: Carrot, potato, beet, and celery peelings are rich in nutrients like potassium and calcium, essential for root development.
-
Eggshells: Crushed eggshells add calcium to the soil, helping prevent blossom end rot and strengthening plant cell walls.
-
Coffee Grounds: Used coffee grounds provide nitrogen and improve soil texture but should be added sparingly to avoid over-acidifying the soil.
-
Banana Peels: These offer potassium and phosphorus, vital for overall plant health and root growth.
-
Herb Trimmings: Leftover herbs like parsley, basil, and mint decompose quickly and add trace minerals.
-
Compost Tea: A liquid fertilizer made by steeping compost in water can be sprayed onto carrot foliage or soil to supply nutrients directly.
Preparing Your Garden Bed Using Kitchen Scraps
A healthy carrot crop starts with healthy soil. Here’s how to prepare your garden bed using kitchen scraps:
-
Collect and Chop Scraps: Gather your vegetable peelings, eggshells, and other scraps. Chop them into smaller pieces to speed decomposition.
-
Create a Compost Pile or Trench: Either add scraps to your compost bin or dig shallow trenches in the garden bed to bury the scraps directly. Burying scraps 6-8 inches deep helps avoid attracting pests.
-
Mix with Soil: Cover the scraps with a few inches of soil and turn it lightly. Over time, microbes will break down the scraps, enriching the soil with nutrients.
-
Allow Time: Let the soil rest for a week or two if burying scraps directly, so decomposition starts before planting.
Planting Carrot Seeds for Best Results
Carrots need loose, well-draining soil to develop straight, tender roots. After enriching the soil with kitchen scraps, follow these planting tips:
-
Sow Seeds Thinly: Carrot seeds are tiny and require light soil contact to germinate. Plant seeds about ¼ inch deep and space them about 2 inches apart to avoid overcrowding.
-
Keep Soil Moist: Carrots need consistent moisture to germinate and grow well. Water gently to keep the soil evenly moist but not waterlogged.
-
Thin Seedlings: Once seedlings emerge and grow their first true leaves, thin them to about 3-4 inches apart to give roots enough room to develop fully.
Nurturing Carrots During Growth Using Kitchen Scrap Benefits
As carrots grow, continue supporting them naturally with kitchen scraps:
-
Mulch with Organic Material: Use chopped vegetable peelings or shredded leaves as mulch around the plants. This retains moisture, regulates soil temperature, and adds nutrients as it decomposes.
-
Feed with Compost Tea: Every 2-3 weeks, apply compost tea to the soil surface or spray on foliage to provide a nutrient boost.
-
Avoid Synthetic Chemicals: Kitchen scraps reduce the need for chemical fertilizers and pesticides, promoting healthier, chemical-free carrots.
Troubleshooting Common Issues Naturally
Even with careful nurturing, carrot growers may face some challenges. Here’s how to address them using natural methods:
-
Pests: To deter carrot flies, plant companion herbs such as parsley, rosemary, or chives nearby. Eggshells sprinkled around the base also deter slugs and snails.
-
Soil Compaction: Carrots need soft soil to grow straight. Avoid walking on the bed and use raised beds or containers if your soil is heavy clay.
-
Nutrient Deficiencies: Yellowing or stunted growth can indicate nutrient shortages. Increase kitchen scrap inputs, especially nitrogen-rich items like coffee grounds, in moderation.
Harvesting and Storing Your Carrots
Carrots are typically ready to harvest 60-80 days after planting, depending on the variety. Here’s how to get the best results:
-
Harvest Carefully: Use a garden fork to loosen soil around roots before pulling carrots out to avoid breaking them.
-
Check Size: Harvest when roots reach about ½ to 1 inch in diameter for the best flavor and texture.
-
Store Properly: Remove foliage, wash gently, and store carrots in a cool, humid environment like a root cellar or refrigerator.
Benefits Beyond Carrots
Using kitchen scraps not only benefits your carrots but also improves overall garden health. This method encourages beneficial microbes, enriches soil structure, and promotes sustainable gardening habits that save money and reduce waste.
Summary
Nurturing carrots using kitchen scraps is a simple, eco-friendly way to enhance your garden’s productivity. By enriching your soil with vegetable peelings, eggshells, coffee grounds, and compost tea, you provide essential nutrients naturally. Combined with proper planting, watering, and care, these methods can speed up growth and yield delicious, healthy carrots with surprising ease.
Start your kitchen scraps composting today and watch your carrot patch thrive like never before!


