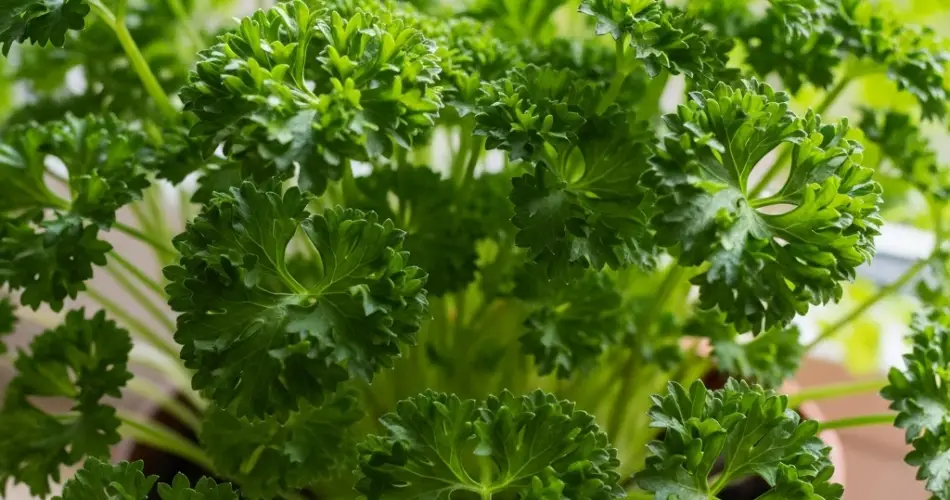
Parsley is a versatile and flavorful herb that adds freshness to countless dishes, from soups to salads. If you love cooking with parsley but don’t want to keep buying fresh bunches at the store, growing your own parsley at home is a great solution. Even better, you can maximize your parsley harvest surprisingly easily by using common kitchen scraps. This sustainable, budget-friendly approach not only reduces waste but also gives you a steady supply of fresh parsley.
This guide will walk you through how to use kitchen scraps effectively to grow parsley and boost your yield without much effort—even if you have limited space or gardening experience.
Why Grow Parsley at Home?
Growing parsley at home has many benefits:
-
Freshness: You can harvest parsley as you need it, ensuring peak flavor.
-
Cost-saving: Save money by regrowing from scraps rather than buying new plants.
-
Sustainability: Reduce kitchen waste by reusing parts of parsley you would normally throw away.
-
Easy to grow: Parsley adapts well to pots, windowsills, or small garden beds.
Parsley is a biennial herb, but most gardeners treat it as an annual because it’s easy to grow quickly from seed or cuttings.
Step 1: Select Parsley Kitchen Scraps to Regrow
You can regrow parsley from kitchen scraps such as:
-
Parsley stems with leaves attached.
-
Root ends of fresh parsley bunches (if you buy parsley with roots intact).
-
Leftover stems trimmed during cooking.
While parsley doesn’t regrow well from just the root ends alone like some other herbs, you can still propagate healthy cuttings and maximize growth with careful care.
Step 2: Regrowing Parsley from Cuttings
Using cuttings is one of the easiest ways to get more parsley from kitchen scraps.
-
Choose healthy stems with several leaves.
-
Trim the lower leaves off the stem, leaving a few leaves at the top.
-
Place the stem in a glass of clean water, making sure the lower part is submerged.
-
Keep the glass in a bright spot but away from direct sunlight.
-
Change the water every 2–3 days to prevent stagnation and bacteria buildup.
-
After about 2–3 weeks, you should see roots starting to form.
Once roots are well developed (about 1–2 inches long), transplant your parsley cutting into a pot with quality potting soil.
Step 3: Planting and Caring for Parsley
Whether starting from cuttings or seeds, growing parsley successfully requires some basic care:
-
Soil: Use well-draining soil rich in organic matter. Parsley prefers soil with a slightly acidic to neutral pH (6.0 to 7.0).
-
Light: Parsley grows best in full sun to partial shade. If indoors, a sunny windowsill with indirect light works well.
-
Water: Keep the soil consistently moist but not soggy. Parsley doesn’t like to dry out completely.
-
Temperature: Parsley thrives between 50°F and 70°F (10°C to 21°C).
-
Fertilizer: Feed with a balanced liquid fertilizer once every few weeks during the growing season for best yields.
Step 4: Using Kitchen Scraps to Boost Soil Fertility
Maximizing parsley growth is easier when the plant has nutrient-rich soil. Kitchen scraps can help improve your soil naturally:
-
Compost: Add vegetable peelings, coffee grounds, eggshells, and other kitchen scraps to a compost bin to create rich, organic compost. Mix this compost into your parsley potting soil to boost nutrients.
-
Banana peel tea: Soak banana peels in water for a few days to make a natural fertilizer rich in potassium and phosphorus, then use this liquid to water your parsley.
-
Vegetable broth water: Water your parsley with leftover water from boiled vegetables (once cooled) for added minerals.
-
Avoid scraps that attract pests: Don’t add greasy or cooked food scraps directly to soil or compost used for parsley to avoid attracting unwanted pests.
Step 5: Harvesting Parsley for Maximum Yield
Harvesting parsley properly encourages the plant to produce more leaves and grow bushier:
-
Start harvesting once the parsley plant is at least 6 inches tall.
-
Use scissors or pruning shears to cut outer stems at the base, near the soil line.
-
Avoid cutting the central stem to allow new growth.
-
Regular harvesting (about once a week) promotes continuous production.
-
Don’t remove more than one-third of the plant at a time to avoid stress.
Frequent harvesting encourages the parsley plant to keep producing fresh leaves rather than going to seed.
Step 6: Tips to Keep Your Parsley Thriving
-
Rotate your parsley pot occasionally to ensure even light exposure.
-
Remove any yellowing or damaged leaves to prevent disease.
-
If growing indoors, increase humidity by misting or using a humidity tray.
-
Protect outdoor parsley from strong winds or frost.
-
Consider companion planting with tomatoes or carrots if growing in a garden bed, as they can benefit each other.
Benefits of Regrowing Parsley from Kitchen Scraps
By using kitchen scraps to regrow parsley, you:
-
Cut down on grocery bills.
-
Reduce food waste by giving new life to discarded parts.
-
Gain satisfaction from nurturing plants with minimal effort.
-
Create a sustainable cycle of growth, harvest, and regrowth.
This approach is ideal for gardeners of all skill levels and especially useful for apartment dwellers or anyone with limited outdoor space.
Final Thoughts
Maximizing your parsley yield using kitchen scraps is a simple, rewarding process that anyone can do. From selecting healthy cuttings to enriching soil with homemade compost and harvesting regularly, these steps will ensure a steady supply of fresh, vibrant parsley for your kitchen.
Not only will you enjoy better tasting meals, but you’ll also take part in an eco-friendly gardening practice that reduces waste and makes the most out of what you already have.
Start your parsley-growing journey today, and watch how a few kitchen scraps can transform your garden and your cooking!


