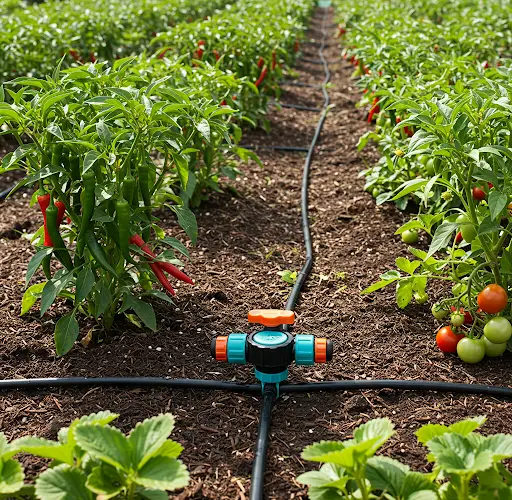
How to Make a Home and Automatic Drip Irrigation System for Chilis, Strawberries, and Tomatoes
Growing your own fruits and vegetables, like chilis, strawberries, and tomatoes, can be incredibly rewarding. However, ensuring these plants receive consistent watering is essential for their healthy development and high yields. A simple and cost-effective solution is to set up a home and automatic drip irrigation system. With basic materials and a little time, you can create a system that keeps your plants hydrated even when you’re busy or away.
Here’s a detailed guide to building an easy, homemade automatic drip irrigation system.
Materials You Will Need
-
1 large plastic container (a bucket, barrel, or large water jug)
-
Flexible irrigation tubing (commonly 4mm or 6mm in diameter)
-
Small drip nozzles or emitters
-
A faucet connector or hose adapter (if connecting to a water source)
-
A drill or sharp object to make holes
-
Water flow regulator (optional, but helps manage pressure)
-
Stakes or holders for the tubing
-
Timer (optional for full automation)
All these materials are inexpensive and available at hardware or garden supply stores.
Step 1: Prepare the Water Container
First, select a container that can hold enough water for a few days. The size will depend on how many plants you have and how much water they need. Drill a hole near the bottom of the container to fit the irrigation tubing snugly.
If you prefer not to drill, you can insert a submersible pump inside the container to push water through the tubes.
Attach the tubing securely to the hole using waterproof adhesive or a rubber grommet to prevent leaks. Make sure the container is elevated (on a stand or shelf) to allow gravity to help with water flow if you are not using a pump.
Step 2: Set Up the Main Line and Branches
Connect a main length of tubing from the water container. This will serve as the backbone of your system. From the main line, branch out smaller pieces of tubing that lead to each plant.
Use connectors or simply cut small slits in the main tube to insert the smaller tubes. Secure them with glue if needed to avoid disconnection.
Place stakes or holders to keep the tubing in place and direct the water to the base of each plant. This ensures the water reaches the roots efficiently, preventing evaporation and runoff.
Step 3: Install the Drip Emitters
At the end of each branch tube, attach a drip emitter or nozzle. These regulate how much water flows to each plant. You can select emitters based on the water needs of different plants:
-
Chilis generally prefer moderate watering.
-
Strawberries need steady but not excessive moisture.
-
Tomatoes require consistent, deep watering, especially during fruiting.
Emitters usually allow between 1 to 4 liters per hour, but adjustable ones are ideal if you have different types of plants.
Step 4: Test and Adjust the System
Fill the container with water and observe the system. Make sure:
-
Water flows steadily through each tube.
-
There are no leaks at the connections.
-
Each plant receives a sufficient amount of water.
Adjust the flow at each emitter as needed. If some plants are getting too much or too little water, reposition the emitters or adjust the water pressure.
If you installed a water flow regulator or timer, set it according to your plants’ watering schedule. A timer can make your system fully automatic, watering once or twice a day depending on your settings.
Tips for Better Results
-
Use clean water: Always fill the container with clean water to avoid clogging the emitters.
-
Check regularly: Inspect the system weekly to clear any debris and ensure proper functioning.
-
Adjust seasonally: Plants need more water during hot, dry periods and less during cooler seasons.
-
Fertilizer addition: You can mix liquid fertilizer into the water container for simultaneous watering and feeding.
Benefits of a Home Drip Irrigation System
This DIY drip irrigation system offers numerous benefits:
-
Saves water by delivering it directly to the roots.
-
Reduces labor since you won’t need to water by hand daily.
-
Promotes healthier plants with consistent moisture.
-
Increases yield in crops like chilis, strawberries, and tomatoes.
Moreover, it’s eco-friendly, affordable, and perfect for urban gardens, balconies, and backyards.


