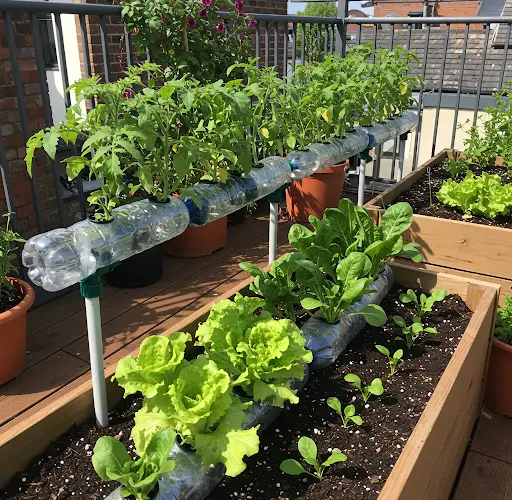
Growing vegetables on your terrace can be simple, sustainable, and productive when you use smart irrigation methods. One effective technique is capillary irrigation, which allows plants to draw up water naturally as they need it. With just recycled plastic bottles and a few basic materials, you can set up a system that keeps your terrace garden thriving with minimal effort.
This method is ideal for busy gardeners, people who travel often, or anyone who wants to ensure consistent watering for their plants. Best of all, it’s inexpensive and eco-friendly.
What is Capillary Irrigation?
Capillary irrigation, also known as self-watering or passive watering, mimics how plants absorb water naturally in the wild. Water travels upward through the soil by capillary action—tiny gaps between soil particles draw water up from a reservoir below. This keeps the soil evenly moist without frequent surface watering.
Why Use Plastic Bottles?
Plastic bottles are lightweight, easy to handle, and perfect for terrace gardening. By reusing them, you reduce waste and save money. They can act as both the water reservoir and the delivery system for capillary irrigation, providing a sustainable and simple setup.
Materials You’ll Need
-
2-liter or 5-liter plastic bottles (depending on plant size)
-
Potting soil (preferably a light, absorbent mix)
-
Vegetable seeds or seedlings
-
Cotton or polyester fabric strips (for wicking)
-
A knife or scissors
-
A small drill, nail, or heated needle
-
Planter containers or additional bottles cut for planting
-
Organic compost or slow-release fertilizer (optional)
Step-by-Step Guide
Step 1: Prepare the Water Reservoir
Start by cleaning the plastic bottles thoroughly. Cut the bottles horizontally into two parts:
-
The bottom part will hold water (the reservoir).
-
The top part (inverted) will hold the soil and plant.
Create a small hole in the bottle cap to allow the wick to pass through. The hole should be tight enough to hold the wick snugly but allow water movement.
Step 2: Insert the Wick
Take a strip of cotton cloth or thick polyester string and thread it through the hole in the bottle cap. The wick should extend 2–3 inches into the water reservoir and about 4–6 inches into the soil above. This wick is what draws water up from the reservoir into the soil.
Make sure the material used for wicking is absorbent and durable.
Step 3: Assemble the Self-Watering Pot
Screw the cap with the wick back onto the bottle top. Invert the top half into the bottom half like a funnel sitting inside a cup. Ensure the wick hangs down into the reservoir.
You can also poke a few small ventilation holes near the soil surface to improve aeration if you wish.
Step 4: Add Soil and Plant
Fill the inverted top section with moist potting soil, gently packing around the wick to ensure good soil-to-wick contact.
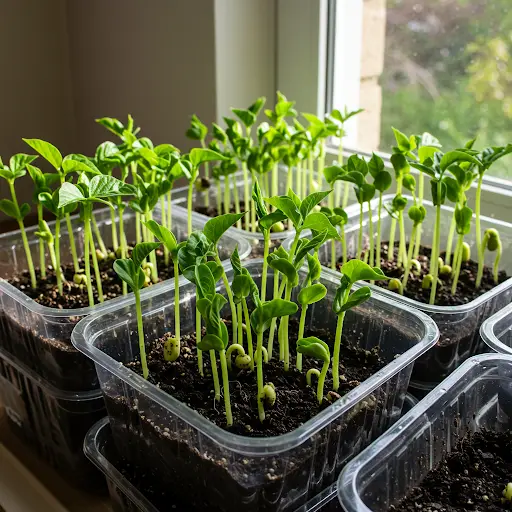
Add your vegetable seeds or seedlings according to their planting requirements. Good options for capillary irrigation include leafy greens (like lettuce, spinach, and kale), herbs, radishes, and even small peppers.
Step 5: Fill the Water Reservoir
Pour clean water into the reservoir at the bottom. Initially, also water the soil from the top to ensure everything is evenly moist and the wick starts functioning properly.
Monitor the water level regularly and refill when necessary. Depending on plant size and temperature, the reservoir may need refilling every few days to a week.
Step 6: Position Your Containers
Place your capillary irrigation planters in a spot on your terrace where they get appropriate sunlight—at least 4–6 hours a day for most vegetables.
Grouping containers together can create a mini-garden, conserving moisture further and making maintenance easier.
Step 7: Ongoing Care
-
Watering: Top up the reservoir when it’s low. Avoid letting it dry out completely.
-
Feeding: Add a diluted liquid fertilizer every few weeks if your plants need extra nutrients.
-
Pruning: Remove dead leaves and thin seedlings as needed to promote healthy growth.
-
Pests: Keep an eye out for insects, especially if your terrace is close to plants or trees.
Tips for Success
-
Use dark-colored or painted bottles to prevent algae growth inside the reservoir.
-
Ensure wicks are clean and replace them if they become clogged or moldy over time.
-
Use lightweight, fluffy soil that absorbs water easily for best results.
-
Test the wick’s performance before planting by seeing how fast it pulls water upward.
Advantages of Capillary Irrigation
-
Water Efficiency: Reduces waste by watering only as needed.
-
Time-Saving: Less frequent watering required, perfect for busy lifestyles.
-
Healthier Plants: Consistent moisture reduces plant stress and promotes stronger growth.
-
Eco-Friendly: Reduces water consumption and plastic waste simultaneously.
Conclusion
Creating a capillary irrigation system with plastic bottles is an excellent way to maintain a thriving vegetable garden on your terrace. It’s easy, cost-effective, and promotes healthier plant growth by supplying consistent moisture directly to the roots.
With a few recycled bottles and basic materials, you can set up a sustainable, low-maintenance watering system that helps your vegetables grow strong and flavorful—all while making the most of limited space and resources.
Get started today and enjoy the satisfaction of harvesting fresh vegetables right from your own terrace!