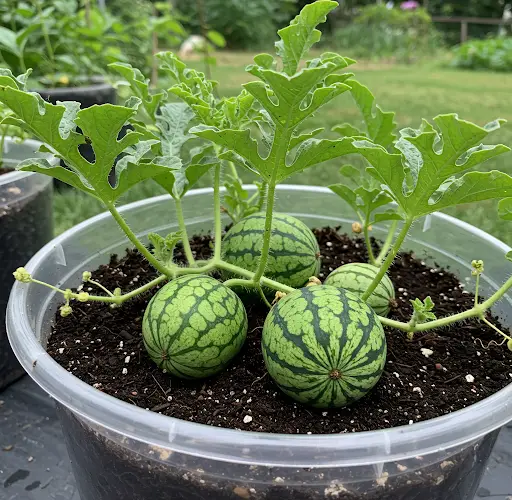
Growing watermelons at home may seem like a challenge due to their size and water requirements, but with a clever self-watering system, it’s not only possible—it’s highly productive. Whether you’re working with limited space or aiming for less maintenance and higher yields, a self-watering setup can help you grow juicy, sweet watermelons right at home.
This guide will show you how to make a self-watering watermelon garden using simple, affordable materials and offer tips to help your plants thrive.
Why Choose a Self-Watering System?
Watermelons are thirsty plants. Their large fruits and sprawling vines require consistent moisture, especially during flowering and fruit development. A self-watering system provides:
-
Consistent moisture levels without daily watering
-
Reduced water waste, perfect for dry climates
-
Healthier roots with proper oxygen and moisture balance
-
Convenience for busy gardeners or those with limited time
This method works especially well in containers, patios, or rooftop gardens.
Materials You’ll Need
To create a basic self-watering watermelon planter, gather:
-
Two 20-liter plastic buckets or containers (one for water reservoir, one for soil)
-
A small plastic cup or mesh basket (for wicking)
-
A length of PVC pipe or plastic tube (for watering inlet)
-
Potting soil mixed with compost
-
Watermelon seeds or seedlings (preferably compact or bush varieties)
-
A hand drill or sharp tool for making holes
-
Mulch (optional)
Step-by-Step: Building the Self-Watering Planter
1. Prepare the Containers
-
Take one bucket and drill several holes in the bottom. This will serve as the growing container.
-
In the second bucket (the reservoir), leave it intact. This will hold the water.
2. Create the Wick
-
Cut a hole in the center of the growing bucket’s bottom to fit the plastic cup or mesh basket. Fill the cup with soil—it will act as a wick, drawing water up into the soil.
-
The cup should rest inside the bottom container when stacked.
3. Add the Watering Pipe
-
Cut a 1-inch diameter PVC pipe about 12–15 inches long.
-
Insert the pipe vertically through the side of the top bucket, so it reaches the bottom reservoir. This is your watering tube.
4. Stack and Fill
-
Place the growing bucket over the reservoir. Make sure the wick is touching the base of the bottom bucket.
-
Fill the growing container with your potting mix:
-
50% garden soil
-
30% compost
-
20% sand or cocopeat
-
-
Leave some space at the top for mulch.
Planting Watermelon
-
Sow 1–2 watermelon seeds directly into the soil about 1 inch deep.
-
If using seedlings, plant them once they have at least two true leaves.
-
Water the top layer lightly the first few days until the roots reach the wick.
After the initial watering, pour water directly into the watering pipe. Refill the reservoir every 3–5 days depending on weather conditions.
Sunlight and Space
Watermelons need 6–8 hours of full sunlight daily. Place the container in a bright, warm spot. As the vines grow, guide them using a trellis, hammock, or ground cover depending on your space. If using a trellis, make sure to support the developing fruit with slings or netting.
Compact watermelon varieties such as ‘Sugar Baby’ or ‘Bush Jubilee’ are ideal for container growing.
Feeding Your Plants
Though your potting mix may be nutrient-rich, watermelons are heavy feeders. Feed them every 10–14 days with:
-
Compost tea or
-
Banana peel water (for potassium) or
-
A balanced organic fertilizer high in phosphorus and potassium
Avoid over-fertilizing with nitrogen, as this encourages vines over fruit.
Mulching and Pollination
Add a layer of dry grass, straw, or coconut husk around the base of the plant to retain moisture and prevent weeds.
Watermelons produce both male and female flowers. Bees and insects usually handle pollination, but if you notice flowers dropping without fruiting, hand-pollinate using a small brush or cotton swab.
Harvesting Your Watermelons
Watermelons are ready to harvest in 75–90 days, depending on the variety. Here are signs to look for:
-
The tendrils near the fruit stem turn brown and dry
-
The underside of the fruit turns yellow (ground spot)
-
The fruit gives a hollow sound when tapped
Cut the fruit carefully with a knife, leaving a few inches of stem to prevent rot.
Final Tips for High Yield
-
Train the vines to grow outward or upward for better airflow and space efficiency
-
Prune excess growth to focus the plant’s energy on fruiting
-
Keep the reservoir filled, especially during flowering and fruiting stages
-
Rotate containers if sunlight is uneven across your space
With proper care and consistency, your self-watering system will keep the watermelon roots healthy and hydrated—leading to bigger, juicier, and more abundant harvests without daily watering stress.
Growing watermelons at home can be both satisfying and surprisingly easy with this method. A self-watering container reduces labor and increases your chances of success, even in small spaces. Whether you’re a beginner or seasoned gardener, this smart system can help you enjoy sweet, homegrown watermelons all summer long.


