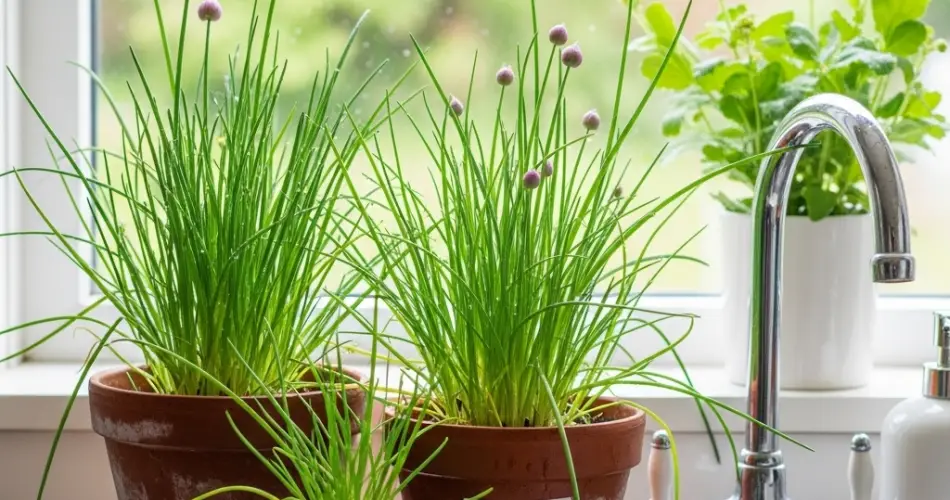
Chives are one of the most popular and easy-to-grow culinary herbs, prized for their mild onion-like flavor and vibrant green stalks. Perfect for garnishing soups, salads, and baked dishes, fresh chives add a burst of flavor and color to any meal. Growing chives on your kitchen counter is a fantastic way to have fresh herbs within arm’s reach all year round. This guide will walk you through the essential steps to keep your chives thriving indoors, covering everything from choosing the right container to watering, light requirements, and maintenance tips.
Why Grow Chives on Your Kitchen Counter?
Growing chives indoors offers several advantages:
-
Convenience: Having fresh chives near your cooking area means you can snip leaves anytime.
-
Space-Saving: Chives are compact and thrive in small pots, perfect for kitchen counters or windowsills.
-
Low Maintenance: Chives are hardy and forgiving, ideal for beginner gardeners.
-
Decorative: Their bright green stalks add a fresh, natural aesthetic to your kitchen space.
Choosing the Right Container for Chives
The container you choose can affect the growth and health of your chives:
-
Size: Use a pot at least 6-8 inches in diameter to provide ample root space.
-
Material: Terracotta pots are breathable and help prevent overwatering. Plastic pots retain moisture but require careful monitoring.
-
Drainage: Make sure the pot has drainage holes to prevent waterlogging, which can cause root rot.
Soil Requirements for Healthy Chives
Chives thrive in nutrient-rich, well-draining soil:
-
Potting Mix: Use a high-quality, all-purpose potting mix that retains moisture but drains well.
-
Soil Texture: Chives prefer a loose, loamy soil with organic matter.
-
pH Preference: Ideal soil pH is between 6.0 and 7.0.
-
Fertilizing: Feed chives with a balanced liquid fertilizer every 4-6 weeks during the growing season for best results.
Planting Chives on Your Kitchen Counter
You can start chives from seeds, seedlings, or divisions from established plants:
-
Seeds: Sow chive seeds about ¼ inch deep in moist soil. Keep the soil consistently moist until germination, which usually takes 10-14 days.
-
Seedlings: Transplant young chive plants from nurseries into your container with fresh soil.
-
Divisions: Divide mature chive clumps by separating root sections and planting them individually.
Light Requirements for Thriving Chives
Light is crucial for healthy chive growth:
-
Sunlight: Chives need at least 6 hours of direct or bright indirect sunlight daily. Place the pot near a south-facing window if possible.
-
Supplemental Lighting: In low-light conditions or during winter, use fluorescent or LED grow lights to provide 10-12 hours of light.
-
Rotation: Rotate the pot regularly to ensure even light exposure and prevent the plant from leaning.
Watering Chives Properly
Watering plays a key role in keeping chives healthy:
-
Frequency: Water when the top inch of soil feels dry. Chives prefer consistently moist soil but do not like to sit in water.
-
Method: Water thoroughly, allowing excess to drain out of the pot. Avoid wetting leaves to prevent fungal diseases.
-
Humidity: Average indoor humidity is adequate for chives.
Pruning and Harvesting Chives
Regular pruning promotes fresh growth and keeps plants tidy:
-
Harvesting: Begin snipping chive leaves once plants reach 6 inches tall. Cut leaves near the base, leaving about 2 inches above soil to encourage regrowth.
-
Frequency: Harvest regularly to stimulate new growth and prevent flowering, which can make leaves tough.
-
Flower Management: Remove flower buds as they appear to keep leaves tender and flavorful.
Common Issues and How to Address Them
-
Yellowing Leaves: Often caused by overwatering or poor drainage. Adjust watering and check that the pot drains properly.
-
Leggy Growth: Caused by insufficient light. Move the plant to a sunnier spot or supplement with grow lights.
-
Pests: Chives can occasionally attract aphids or spider mites. Wipe leaves with a damp cloth or use insecticidal soap if necessary.
-
Root Rot: Prevent by ensuring proper drainage and avoiding waterlogged soil.
Benefits of Growing Chives Indoors
-
Fresh Flavor: Homegrown chives have a brighter, more delicate flavor than store-bought.
-
Low Maintenance: Chives are hardy and adapt well to indoor conditions.
-
Year-Round Growth: With proper light and care, chives can be harvested throughout the year.
-
Health Benefits: Chives are rich in vitamins A and C and have antioxidant properties.
Tips for Long-Term Success
-
Repotting: Refresh soil and repot every 1-2 years to maintain healthy roots and prevent overcrowding.
-
Companion Herbs: Grow chives alongside other kitchen herbs like parsley, basil, or thyme for a diverse herb garden.
-
Keep It Clean: Remove dead or yellow leaves to promote healthy growth and prevent disease.
-
Rotate Plants: Rotate the container regularly for even sunlight exposure.
Conclusion
Growing chives on your kitchen counter is a simple, rewarding way to have fresh, flavorful herbs at your fingertips. With the right container, well-draining soil, adequate light, and proper watering, your chive plants will flourish indoors, providing a steady supply of vibrant leaves for your culinary creations. Whether you’re sprinkling them over eggs, mixing them into salads, or using them as a garnish, homegrown chives add freshness and color to your kitchen every day.


