Growing fresh, crisp lettuce at home is easier than you might think — and you don’t even need a garden. By using simple, recycled plastic buckets, you can create a productive mini-garden right on your balcony, patio, or even by a sunny window. This method is affordable, eco-friendly, and perfect for anyone with limited space.
Here’s a complete step-by-step guide on how to grow your own lettuce at home using plastic buckets.
Why Use Plastic Buckets for Growing Lettuce?
Plastic buckets are an excellent choice for home gardening:
-
Recycled and low-cost: You can reuse old buckets, making the project economical and sustainable.
-
Portable: Buckets can be moved to follow the sun or brought indoors during bad weather.
-
Control over soil and water: Growing in buckets helps manage soil quality, moisture levels, and drainage.
-
Space-saving: Buckets are perfect for small spaces like balconies, patios, rooftops, and small yards.
With just a little effort, you can enjoy homegrown, chemical-free lettuce all year round.
Materials Needed
Gather the following items before you start:
-
Plastic buckets (at least 10–15 liters in capacity)
-
Good-quality potting soil (light and well-draining)
-
Lettuce seeds (loose-leaf varieties are ideal)
-
Compost or organic fertilizer
-
A drill or sharp tool (to make drainage holes)
-
Watering can or spray bottle
Optional but helpful materials include mulch (such as straw or dried leaves) and a small hand trowel.
Step 1: Prepare Your Plastic Buckets
Start by thoroughly cleaning the plastic buckets to remove any residues, especially if they were previously used for chemicals or paint.
-
Drill several holes in the bottom of each bucket to allow excess water to drain out. Proper drainage is crucial to prevent root rot.
-
If you want extra drainage, place a layer of small stones or gravel at the bottom before adding soil.
Buckets of 10–15 liters are ideal because they are deep enough to support the roots and wide enough to accommodate multiple plants.
Step 2: Prepare the Soil
Fill each bucket with high-quality potting soil, enriched with compost for extra nutrients.
-
The soil should be light, airy, and able to retain moisture without becoming waterlogged.
-
Mix a small amount of organic fertilizer into the soil to give your lettuce a strong start.
-
Leave about 2–3 inches of space at the top of the bucket to make watering easier.
Good soil preparation is the foundation for healthy, vigorous plants.
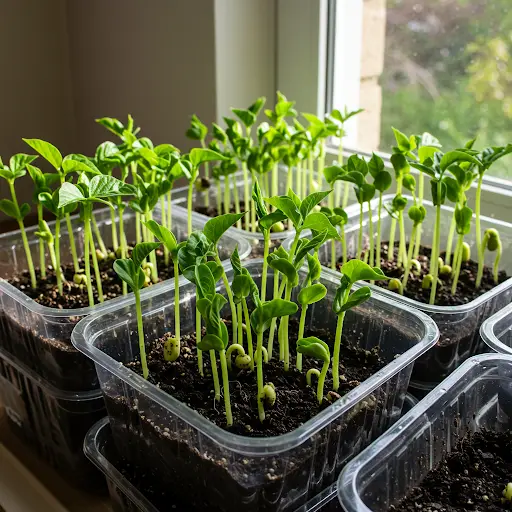
Step 3: Sow the Lettuce Seeds
Lettuce seeds are tiny and easy to handle.
-
Scatter seeds evenly over the surface or plant them individually about ¼ inch deep.
-
For loose-leaf varieties, you can plant seeds closer together. For head-forming varieties, space them 6–8 inches apart.
-
Gently cover the seeds with a thin layer of soil and mist lightly with water.
Keep the buckets in a warm, bright spot. Lettuce seeds germinate quickly, usually within 7–10 days.
Step 4: Provide Proper Light and Water
Lettuce grows best with 4–6 hours of sunlight per day. Place the buckets where they will receive plenty of morning sun, which is softer and less likely to cause wilting.
-
Keep the soil consistently moist, but not soggy.
-
Water gently when the top inch of soil feels dry. Using a spray bottle or watering can with a fine nozzle works well for young plants.
-
Avoid overwatering, which can lead to root problems.
If the sun is too strong, provide a little shade during the hottest part of the day to prevent the plants from bolting (going to seed early).
Step 5: Maintain Your Lettuce Plants
Lettuce is a low-maintenance crop, but a few small steps will ensure success:
-
Thin the seedlings once they are a few inches tall, leaving the strongest plants about 4–6 inches apart.
-
Mulch around the base with straw or dried leaves to retain moisture and keep the soil cool.
-
Feed the plants with a mild organic fertilizer every 2–3 weeks if growth appears slow or leaves look pale.
-
Watch for pests such as aphids or snails. Remove them by hand or use natural pest control methods like neem oil.
Growing lettuce in buckets makes it easier to monitor and manage pests and soil health.
Step 6: Harvest Your Lettuce
You don’t have to wait for the whole head to mature before enjoying your homegrown lettuce.
-
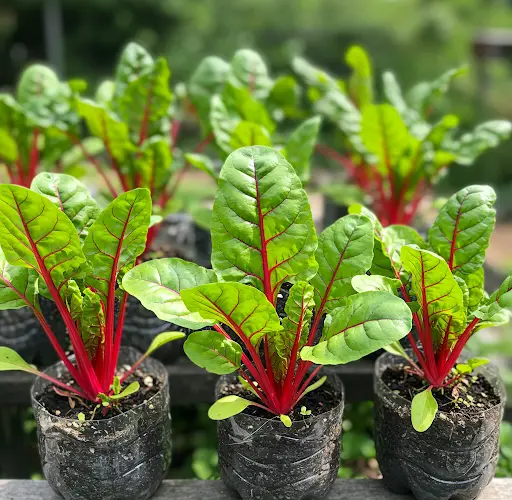
Loose-leaf varieties can be harvested leaf by leaf once they reach about 4 inches tall.
-
Head-forming types should be harvested once the heads are firm and mature, usually after 6–8 weeks.
Use scissors or garden shears to cut the leaves, taking care not to damage the plant’s core if you want it to continue producing.
Harvest in the morning for the crispest, sweetest leaves.
Tips for Success
-
Sow seeds successively every two to three weeks to ensure a continuous supply of fresh lettuce.
-
Rotate buckets occasionally if sunlight is uneven.
-
Use different varieties for a mix of colors, textures, and flavors in your salads.
-
Protect plants from heavy rain by moving buckets under a sheltered area when necessary.
Conclusion
Growing lettuce at home using plastic buckets is a simple, satisfying project that requires minimal space, effort, and investment. With just a few supplies and a little care, you can enjoy fresh, healthy greens straight from your home whenever you need them. Whether you’re a beginner or an experienced gardener, this method is a great way to start or expand your home gardening journey.
Happy planting!