How to Grow Spinach in a Plastic Basket to Save Space
Spinach is a highly nutritious leafy green that grows quickly and thrives in both cool and mild climates. It’s perfect for home gardening and can be grown in containers, raised beds, or even creatively repurposed items like plastic baskets. If you’re short on space or want to start a simple, budget-friendly garden, using a plastic basket is an excellent method to grow your own fresh spinach.
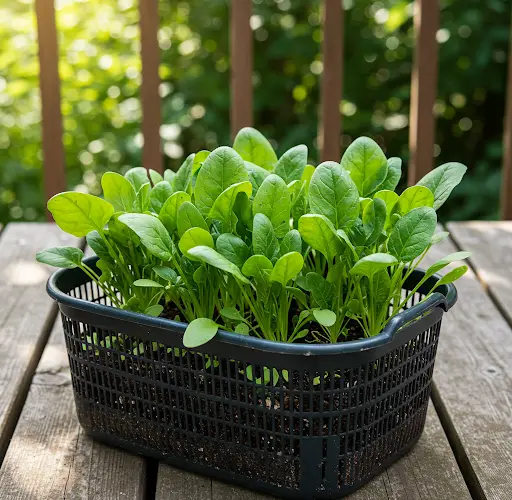
Plastic baskets offer good drainage, are lightweight, and easy to move around, making them ideal for balconies, patios, or even indoor gardens with enough sunlight. Here’s a complete guide to growing spinach in a plastic basket—from setup to harvest.
Why Use a Plastic Basket for Spinach?
Using a plastic basket has many advantages:
-
Maximizes space: Ideal for small balconies, rooftops, or areas with limited soil access.
-
Excellent drainage: The holes in plastic baskets allow excess water to drain easily.
-
Air circulation: Better airflow helps prevent root rot and soil-borne diseases.
-
Cost-effective: Reuses everyday items that would otherwise go to waste.
-
Portable: Easy to relocate depending on sunlight or weather conditions.
Spinach, with its shallow root system and compact size, is a perfect crop for growing in baskets.
What You’ll Need
-
A medium-to-large plastic basket (10–12 inches deep)
-
A coconut husk liner, old cloth, or mesh to line the inside
-
Quality potting soil or a homemade soil mix
-
Spinach seeds (any fast-growing or local variety)
-
Organic fertilizer (like compost or worm castings)
-
Watering can or spray bottle
-
A sunny spot (4–6 hours of sunlight per day)
Step-by-Step Guide to Growing Spinach in a Basket
1. Prepare the Basket
Start by cleaning your basket thoroughly. Since plastic baskets usually have large holes, you’ll need to line them with a breathable material to hold the soil in while still allowing drainage.
-
Line the basket with coconut husk, old t-shirt cloth, jute sack, or even multiple layers of newspaper.
-
Make sure the material covers all sides but still allows water to drain through the bottom.
This lining also helps retain some moisture without waterlogging the roots.
2. Fill with Soil
Use a light, well-draining soil mix. You can either buy ready-made potting mix or create your own blend:
-
50% garden soil or cocopeat
-
30% compost (vermicompost or decomposed manure)
-
20% sand or perlite for aeration
Fill the basket, leaving about 2 inches of space from the top.
3. Sow the Seeds
-
Soak spinach seeds in water for 4–6 hours before planting to speed up germination.
-
Sprinkle the seeds evenly across the soil surface. You can plant them close together (about 1–2 inches apart).
-
Cover lightly with a thin layer of soil or compost and gently pat it down.
Water gently using a spray bottle or watering can with a fine spout to avoid displacing the seeds.
4. Provide the Right Conditions
Spinach prefers:
-
Cooler temperatures between 15–25°C (59–77°F)
-
Partial to full sunlight, ideally 4–6 hours per day
-
Consistent moisture without waterlogging
Place the basket in a spot that gets good morning sunlight but some afternoon shade in hotter climates.
5. Watering and Fertilizing
Water your spinach every 1–2 days or when the top inch of soil feels dry. During hot or dry weather, you may need to water daily.
For fertilizing:
-
Apply diluted compost tea or seaweed extract every 10–14 days.
-
Avoid high-nitrogen chemical fertilizers; instead, rely on organic sources to ensure safe, leafy growth.
6. Thinning and Maintenance
When seedlings reach about 2–3 inches tall, thin them to leave about 3–4 inches between plants. This gives each spinach plant room to grow full, healthy leaves.
Regularly remove yellowing or damaged leaves and keep the area around the basket clean to discourage pests.
Harvesting Spinach
Spinach can be harvested in 25–40 days after planting, depending on the variety and growing conditions.
You have two options:
-
Cut-and-come-again: Snip off outer leaves as needed, allowing the center to keep growing. This method can provide several harvests over a few weeks.
-
Full harvest: Cut the whole plant at the base if it starts to bolt (go to seed), especially in warm weather.
Harvest in the early morning for the best flavor and texture.
Tips for Success
-
In hot climates, plant spinach in early morning light and protect from harsh afternoon sun.
-
Reuse the same basket for other leafy greens like mustard, kale, or lettuce after the spinach season ends.
-
If growing indoors, place the basket near a south-facing window or use grow lights.
Final Thoughts
Growing spinach in a plastic basket is a smart, eco-friendly, and space-saving solution for anyone wanting to enjoy fresh, organic greens at home. Whether you live in a small apartment or want to make use of your balcony, this method is easy to set up and highly productive.
With minimal tools and materials, you can turn a simple basket into a mini garden that supplies your kitchen with one of the healthiest vegetables around.

