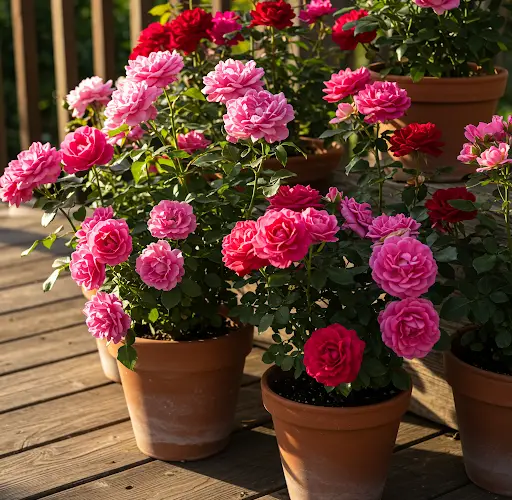
Roses are among the most beloved flowers in the world, admired for their beauty, fragrance, and variety. While most gardeners purchase rose plants from nurseries, growing roses from seed can be a rewarding and fulfilling challenge. Not only does it allow you to propagate unique varieties, but it also gives you a deeper connection to the plant’s growth process. If you’re looking to grow roses from seed, this step-by-step guide will help you navigate the process with confidence.
Step 1: Choosing the Right Rose Seeds
Not all roses are the same, and it’s important to select the right type of rose for growing from seed. Some roses are easier to grow from seed than others, and selecting varieties that are known to be hardy and resilient will increase your chances of success. Here are a few things to consider when choosing rose seeds:
-
Hybrid vs. Heirloom: While hybrid roses tend to have more vibrant colors and bigger blooms, heirloom or older varieties may be easier to grow from seed and produce plants that are closer to the parent plant.
-
Seed source: It’s important to purchase seeds from a reputable source, as some roses are difficult to grow from seed without specific conditions.
-
Flower type: Decide if you want to grow a climbing rose, shrub rose, or a miniature variety, as each type will require different care and growing conditions.
Step 2: Preparing the Seeds
Rose seeds have a natural dormancy period that can make germination a bit tricky. To give your seeds the best chance at sprouting, you’ll need to simulate the conditions they would experience in nature. Here’s how:
-
Stratification: Rose seeds require cold stratification to break dormancy. This mimics winter conditions, allowing the seeds to prepare for germination.
-
To cold-stratify rose seeds, place them in a sealed plastic bag with a small amount of moist sand, peat, or paper towel.
-
Store the bag in the refrigerator for 10–12 weeks. This cold period helps to soften the seed coat, making it easier for the seeds to germinate.
-
-
Soaking: Before stratification, some gardeners prefer to soak the seeds for 24 hours in warm water. This softens the seed coat and can further improve germination rates.
Step 3: Preparing the Soil
Rose seeds require well-draining soil to prevent rot. It’s crucial to use a soil mix that holds moisture but also allows air to reach the roots. Here’s how to prepare the soil:
-
Seed-Starting Mix: Use a light, sterile seed-starting mix. Avoid heavy garden soil, which can become compacted and prevent proper seedling growth.
-
Containers: Choose shallow containers or seed trays with drainage holes to ensure the soil doesn’t become waterlogged. Fill each container with the seed-starting mix, leaving some space at the top.
Step 4: Sowing the Seeds
Once your seeds have gone through stratification, you can sow them in the prepared containers. Here’s how to do it:
-
Planting depth: Gently press the seeds into the soil. Rose seeds should be planted about 1/8 to 1/4 inch deep. Be sure not to bury them too deep, as they need light to germinate.
-
Watering: Lightly water the soil after planting. It’s important to keep the soil consistently moist but not soggy, as excess moisture can lead to mold or rot.
-
Light conditions: Place the containers in a location that gets bright, indirect sunlight. A windowsill or under grow lights is ideal. Rose seeds need plenty of light to germinate, so don’t place them in dark areas.
-
Temperature: Roses thrive in temperatures between 65°F to 75°F (18°C to 24°C) during germination. If needed, you can use a seed heat mat to maintain a consistent temperature.
Step 5: Germination and Care
Rose seeds can take 3–6 weeks to germinate, so patience is key. During this time, you’ll need to maintain proper care to ensure the seedlings are healthy:
-
Watering: Keep the soil consistently moist, but avoid overwatering. Water gently to avoid disturbing the seeds.
-
Humidity: You can cover the container with a clear plastic dome or plastic wrap to create a humid environment. This will help keep the seeds warm and moist during the germination process.
-
Ventilation: Once the seeds begin to sprout, remove the plastic cover to allow fresh air to circulate and prevent mold growth.
Step 6: Transplanting Seedlings
Once the seedlings have developed at least a couple of sets of leaves, they are ready to be transplanted into larger pots. Here’s how to do it:
-
Potting Up: Carefully lift the seedlings from their initial container, being gentle with the roots. Plant each seedling into a larger pot filled with high-quality potting soil.
-
Spacing: Give each seedling plenty of space to grow by spacing them about 3–4 inches apart in the new pots.
-
Fertilizing: After transplanting, begin fertilizing the seedlings every 2–3 weeks with a balanced, water-soluble fertilizer to encourage strong growth.
-
Sunlight: Continue providing the seedlings with bright, indirect sunlight. As the plants grow, you can gradually introduce them to more direct sunlight.
Step 7: Moving Outdoors
After the risk of frost has passed and the seedlings have grown large enough to handle, it’s time to move them outdoors. Here’s how:
-
Hardening off: Before transplanting, harden off the seedlings by gradually introducing them to outdoor conditions. Start by placing them in a shaded area for a few hours each day, then gradually increase their exposure to full sun.
-
Planting outdoors: Choose a location with well-draining soil and full sun for at least 6 hours a day. Space the plants about 18–24 inches apart, depending on the variety.
-
Watering: Keep the young plants watered but not waterlogged, and mulch around them to retain moisture and keep weeds at bay.
Step 8: Ongoing Care
Roses require regular maintenance to thrive. Here’s how to keep your plants healthy:
-
Pruning: Regularly prune your roses to remove dead or diseased wood and encourage healthy growth.
-
Watering and Fertilizing: Continue to water the roses regularly and fertilize them during the growing season. A balanced fertilizer will help the plant grow strong and bloom beautifully.
-
Pest control: Keep an eye out for pests such as aphids and spider mites. Use organic treatments or insecticidal soap if necessary.
Conclusion
Growing roses from seed is a rewarding process that requires patience, care, and the right conditions. By following these steps, you can successfully grow your own roses, starting from seed and watching them bloom into beautiful, fragrant flowers. Whether you’re looking to propagate a favorite variety or start a new rose garden, this step-by-step guide will help you get started on the right foot.


