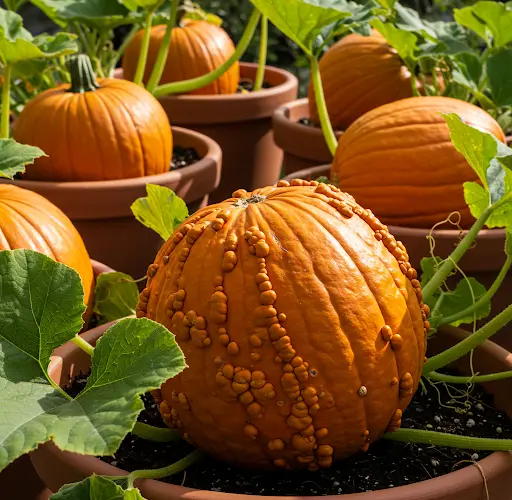
Pumpkins are often thought of as large, sprawling plants that need a lot of space, but compact varieties like ‘Wee Be Little’ make it possible to grow pumpkins even in small gardens or containers. These miniature pumpkins are not only cute and decorative but also edible, making them a fun and practical crop for container gardeners.
In this easy planting guide, you’ll learn how to grow Wee Be Little pumpkins from seed in containers—from soil preparation to harvesting.
1. Why Grow Pumpkins in Containers?
Growing pumpkins in containers is ideal for small spaces like patios, balconies, or urban gardens. Using containers has several benefits:
-
You can control the soil quality and drainage.
-
Plants are less vulnerable to ground-dwelling pests and diseases.
-
Easier to manage vines and support growth vertically.
-
Compact varieties like ‘Wee Be Little’ thrive in limited space.
This method is perfect for gardeners who want to enjoy homegrown pumpkins without dedicating a large garden bed.
2. Choosing the Right Variety
Not all pumpkins are suitable for containers. For successful container growing, choose dwarf or bush-type varieties. ‘Wee Be Little’ is a great option because:
-
It grows on compact vines, ideal for pots or grow bags.
-
The fruits are small (about 3–4 inches in diameter).
-
Each plant can produce 6–10 fruits under the right conditions.
This variety is excellent for fall displays, cooking, or gifting.
3. Container Size and Setup
To grow healthy pumpkin plants, you need large containers to accommodate their root systems.
Recommended container specifications:
-
Size: Minimum 15–20 gallons per plant
-
Depth: At least 12–16 inches
-
Drainage: Must have drainage holes to prevent waterlogging
Fabric grow bags, large buckets, or half-barrels are great choices. Place the container in a location that receives 6–8 hours of full sun daily.
4. Soil and Fertilizer Needs
Pumpkins thrive in rich, well-draining soil loaded with organic matter.
Ideal soil mix:
-
2 parts organic potting soil
-
1 part compost or aged manure
-
1 part perlite or coarse sand for aeration
Before planting, mix in a slow-release organic fertilizer high in phosphorus and potassium to support flowering and fruiting.
5. Planting Pumpkin Seeds
You can start seeds indoors or sow them directly into containers once the weather warms.
Sowing instructions:
-
Plant 2–3 seeds in the center of the container, about 1 inch deep.
-
Keep the soil moist but not soggy.
-
Seeds will germinate in 7–10 days under warm conditions (70–85°F or 21–29°C).
-
Once seedlings have two sets of true leaves, thin them by snipping the weakest ones at the soil line—leave the strongest plant.
If starting indoors, transplant carefully to avoid disturbing roots.
6. Supporting Pumpkin Vines
Even compact pumpkin varieties like ‘Wee Be Little’ will send out vines. You can:
-
Let the vines trail over the container’s edge.
-
Use a trellis or tomato cage to train vines vertically.
-
Support small fruits with slings (made from cloth or mesh) if growing vertically.
Training the vines helps save space, improves airflow, and reduces disease risk.
7. Watering and Feeding
Pumpkins need consistent moisture, especially during flowering and fruit formation.
Watering tips:
-
Water deeply 2–3 times per week, depending on heat and rainfall.
-
Avoid wetting the leaves to prevent fungal issues.
-
Use mulch (like straw or shredded leaves) to retain moisture and reduce weeds.
Feeding schedule:
-
After initial soil prep, begin feeding every 2–3 weeks with a liquid organic fertilizer.
-
Once flowers appear, switch to a fertilizer with higher potassium (like tomato fertilizer) to encourage fruiting.
8. Pollination and Flowering
Pumpkin plants produce male and female flowers. Bees and pollinators usually handle pollination, but in containers, you may need to assist manually.
How to hand-pollinate:
-
Identify male flowers (on long thin stems) and female flowers (with a small fruit behind them).
-
Use a small brush or cotton swab to transfer pollen from the male flower to the center of the female flower.
-
Do this early in the day when flowers are open.
Successful pollination will lead to fruit development within a few days.
9. Harvesting Wee Be Little Pumpkins
Wee Be Little pumpkins mature in about 90–100 days from sowing.
Signs of readiness:
-
The pumpkin turns a deep orange color.
-
The stem begins to dry and harden.
-
The fruit feels firm when gently pressed.
Use pruning shears to cut the pumpkin from the vine, leaving a 2–3 inch stem attached. Cure them in a dry, shaded area for 7–10 days to extend storage life.
10. Final Growing Tips
-
Rotate the container every few days to promote even sunlight exposure.
-
Watch for pests like squash bugs or powdery mildew and treat early.
-
Use compact companion plants like marigolds to help repel pests.
Growing Wee Be Little pumpkins in containers is a fun and satisfying way to enjoy fresh pumpkins in a small space. With the right care, sunlight, and support, your pumpkin plants will reward you with charming little fruits perfect for autumn decor or the dinner table.


