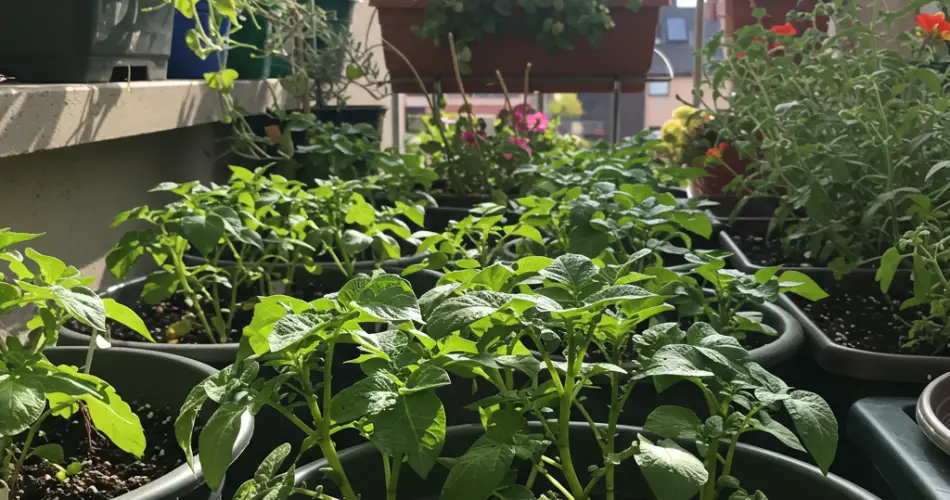
You don’t need a big backyard or even a garden bed to grow your own potatoes. With the right setup, you can cultivate a surprisingly generous harvest of fresh, flavorful potatoes right on your balcony. All it takes is a few containers, some quality soil, and a bit of attention to their growth cycle.
This method is ideal for those living in apartments or with limited space, and it offers the satisfaction of harvesting your own food even in an urban setting. Here’s everything you need to know to grow potatoes successfully on your balcony—and impress your neighbors with your vertical farming skills.
Why Potatoes Are Perfect for Balcony Growing
Potatoes are one of the easiest root vegetables to grow in containers. They don’t require pollination, they’re relatively pest-resistant, and they produce abundantly with minimal space. Plus, there’s something especially rewarding about digging into the soil and discovering your own homegrown spuds.
What You’ll Need to Get Started
Before planting, gather the following:
-
Seed potatoes (not store-bought eating potatoes, which may be treated with growth inhibitors)
-
Large containers (grow bags, buckets, or deep pots—minimum 10 gallons in size)
-
High-quality potting mix
-
Compost or well-rotted manure
-
Watering can or hose with a gentle spray
-
Sunny balcony spot with at least 6 hours of sunlight per day
Choosing the Right Potatoes
Select seed potatoes from a garden center or online supplier. You can choose between:
-
Early varieties: mature in about 60–70 days; great for fast harvests
-
Maincrop varieties: take around 90–120 days; produce larger harvests
Popular container-friendly varieties include ‘Yukon Gold,’ ‘Red Pontiac,’ and ‘Charlotte.’ For best results, choose varieties known for compact or container-growing performance.
Preparing and Sprouting Seed Potatoes
Before planting, it’s helpful to “chit” your seed potatoes. This simply means allowing them to sprout before planting to encourage stronger growth.
Here’s how:
-
Place seed potatoes in a cool, bright spot (like a windowsill).
-
Allow them to form short, stubby shoots about 2 cm (1 inch) long.
-
This process typically takes 2–3 weeks.
Once chitted, your seed potatoes are ready to plant.
Planting Potatoes in Containers
-
Fill your container with about 10–15 cm (4–6 inches) of soil mixed with compost.
-
Place 2–3 chitted potatoes on top, with the sprouts facing upward.
-
Cover them with another 10 cm (4 inches) of soil.
-
As the plants grow and stems reach about 15–20 cm (6–8 inches), add more soil to cover most of the stem. This is known as “hilling” and encourages more tuber formation.
-
Repeat the hilling process until the container is full.
Be sure the container has drainage holes to prevent waterlogging, which can rot the tubers.
Watering and Care
Consistent moisture is key to a healthy potato crop. Here’s how to keep your plants happy:
-
Water regularly, keeping the soil evenly moist but not soggy.
-
Avoid wetting the leaves excessively, especially during hot, humid weather to prevent fungal diseases.
-
If your balcony receives heavy rain, move the containers temporarily to avoid oversaturation.
Potatoes don’t need much fertilizing, but a light feed with compost tea or a balanced liquid fertilizer once or twice during the growing season can improve yield.
Dealing with Pests and Problems
Potatoes grown on balconies are less likely to suffer from common ground pests, but you should still watch for:
-
Aphids or flea beetles: treat with neem oil or insecticidal soap.
-
Blight: avoid overhead watering and remove infected leaves immediately.
-
Green potatoes: if any parts are exposed to sunlight, cover them with more soil to prevent the formation of solanine, a toxic compound.
Harvesting Your Balcony Potatoes
For early varieties, harvesting usually begins around 10 weeks after planting when the plants flower. For maincrop potatoes, wait until the foliage turns yellow and begins to die back.
To harvest:
-
Gently dig into the soil with your hands or a trowel.
-
Be careful not to damage the potatoes.
-
Shake off excess soil and allow them to air dry.
-
Store in a cool, dark place in a paper bag or basket.
One container can yield several pounds of potatoes, making the effort well worth it.
Final Tips for Balcony Success
-
Rotate your potato containers each season to avoid nutrient depletion.
-
After harvesting, reuse the soil in other pots by mixing in fresh compost.
-
If space allows, stagger plantings every few weeks for a continuous harvest.
-
Use decorative containers to blend your potato plants with balcony decor.
In Conclusion
Growing potatoes on a balcony is not only practical but also highly rewarding. With minimal space and effort, you can enjoy homegrown potatoes that taste far better than store-bought ones. From planting to harvest, it’s a process that brings joy, pride, and a touch of rustic charm to even the smallest urban spaces.
Your neighbors might be surprised to learn that a container of leafy green plants is hiding a treasure trove of potatoes beneath the surface—proving you don’t need a big garden to enjoy big results.


