Growing potatoes indoors might sound unusual, but it’s entirely possible—and surprisingly simple—with the right approach. Whether you lack outdoor garden space or want to enjoy fresh, homegrown potatoes year-round, cultivating them inside your home can be a fun and rewarding experience. You don’t need a field or even a yard—just a container, some soil, and a little know-how.
This guide will walk you through the complete process of growing potatoes indoors, from choosing the right variety to harvesting a healthy crop, all in the comfort of your home.
Why Grow Potatoes Indoors?
Potatoes are a staple food in many households, and growing them indoors comes with several advantages:
-
Year-round cultivation: No need to wait for the right season—you control the environment.
-
Space-saving: Ideal for apartments, balconies, or homes with no garden.
-
Pest control: Fewer problems with insects and diseases compared to outdoor crops.
-
Fresh harvest: Enjoy chemical-free, freshly dug potatoes anytime.
Indoor potato growing also makes a great educational project for kids or beginner gardeners.
Step 1: Choose the Right Potato Variety
Not all potatoes are equally suited to indoor growing. Some varieties perform better in containers and confined spaces.
Recommended types include:
-
‘Yukon Gold’ – a versatile yellow-flesh potato great for roasting and mashing.
-
‘Red Pontiac’ – a red-skinned variety that grows well in containers.
-
‘Fingerlings’ – small, narrow potatoes that don’t require a lot of depth.
-
‘Charlotte’ or ‘Nicola’ – good options for salad or boiling.
Start with certified seed potatoes from a garden center or online supplier to avoid diseases. Do not use grocery store potatoes, as they are often treated to prevent sprouting.
Step 2: Sprout (Chit) the Potatoes
Sprouting, also known as “chitting,” gives your potatoes a head start.
-
Place seed potatoes in a cool, bright spot (but not direct sun), like a windowsill.
-
Allow small sprouts (“eyes”) to grow from the tubers over 2–3 weeks.
-
When the shoots are about 1 inch long, the potatoes are ready for planting.
This step helps accelerate the growth process once the potatoes are planted indoors.
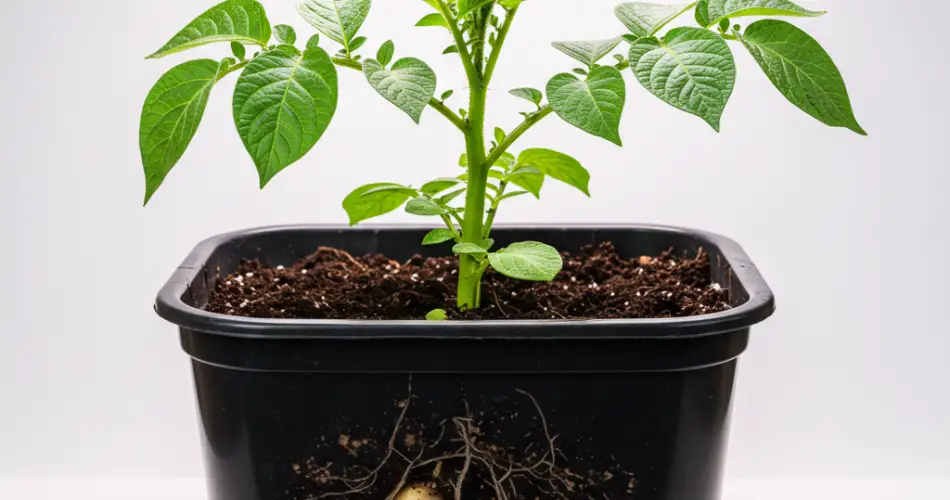
Step 3: Choose a Container and Soil
Potatoes need room to grow, so select a container that is deep and has good drainage.
-
Use a 5 to 10-gallon container—buckets, grow bags, or even large pots work well.
-
Ensure there are drainage holes at the bottom to prevent soggy soil.
-
Use a loose, well-draining potting mix enriched with compost. Avoid heavy garden soil, which can become compacted indoors.
Fill the container with about 4–6 inches of soil before planting.
Step 4: Plant the Potatoes
-
Place 2–4 seed potatoes (depending on container size) with the sprouted side facing up.
-
Space them evenly apart and cover with 4 inches of soil.
-
As the shoots grow, “hill up” the soil by adding more mix every time the stems grow 4–6 inches tall, covering part of the stem each time.
-
Repeat this until the container is nearly full. This encourages more tuber formation along the buried stem.
Step 5: Light, Temperature, and Watering
For optimal indoor potato growth, proper conditions are key:
-
Light: Place the container in a location that gets at least 6 hours of sunlight daily, such as near a bright window. Alternatively, use grow lights to supplement natural light.
-
Temperature: Maintain temperatures between 60–70°F (15–21°C) for best results.
-
Watering: Keep the soil consistently moist but not soggy. Water when the top inch of soil feels dry. Avoid letting the container sit in water to prevent root rot.
Step 6: Fertilizing and Maintenance
Potatoes are hungry plants and benefit from regular feeding:
-
Apply a balanced organic fertilizer or a low-nitrogen fertilizer every 2–3 weeks.
-
Too much nitrogen will encourage leaf growth at the expense of tubers.
-
Monitor for signs of pests like fungus gnats and use sticky traps or neem oil if needed.
Keep the area well-ventilated and check moisture levels regularly.
Step 7: Harvesting Your Indoor Potatoes
About 10–12 weeks after planting, your potato plant will begin to flower. This is a sign that baby potatoes are forming.
-
For new potatoes, you can gently reach into the soil and harvest a few small ones once flowers appear.
-
For mature potatoes, wait until the foliage turns yellow and dies back, typically after 14–16 weeks.
-
To harvest, tip the container over and dig out your fresh crop. Let the potatoes dry for a few hours in a cool, dry spot before storing.
Final Tips for Success
-
Rotate containers if you’re using artificial light to ensure even growth.
-
Avoid overwatering, especially as the plant nears maturity.
-
If you want a continuous supply, stagger plantings every few weeks.
-
Store harvested potatoes in a cool, dark, and dry place—not in the fridge.
Final Thoughts
Growing potatoes indoors might seem like a novelty, but it’s a practical and enjoyable way to produce fresh food right at home. Whether you’re working with a small apartment, an urban balcony, or a sunny corner in your kitchen, indoor potato growing is achievable with the right setup and care. With a bit of patience and attention, you’ll be rewarded with a hearty, homegrown harvest that just might surprise you.


