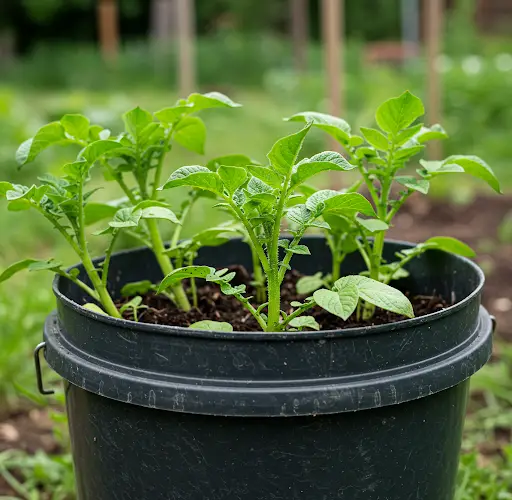
Growing your own potatoes can be a highly rewarding experience, and it’s easier than you might think. You don’t need a vast garden to grow these delicious tubers. Using a simple and inexpensive method, you can grow potatoes in used plastic buckets, making it a perfect solution for small spaces, terraces, or balconies. By repurposing plastic buckets, you’re not only growing your own food but also helping the environment by recycling waste.
In this guide, we’ll walk you through the steps to grow potatoes in used plastic buckets. You’ll learn the process from start to finish, ensuring you have a successful and fruitful harvest.
Why Use Plastic Buckets for Growing Potatoes?
Plastic buckets are an excellent option for growing potatoes for several reasons:
-
Space-saving: Growing potatoes in buckets allows you to maximize limited space, making it perfect for urban gardeners.
-
Recycling: Using recycled plastic buckets helps reduce waste and gives new life to items that would otherwise end up in a landfill.
-
Good drainage: Plastic buckets can easily be modified to ensure proper drainage, which is essential for potato growth.
-
Easy mobility: You can move the buckets around to ensure your potatoes get enough sunlight and protection from harsh weather.
Materials Needed
To grow potatoes in plastic buckets, you will need the following materials:
-
1 or 2 used plastic buckets (5-gallon size is ideal)
-
Potting soil or a well-draining garden mix
-
Seed potatoes (buy certified seed potatoes or use potatoes from the grocery store, though these may have been treated with growth inhibitors)
-
A drill or sharp object to make drainage holes
-
Fertilizer (optional)
-
Water
-
A sunny location (balcony, patio, or garden)
Step-by-Step Guide to Growing Potatoes in Plastic Buckets
1. Prepare the Plastic Buckets
The first step is to prepare the plastic buckets. If you’re using a bucket that hasn’t been used before, you’ll need to make sure it has adequate drainage for the potatoes to grow properly.
-
Create Drainage Holes:
Use a drill or sharp object to make several drainage holes at the bottom of the bucket. This is important because potatoes need well-draining soil to avoid rot. You can also make some holes around the sides of the bucket to improve airflow. -
Clean the Buckets:
If the plastic buckets have been used for other purposes, ensure they are clean and free from any residue that might harm the plants. Rinse them thoroughly before use.
2. Choose and Prepare the Seed Potatoes
Next, choose your seed potatoes. You can buy certified seed potatoes from a garden center, or you can use potatoes you already have, but be aware that store-bought potatoes may be treated with chemicals to prevent sprouting. For best results, choose seed potatoes that are firm and free of blemishes.
-
Cut the Potatoes (Optional):
If your seed potatoes are large, you can cut them into smaller pieces, ensuring each piece has at least one “eye” (the small indentations from which new shoots grow). Allow the cut pieces to dry for 1-2 days before planting to reduce the risk of rot.
3. Layering the Soil and Potatoes
-
Add Soil to the Bucket:
Fill the bottom of the bucket with about 4-6 inches of potting soil or a good-quality garden mix. Make sure the soil is loose and well-draining. You can mix some compost or organic fertilizer into the soil to give your potatoes a nutrient boost. -
Place the Seed Potatoes:
Place your seed potatoes on top of the soil, ensuring the “eyes” are facing up. Space the potatoes out evenly, allowing each piece enough room to sprout and grow. Typically, 3-4 seed potatoes will fit comfortably in a 5-gallon bucket. -
Cover with Soil:
After placing the seed potatoes, cover them with another 4-6 inches of soil. Gently pat the soil down to remove air pockets but don’t compact it too much.
4. Caring for Your Potato Plants
-
Watering:
Potatoes need consistent moisture to grow, but it’s important not to overwater. The soil should be kept moist, but not soggy. Water the bucket thoroughly after planting and continue to water whenever the top inch of soil feels dry. Be careful not to let the soil dry out completely, as this can lead to poor growth. -
Fertilizing (Optional):
While potatoes are relatively low-maintenance, you can apply a balanced fertilizer every 4-6 weeks to encourage healthy growth. Be sure to follow the manufacturer’s instructions for application rates. -
Provide Sunlight:
Potatoes require a lot of sunlight to grow. Place the bucket in a location where it will receive at least 6 hours of direct sunlight each day. A sunny balcony, patio, or backyard is ideal.
5. Hill Up the Potatoes
As the potato plants begin to grow, you will need to “hill up” the soil to encourage more potato production.
-
Add More Soil as Plants Grow:
Once the potato plants grow to about 6-8 inches tall, add another layer of soil around the stems, covering the lower leaves but leaving the top few inches exposed. This process is called “hilling,” and it helps protect the developing potatoes from sunlight, which can cause them to turn green and become toxic. -
Repeat the Process:
Continue to add soil every time the plants grow taller, leaving just the top few inches of the plant exposed. You can keep adding soil until the bucket is full or until the plants reach the top of the bucket.
6. Harvesting Potatoes
Potatoes are ready for harvest when the plants start to flower and the foliage begins to yellow. This usually occurs around 3-4 months after planting.
-
Check for Potatoes:
Gently tip the bucket over onto a tarp or in a clean area, and carefully sift through the soil to uncover the potatoes. Be gentle to avoid damaging the tubers. -
Harvest in Batches:
You can harvest the potatoes in stages. If you want smaller “new potatoes,” start harvesting after the plants flower. For larger potatoes, wait until the foliage dies back completely.
7. Storing Your Potatoes
After harvesting, let the potatoes dry in a cool, dark place for a few hours. Store them in a cool, dark location in a paper bag or a breathable container to prevent sprouting. Do not store them in plastic bags, as this can cause them to rot.
Conclusion
Growing potatoes in used plastic buckets is an easy, sustainable, and space-efficient way to enjoy homegrown potatoes. By following these simple steps, you can successfully grow your own crop without needing a traditional garden. Whether you have a small balcony, terrace, or even just a sunny windowsill, you can enjoy fresh, delicious potatoes right from your own home. Happy gardening!


