Growing potatoes in containers or grow bags is a fantastic way to enjoy fresh, homegrown spuds even if you don’t have a garden. With the right method, you can grow an abundant crop of tender, flavorful potatoes on a balcony, patio, or backyard. Container growing also reduces the risk of pests and diseases commonly found in soil and makes harvesting clean and easy.
This guide will take you through the process of growing potatoes in containers and bags, from planting to harvesting.
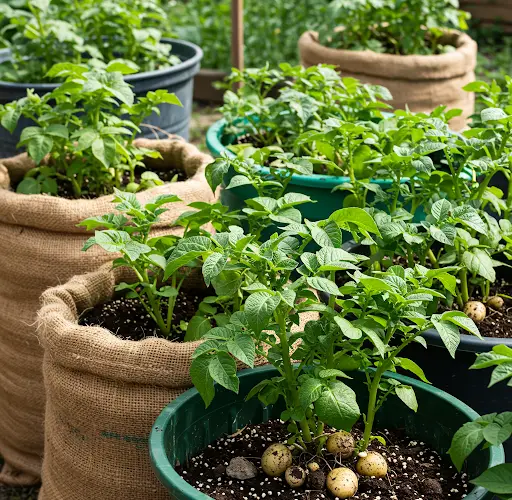
Why Grow Potatoes in Containers or Bags?
Containers and grow bags offer better control over soil quality, moisture, and temperature. They’re perfect for people with limited space or poor soil conditions. Fabric grow bags, in particular, allow for excellent drainage and airflow, which helps develop healthy tubers and prevents rot.
Another advantage is the ease of harvesting—no digging through heavy soil. You can simply dump out the bag and gather your potatoes by hand.
What You’ll Need
-
Seed potatoes (not grocery store potatoes; choose certified disease-free varieties)
-
Containers or grow bags (minimum 10–15 gallons; deeper is better)
-
Good-quality potting mix (light, well-draining, enriched with compost)
-
Slow-release fertilizer or organic compost
-
Watering can or hose
-
Sunny location (6–8 hours of sunlight daily)
Step 1: Choose and Prepare Seed Potatoes
Start with certified seed potatoes, available at garden centers or online in early spring. You can grow early, mid-season, or late varieties depending on your climate and growing time.
If the seed potatoes are large, cut them into chunks, making sure each piece has at least one “eye” or sprout. Let the cut pieces air-dry for 24 hours to reduce the risk of rotting when planted.
For smaller seed potatoes, you can plant them whole.
Step 2: Prepare the Container or Grow Bag
Select a container or grow bag at least 12–15 inches deep and wide. Fill the bottom 4–6 inches with a mix of potting soil and compost. Avoid garden soil, which is too heavy and may harbor pests or diseases.
Mix in some slow-release organic fertilizer or a handful of compost for added nutrients. Potatoes need rich, loose soil to grow well.
Step 3: Plant the Seed Potatoes
Place the seed potatoes on top of the soil with the eyes facing up. Space them 6–8 inches apart—typically 3–4 seed potatoes per 10-gallon grow bag.
Cover them with 3–4 inches of soil. As the plants grow, you will be “hilling” or adding more soil gradually to cover the stems, encouraging more tuber development along the buried stems.
Step 4: Water and Care
Water the container thoroughly after planting and keep the soil consistently moist throughout the growing season. Potatoes in containers dry out more quickly than those in the ground, so monitor moisture levels daily during hot weather.
Place the container in a spot that receives 6 to 8 hours of sunlight per day. Insufficient light will lead to weak plants and small yields.
Fertilize every 2–3 weeks with a balanced liquid feed or organic fertilizer to support leafy growth and tuber development.
Step 5: Hilling the Potatoes
As the potato plants grow 6–8 inches tall, begin adding more soil or compost around the base of the plants, covering the lower leaves and leaving just the top foliage exposed. Repeat this process every couple of weeks until the container is nearly full.
Hilling is a key step—it prevents tubers from being exposed to sunlight, which turns them green and inedible, and encourages more potatoes to grow along the buried stems.
Step 6: Monitor for Pests and Diseases
Potatoes can be affected by pests like aphids, flea beetles, or Colorado potato beetles. Check the leaves regularly and remove pests by hand or use organic pest controls if needed.
Avoid overwatering, which can lead to rot. Make sure containers have proper drainage holes and are not sitting in water.
Step 7: Harvesting Potatoes
New potatoes (small, tender ones) can be harvested about 8–10 weeks after planting, once the plants begin flowering. Gently reach into the soil and pick a few as needed.
For mature potatoes, wait until the foliage turns yellow and begins to die back—usually 14–16 weeks after planting. At this stage, stop watering and allow the soil to dry out for a few days before harvesting.
To harvest, simply dump out the container or bag and sift through the soil to collect the potatoes. Brush off the dirt but do not wash if you plan to store them.
Storing Your Harvest
Let freshly harvested potatoes cure in a cool, dark, and well-ventilated place for about a week. This allows the skins to toughen and improves storage life. Store cured potatoes in a cool, dark, and dry location. Avoid refrigeration, which alters their texture and flavor.
Final Tips
-
Rotate potato crops each year to avoid disease buildup.
-
Don’t overcrowd containers—give each plant space to grow.
-
Try different varieties for different flavors and cooking uses.
With just a bit of space and care, you can enjoy fresh, flavorful potatoes grown right at home. Container gardening makes it easy to grow this staple crop, whether you’re working with a small patio, rooftop, or even a sunny doorstep.


