Growing your own green beans at home is a rewarding and sustainable way to ensure a fresh supply of this nutritious vegetable. If you have limited space, you can easily grow green beans in sacks, making it an ideal solution for balconies, terraces, small patios, or even backyards. This method is simple, affordable, and perfect for beginner gardeners or anyone looking to maximize their growing area.
Here’s a complete guide on how to successfully grow green beans at home using sacks.
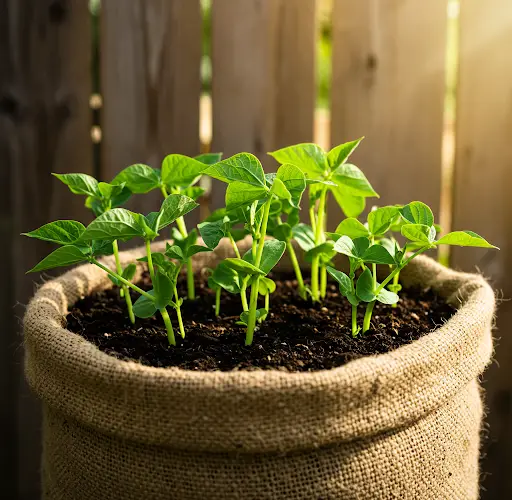
Why Use a Sack for Growing Green Beans?
Sack gardening is a smart and practical technique, especially for urban gardeners. It allows you to grow a variety of vegetables vertically, saving space while offering excellent drainage and easy mobility. Green beans are particularly suited for sack gardening because they have shallow roots and grow quickly, providing you with a harvest in just a few weeks.
Materials Needed
-
A large sack (potato sack, rice sack, or any sturdy woven sack)
-
Potting soil or a mixture of garden soil and compost
-
Green bean seeds (bush or pole varieties)
-
Wooden stakes or bamboo poles (if using pole beans)
-
Watering can or hose
-
Organic fertilizer (optional)
Step-by-Step Instructions
Step 1: Choose the Right Sack
Pick a sack made of durable material, like woven plastic or thick cloth, which can hold soil and withstand watering. The sack should be about 40–50 liters in volume to allow enough space for root development.
You can reuse old rice bags, animal feed bags, or potato sacks. Make sure the sack is clean and free of any harmful residues.
Step 2: Prepare the Sack
Punch several small holes in the bottom and lower sides of the sack for drainage. Proper drainage is crucial to prevent waterlogging, which can lead to root rot and other problems.
Roll down the top edge of the sack to about halfway to make it easier to fill and manage in the beginning.
Step 3: Add Soil
Fill the sack about three-quarters full with good-quality potting soil or a mixture of garden soil, compost, and a bit of sand for better drainage. A light, fertile, and well-draining soil mix will support healthy root growth and strong plants.
You can also mix in some organic fertilizer like composted manure or worm castings to give your beans a nutrient-rich start.
Step 4: Plant the Seeds
Green beans can be sown directly into the soil. Plant the seeds about 1 inch deep and space them 3–4 inches apart.
If you’re growing pole beans, you’ll also need to insert stakes or bamboo poles into the sack at this stage to support the climbing vines as they grow. If growing bush beans, no support is needed as they stay compact.
Cover the seeds lightly with soil and water gently but thoroughly.
Step 5: Provide Sunlight
Place the sack in a location that receives at least 6 to 8 hours of direct sunlight daily. Green beans love warmth and sunlight, and their growth will be stunted if they don’t get enough light.
If you’re growing on a balcony or terrace, make sure the sack is protected from strong winds, which can damage the plants.
Step 6: Watering
Green beans need consistent moisture, especially during flowering and pod development. Water the sack whenever the top inch of soil feels dry. Avoid overwatering, as this can lead to root diseases.
Using a watering can with a fine nozzle helps prevent disturbing the seeds and young plants.
Step 7: Fertilizing
Green beans are light feeders and often do well without much additional fertilizer. However, if you notice slow growth or pale leaves, you can feed the plants with a diluted liquid fertilizer once or twice during the growing season.
Avoid nitrogen-heavy fertilizers, which will encourage excessive leaf growth at the expense of bean production.
Step 8: Maintenance
-
Weeding: Keep the area around the base of the plants free from weeds, which can compete for nutrients and water.
-
Staking: If you’re growing pole beans, help the vines climb the stakes or poles by gently guiding them as they grow.
-
Pest Control: Watch out for common pests like aphids, beetles, or caterpillars. Hand-pick pests or use organic insecticidal soap if necessary.
Step 9: Harvesting
Green beans are typically ready to harvest 50–70 days after planting, depending on the variety.
Pick the beans when they are firm, crisp, and about the width of a pencil. Regular harvesting encourages the plants to produce more beans. Don’t let the beans become too mature on the plant, as this can slow down further production.
Use scissors or garden shears to cut the beans to avoid damaging the plants.
Tips for Success
-
Rotate the sack occasionally if sunlight comes from only one direction.
-
Add mulch on top of the soil to conserve moisture and suppress weeds.
-
Start a second sack a few weeks after the first to stagger your harvest.
Conclusion
Growing green beans at home using a sack is a simple, rewarding project that doesn’t require much space or investment. With just a little care and attention, you can enjoy a fresh, healthy supply of green beans right from your own terrace or backyard.
This method not only provides delicious vegetables but also promotes recycling and smart use of limited urban spaces. Get started today, and soon you’ll be harvesting your very own green beans straight from your sack garden!


