Garlic is one of the most rewarding crops to grow at home. Known for its bold flavor and countless culinary uses, it is also prized for its health benefits. From strengthening the immune system to adding depth to everyday meals, garlic is a kitchen essential. The good news is that you don’t need a sprawling garden to cultivate it—garlic thrives beautifully in containers, especially sturdy wooden boxes.
Growing garlic in wooden containers offers several advantages: it saves space, gives you control over the soil, and allows you to move your crop to sunny spots as needed. This makes it an excellent option for balcony gardeners, urban dwellers, or anyone with limited outdoor space. With the right approach, you can enjoy fresh, homegrown garlic bulbs season after season.
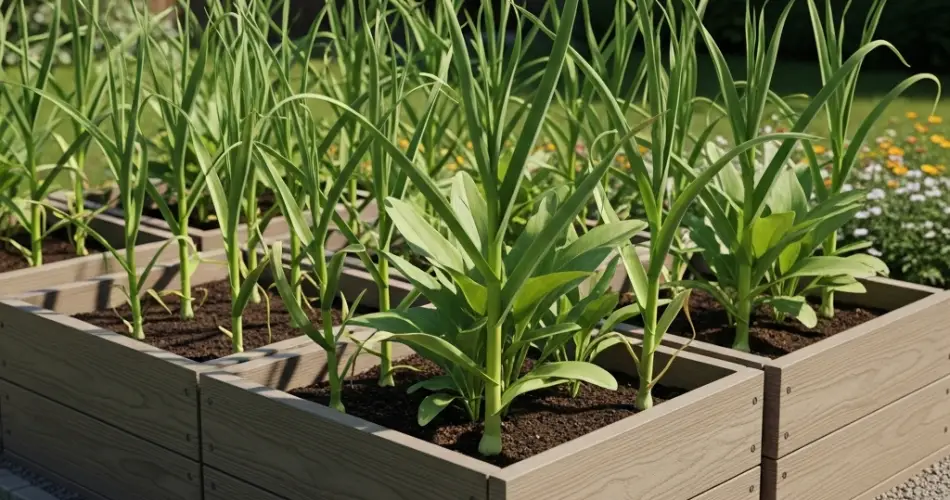
Step 1: Choose the Right Wooden Container
Garlic roots grow deep, so a container with adequate depth is essential. Select a wooden box that is:
-
At least 12 inches deep to accommodate root growth.
-
Around 18–24 inches wide, allowing you to plant multiple cloves with proper spacing.
-
Equipped with drainage holes at the bottom to prevent waterlogging.
Cedar or redwood are excellent choices because of their natural resistance to rot. If using repurposed wood, ensure it is untreated and chemical-free. For extra protection, you can line the inside of the box with landscape fabric before adding soil.
Step 2: Prepare the Soil
Garlic thrives in rich, loose, and well-draining soil. Since compacted or soggy soil can lead to rotting, it’s important to create a balanced mix. A good container blend includes:
-
Two parts potting soil as a base.
-
One part compost for organic nutrients.
-
One part perlite or coarse sand to improve drainage.
Garlic prefers slightly acidic to neutral soil with a pH of 6.0 to 7.0. Before planting, mix in a slow-release organic fertilizer high in phosphorus and potassium to support strong root and bulb development.
Step 3: Select Garlic Cloves
Not all garlic is the same. There are two main types:
-
Hardneck garlic: Produces larger cloves and a central flowering stalk (scape). It grows well in colder climates.
-
Softneck garlic: Known for smaller cloves, longer storage life, and adaptability to milder climates.
Choose large, healthy cloves from a reliable source. Avoid grocery store garlic, as it may be treated with chemicals that prevent sprouting. Each clove will grow into a full bulb, so select the plumpest ones for planting.
Step 4: Plant the Garlic
The best time to plant garlic is in the fall, about 4–6 weeks before the ground freezes. However, in mild climates, you can also plant it in early spring.
-
Break apart the garlic bulb into individual cloves.
-
Plant each clove pointed side up about 2 inches deep.
-
Space cloves 4–6 inches apart to allow bulbs room to grow.
-
Cover with soil and water gently.
For added protection in colder regions, top the soil with a layer of straw or mulch.
Step 5: Provide the Right Conditions
Garlic needs 6–8 hours of full sun per day. Place your wooden box in the sunniest spot available, whether on a balcony, patio, or rooftop garden.
Keep the soil consistently moist, but avoid overwatering. The soil should feel damp but not soggy. Wooden containers can dry out faster than garden beds, so check moisture levels regularly, especially during warmer months.
Step 6: Fertilize for Growth
Garlic benefits from additional feeding during its growing cycle. About one month after planting, apply a nitrogen-rich fertilizer such as compost tea or fish emulsion to encourage leaf development. As the plant matures, reduce nitrogen and shift toward a balanced organic fertilizer to promote bulb formation.
Step 7: Watch for Pests and Problems
Garlic is generally low-maintenance and naturally deters many pests. However, it can occasionally attract issues such as:
-
Aphids on the leaves.
-
White rot in overly damp soil.
-
Fungal diseases if there is poor air circulation.
To prevent problems, avoid overwatering, rotate crops if possible, and keep the wooden box in a breezy, sunny spot.
Step 8: Harvesting Garlic
Garlic takes several months to mature, typically around 8–9 months after planting. You’ll know it’s ready to harvest when the leaves turn yellow and begin to dry out, usually in late spring or summer.
To harvest:
-
Loosen the soil gently with a hand fork.
-
Pull the bulbs out carefully to avoid damage.
-
Shake off excess soil and let the bulbs cure in a dry, well-ventilated place for 2–3 weeks.
Once cured, trim the roots and stems. Properly cured garlic can be stored for months in a cool, dry spot.
Step 9: Enjoy and Replant
Once you harvest, save the biggest and healthiest cloves from your crop to plant in the next season. This way, your container garlic garden becomes a sustainable cycle that provides fresh bulbs year after year.
Final Thoughts
Growing garlic in wooden containers is both practical and rewarding. It doesn’t require much space, yet it delivers flavorful, nutritious bulbs that enhance your cooking and health. With the right soil, sunlight, and care, you can enjoy a steady supply of homegrown garlic even in the smallest spaces.
Whether you’re a beginner gardener or a seasoned grower, planting garlic in wooden boxes is an easy way to connect with the joy of growing your own food.


