Celery is a nutritious, low-calorie vegetable packed with fiber, vitamins, and antioxidants. While growing celery from seeds can be a lengthy and delicate process, a simpler method involves regrowing celery from the root base of a store-bought stalk. This technique is not only beginner-friendly but also a great way to reduce kitchen waste and enjoy a fresh, homegrown harvest. Even with limited space, you can grow healthy, crisp celery in containers right on your balcony, patio, or windowsill.
Here’s a step-by-step guide to growing celery from root cuttings in containers:
1. Selecting and Preparing the Root Base
The key to success begins with choosing a healthy celery base. Purchase a fresh, firm bunch of celery with the root end intact. The base should be pale and tightly packed, without signs of rot or damage.
To prepare it:
-
Use a sharp knife to cut the celery stalks about 2 to 3 inches from the base.
-
Use the stalks in your meals, and keep the root base for planting.
-
Rinse the base gently to remove any dirt.
2. Starting the Root in Water
Before planting the celery directly in soil, you’ll need to encourage root and shoot development in water. This step is crucial for jumpstarting growth.
Here’s how to do it:
-
Place the celery base in a shallow bowl with enough water to cover the bottom inch.
-
Position the bowl near a sunny window or in indirect light.
-
Change the water every couple of days to prevent rot and mold.
Within 5 to 7 days, you’ll notice new leafy growth emerging from the center and small roots forming at the base. Once roots are visible and shoots are growing, it’s time to transplant the celery into a container.
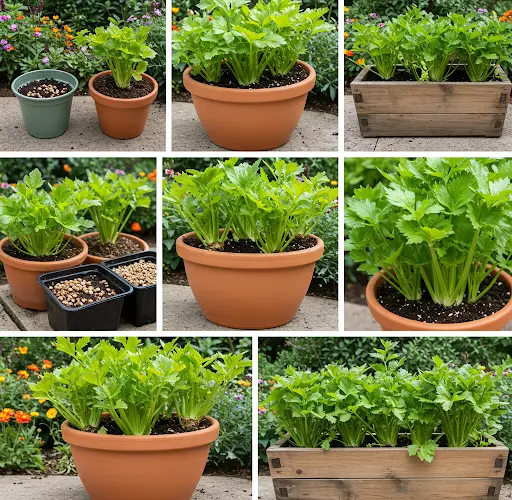
3. Choosing the Right Container and Soil
Celery has shallow roots, but it requires consistent moisture and space to grow well.
Container tips:
-
Choose a container that’s at least 8 to 10 inches deep.
-
Make sure it has proper drainage holes to avoid waterlogging.
Soil requirements:
-
Use a rich, well-draining potting mix.
-
Mix in compost or organic matter to boost nutrients.
-
Ensure the soil retains moisture but doesn’t become soggy.
4. Transplanting the Celery
After about a week of water-rooting, the celery base is ready to be planted in soil.
Planting instructions:
-
Fill the container with soil, leaving space at the top.
-
Make a small hole in the center and place the celery base inside.
-
Gently press the soil around it, leaving the top of the base slightly exposed.
-
Water thoroughly after planting.
5. Providing the Right Conditions
Celery thrives in cool, moist environments and needs consistent care to produce crisp stalks.
Light:
Place the container where the plant gets at least 6 hours of sun daily. In hotter climates, partial shade during the afternoon helps prevent wilting.
Watering:
Celery loves moisture. Keep the soil evenly moist but not waterlogged. Water when the top inch of soil feels dry.
Fertilizing:
Feed the plant every 2–3 weeks with a balanced liquid fertilizer or organic compost tea to encourage steady growth.
6. Maintenance and Common Problems
As the plant grows, continue removing yellowing outer leaves to encourage new center growth. You can also mulch around the base to retain moisture.
Watch out for:
-
Pests: Aphids and slugs are common but manageable with neem oil spray or handpicking.
-
Bolting: In hot weather, celery can bolt (go to seed). Try to grow during cooler seasons or provide shade when needed.
7. Harvesting Your Celery
Celery takes around 3 to 4 months to mature, but you don’t need to wait that long to start harvesting.
You can begin cutting the outer stalks once they are 8 inches tall, leaving the inner stalks to continue growing. This cut-and-come-again method ensures a continuous supply.
Alternatively, if you want a full head, wait until the plant is mature, then cut it at the base. Another root can then be regrown using the same method.
Final Tips:
-
Start multiple celery bases for a more abundant harvest.
-
Use the leafy tops in soups or as herbs.
-
Growing celery from kitchen scraps is not just cost-effective—it’s also a sustainable way to garden in small spaces.
With patience and consistent care, you’ll enjoy crisp, garden-fresh celery straight from your own container garden. Happy growing!