Growing beans from seed in containers is a practical and rewarding way to enjoy fresh, homegrown vegetables even if you’re short on garden space. Whether you’re working with a small patio, balcony, or urban backyard, beans are ideal for container gardening thanks to their compact growth and productive yields. With just a few simple steps, you can harvest a healthy crop of green beans, bush beans, or even pole beans right from your pots.
This guide walks you through the process—from selecting the right container to harvesting fresh beans.
Why Grow Beans in Containers?
Beans are fast-growing, nutritious, and relatively low-maintenance. They are rich in fiber, protein, and essential vitamins, making them a staple crop in many home gardens. In containers, beans grow well as long as they have enough sunlight, support (if needed), and consistent moisture.
Container gardening also allows for better control over soil quality, pests, and location, giving you flexibility to grow beans just about anywhere.
Step 1: Choose the Right Type of Bean
There are two main types of beans you can grow in containers:
-
Bush Beans: These are compact and self-supporting, growing about 1 to 2 feet tall. They’re ideal for smaller pots and don’t require staking.
-
Pole Beans: These grow as vines and need support to climb. While they take up more vertical space, they produce a higher yield over a longer period.
Both types thrive in containers, so choose based on your available space and how much effort you’re willing to put into vertical support.
Step 2: Selecting the Right Container
Choose a container with the following features:
-
Size: For bush beans, use a pot that’s at least 12 inches deep and 12 inches wide. For pole beans, opt for a larger container (at least 16 inches deep and wide) to accommodate both the root system and trellis.
-
Material: Plastic, fabric grow bags, or ceramic pots work well. Just ensure it has adequate drainage holes.
-
Drainage: Beans hate soggy roots. Make sure water can drain freely to prevent root rot.
Step 3: Prepare the Soil
Beans prefer well-draining, loose soil that’s rich in organic matter. Use a high-quality potting mix, ideally one formulated for vegetables.
To improve fertility and structure, add compost or aged manure to the mix. Beans don’t need excessive nitrogen, so avoid high-nitrogen fertilizers, which promote leaf growth over pod production.
Step 4: Sowing the Seeds
Beans grow best when direct-seeded into their final container. Here’s how:
-
Fill your container with moistened potting mix, leaving about an inch of space at the top.
-
Plant seeds about 1 inch deep and 3 to 4 inches apart. For bush beans, you can plant several seeds per pot. For pole beans, plant near the base of your support structure.
-
Cover lightly with soil and water gently.
Beans germinate quickly—typically within 7 to 10 days—if the soil temperature is above 60°F (16°C). For best results, plant after all danger of frost has passed.
Step 5: Provide Support (for Pole Beans)
If you’re growing pole beans, install a trellis or support system at the time of planting. Options include:
-
Bamboo stakes tied into a teepee shape
-
A vertical trellis attached to the container
-
A wire tomato cage
As the vines grow, gently guide them toward the support, and they’ll naturally begin to twine upward.
Step 6: Watering and Feeding
Consistent moisture is key to healthy bean growth:
-
Water when the top inch of soil feels dry.
-
Avoid soaking the soil—beans don’t like “wet feet.”
-
During hot weather, you may need to water daily.
Beans don’t require heavy feeding. If you used compost at planting time, that may be enough. If needed, apply a balanced, diluted organic fertilizer every 3–4 weeks.
Step 7: Maintenance and Care
Beans are fairly pest-resistant, but keep an eye out for:
-
Aphids or spider mites: Spray with water or use neem oil if needed.
-
Fungal issues: Avoid overhead watering. Water at the base of the plant and ensure good airflow.
Mulching with straw or shredded leaves can help retain moisture and suppress weeds.
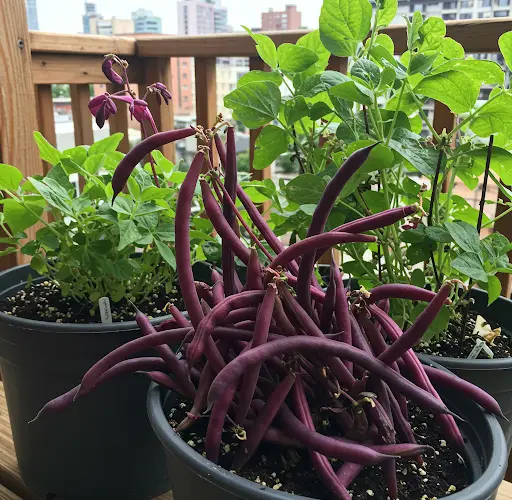
Step 8: Harvesting Beans
Most bush beans are ready for harvest 50–60 days after planting, while pole beans may take a bit longer but produce continuously.
To harvest:
-
Pick beans when they’re firm, crisp, and about the size of a pencil.
-
Use scissors or gently pinch them off to avoid damaging the plant.
-
Regular harvesting encourages more bean production.
Don’t let beans over-mature on the plant, or it will slow further pod development.
Tips for Continued Success
-
Succession Planting: Sow new seeds every 2–3 weeks to extend the harvest season.
-
Rotate pots: If you’re using the same container each season, replace or refresh the soil annually to prevent disease buildup.
-
Sunlight: Place containers where they receive 6 to 8 hours of sunlight daily.
Conclusion
Growing beans from seed in containers is an easy and productive way to enjoy fresh, delicious vegetables even in small spaces. With minimal tools and simple care, you can cultivate a generous supply of beans right on your balcony, patio, or deck. Choose the right variety, give them sun and water, and you’ll be harvesting handfuls of green pods in no time.


