Growing your own baby greens indoors is one of the easiest and most satisfying ways to enjoy fresh, healthy produce all year round. Whether you live in a small apartment or want to add more greens to your kitchen routine, you can create a simple, effective indoor garden using IKEA trays and a few basic materials.
Here’s a step-by-step guide on how to grow baby greens from seed indoors using affordable, accessible items.
Why Baby Greens?
Baby greens—young versions of leafy vegetables like kale, spinach, lettuce, arugula, and mustard—are packed with nutrients and flavor. They’re tender, grow quickly, and don’t require a lot of space or specialized equipment. You can start harvesting in as little as 7 to 14 days, depending on the variety.
What You’ll Need
-
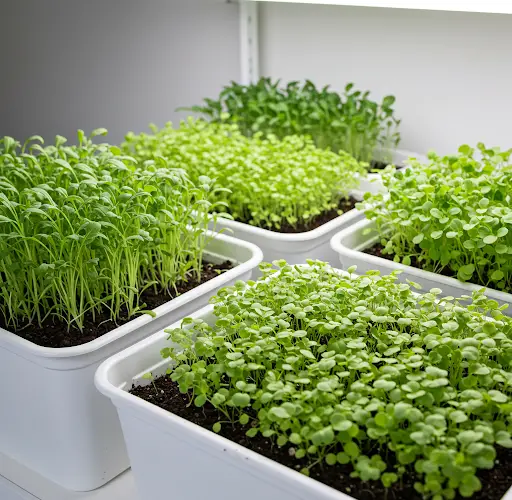
IKEA Trays or Boxes: Look for shallow, rectangular containers like the SOCKERBIT or SAMLA boxes. These are ideal because they’re lightweight, durable, and easy to clean.
-
Seed-Starting Mix: Choose a light, well-draining organic seed-starting mix rather than regular potting soil. This promotes healthy root development.
-
Seeds: Pick a variety or blend of baby greens seeds, such as mesclun mix, baby kale, or arugula. You can find them online or at most garden centers.
-
Spray Bottle or Watering Can: For gently watering your seeds and seedlings.
-
Grow Lights (optional): If you don’t get enough natural sunlight indoors, a basic LED grow light can help boost growth.
-
Tray Liner or Catchment Tray: Optional, but helps contain any excess water.
Step 1: Prepare Your Trays
If using IKEA trays without holes, consider drilling a few small drainage holes in the bottom or layering some gravel or paper towel to prevent waterlogging. Place your growing tray inside a second tray to catch excess water if needed.
Fill the tray with 1.5–2 inches (about 4–5 cm) of moist seed-starting mix. Gently press it down to create a flat surface, but don’t compact it too tightly.
Step 2: Sow the Seeds
Sprinkle your seeds evenly across the surface of the soil. Baby greens can be sown densely since you’ll harvest them young, but make sure the seeds aren’t overlapping too much.
After sowing, lightly press the seeds into the surface using a flat board or your hand. Then, gently mist the soil with water to help the seeds settle in. Some seeds may benefit from a very light covering of soil, but check the instructions on your seed packet.
Step 3: Create the Ideal Growing Environment
Place your tray in a spot that gets 4–6 hours of bright, indirect sunlight daily—like a south-facing window. If you don’t have sufficient natural light, consider using an LED grow light positioned a few inches above the seedlings. Keep the light on for 12–14 hours a day.
Covering the tray loosely with a clear plastic lid or wrap during the first few days can help retain moisture and speed up germination. Remove the cover once the seedlings emerge.
Step 4: Water Gently and Consistently
Use a spray bottle to mist the soil surface once or twice daily to keep it moist but not soggy. Once the seedlings are established, switch to bottom watering by pouring a small amount of water into the catchment tray and letting the soil soak it up through the drainage holes. This prevents disturbing the delicate roots and reduces the risk of mold or fungus.
Step 5: Harvest Time
Most baby greens are ready to harvest in 10–14 days, when the leaves are about 2–4 inches tall. Use clean scissors to snip the greens just above the soil line. For best flavor and texture, harvest in the morning when the leaves are crisp.
You can sow a new tray every week or two for a continuous supply. Some varieties may regrow after the first cut, allowing for a second harvest.
Tips for Success
-
Rotate trays daily if using window light to keep growth even.
-
Keep the temperature between 60–75°F (15–24°C).
-
Avoid overwatering; soggy soil leads to root problems.
-
Wash greens thoroughly before eating, even if grown indoors.
Growing baby greens indoors in IKEA trays is a simple and rewarding way to bring fresh, nutritious food into your home. With just a little time and attention, you’ll have a steady supply of flavorful greens perfect for salads, smoothies, sandwiches, and garnishes. Plus, it’s a great introduction to indoor gardening for beginners and a perfect winter project for more experienced growers.


