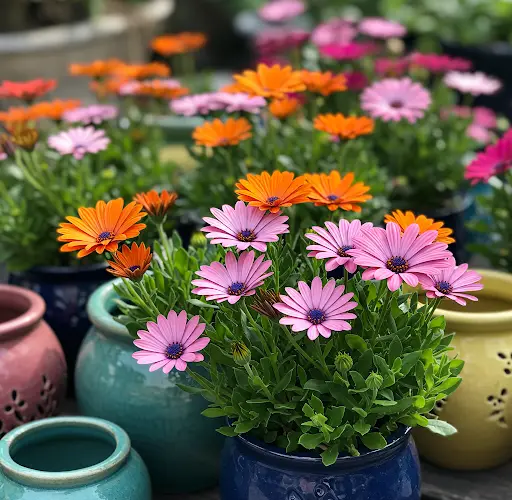
African daisies, also known as Cape marigolds (Osteospermum), are vibrant, low-maintenance flowers that bring a splash of color to any garden. With their daisy-like petals in shades of white, pink, purple, and orange, these blooms are perfect for both containers and garden beds. Growing African daisies from seed is an easy and rewarding process, and in this guide, we’ll walk you through the essential steps to ensure your plants thrive and produce stunning flowers.
Why Grow African Daisies?
African daisies are a favorite among gardeners due to their:
-
Vibrant colors: These flowers come in a variety of bright hues, adding warmth and beauty to your garden.
-
Low maintenance: Once established, they require minimal care, making them ideal for beginners or those with busy schedules.
-
Long bloom time: African daisies bloom profusely throughout the growing season, especially in warmer climates.
Whether you’re growing them in containers, hanging baskets, or garden beds, these flowers will add an instant pop of color to your space.
Materials You’ll Need
Before you begin planting your African daisies from seed, gather the following materials:
-
African daisy seeds (Osteospermum)
-
Seed trays or small pots (for indoor starting)
-
Well-draining potting mix (preferably lightweight and fertile)
-
Plastic wrap or seed trays with clear lids (to maintain humidity)
-
Watering can or spray bottle
-
Grow lights (optional, if growing indoors)
-
Fertilizer (optional for better growth)
-
Containers or garden beds (for transplanting)
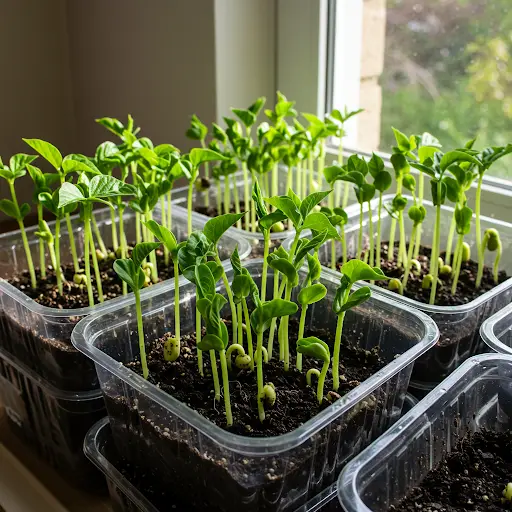
Step 1: Start Seeds Indoors (Optional)
Starting African daisy seeds indoors gives your plants a head start, especially in colder climates where the growing season may be short. Start the seeds 6-8 weeks before the last expected frost date in your area.
-
Prepare your seed trays or small pots by filling them with a well-draining potting mix. You can also use seed-starting kits for convenience.
-
Sow the seeds: African daisies do not require deep planting, so gently press the seeds into the soil, about 1/8 to 1/4 inch deep. Space the seeds about 1–2 inches apart.
-
Water gently to moisten the soil, being careful not to displace the seeds. You can use a spray bottle to prevent disturbing the seed placement.
-
Cover the tray with plastic wrap or a clear lid to maintain humidity and keep the soil warm. Place the tray in a warm spot (ideally between 65–75°F or 18–24°C).
-
Provide light: African daisy seeds need light to germinate, so ensure the tray is placed in a bright location or under grow lights. Germination typically occurs in about 7–10 days.
Step 2: Transplant Seedlings Outdoors
Once the seedlings have grown large enough (with at least two sets of true leaves), it’s time to move them outdoors. You can transplant the seedlings once the outdoor temperatures are consistently 60°F (15°C) or warmer, and all danger of frost has passed.
-
Select a location: African daisies prefer full sun, so choose a spot that receives at least 6 hours of direct sunlight per day. They will tolerate some partial shade but will produce fewer flowers.
-
Prepare the soil: African daisies thrive in well-draining soil. If your soil is heavy or clay-based, amend it with organic matter, like compost, to improve drainage. Ensure the soil pH is slightly acidic to neutral (around 6.0–7.0).
-
Transplant the seedlings: Carefully remove the seedlings from their trays and plant them in the garden or containers. Space them about 10–12 inches apart to give them room to grow.
-
Water the plants: After transplanting, water them thoroughly to help the plants establish their roots in their new home.
Step 3: Care for Your African Daisies
Once your African daisies are planted outdoors, they require minimal care to thrive. However, providing them with the right conditions can enhance their growth and flowering.
-
Watering: African daisies are somewhat drought-tolerant once established, but they still need regular watering. Water the plants deeply and evenly, ensuring the soil stays moist but not soggy. Let the soil dry slightly between waterings to prevent root rot.
-
Fertilizing: To encourage healthy growth and abundant blooms, you can fertilize your African daisies with a balanced, slow-release fertilizer. Apply the fertilizer in early spring as the plants begin to grow, and again mid-season if needed. Over-fertilizing can lead to excessive foliage growth at the expense of flowers, so be mindful of application.
-
Deadheading: To keep your African daisies blooming throughout the season, remove spent flowers by deadheading (cutting off the faded flowers). This encourages the plant to produce more buds and prevents the plant from setting seeds too early.
-
Pests and diseases: African daisies are relatively pest-resistant, but watch out for aphids or spider mites. If you notice any pests, wash them off with a stream of water or use an insecticidal soap.
Step 4: Enjoy the Blooms!
African daisies typically begin blooming in late spring or early summer, and their vibrant flowers will continue until the first frost. The more sunlight and warmth they receive, the more flowers they will produce. These daisy-like blooms are perfect for cutting and bringing indoors to enjoy in a vase, or you can leave them in the garden for pollinators like bees and butterflies.
Final Thoughts
Growing African daisies from seed is an easy and enjoyable process, whether you’re planting them in containers, hanging baskets, or garden beds. With a bit of care and attention to light, water, and soil conditions, you can enjoy these colorful, long-blooming flowers in your garden all season long. Their cheerful blossoms will add a burst of color and bring joy to your space.
Whether you’re a beginner or an experienced gardener, this guide will help you grow stunning Cape marigolds and enjoy their beauty year after year!