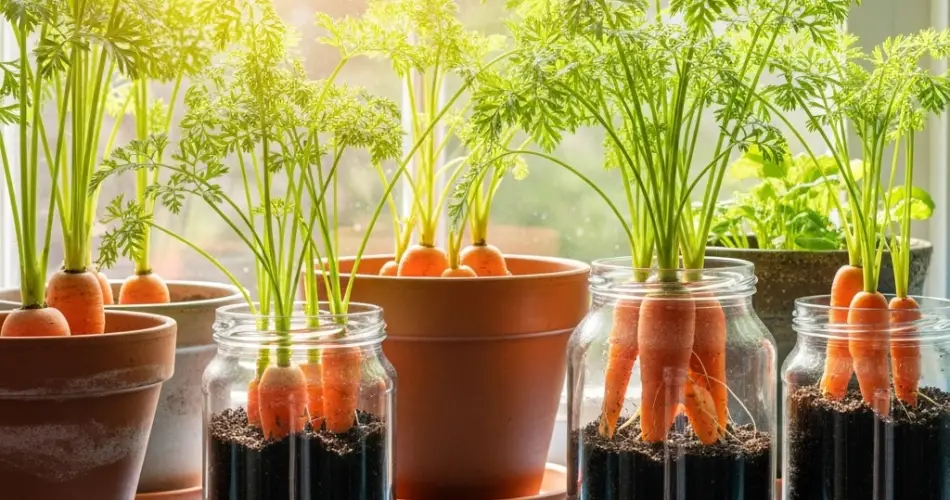
If you’ve ever dreamed of growing your own vegetables but lack garden space, carrots are a great place to start. These root veggies are surprisingly easy to grow in containers—and you don’t even need a yard. With a sunny windowsill and a bit of know-how, you can successfully germinate and grow sweet, crisp carrots right in your home.
Whether you’re a beginner or looking for a low-effort growing project, here’s how to start carrots from seed and raise them to harvest on your windowsill.
1. Choose the Right Carrot Variety for Containers
Not all carrots grow well in pots. Traditional long varieties need deep soil, which isn’t ideal for most windowsill containers. Instead, choose compact or round types that thrive in shallow spaces:
-
Parisian or Paris Market: Small, round carrots perfect for containers.
-
Thumbelina: Another round type, grows well in limited depth.
-
Nantes: A short, blunt-tipped variety that performs well in pots.
-
Little Finger: Small and slender, great for small-space growing.
Check seed packets for varieties labeled as “container-friendly” or “short-rooted.”
2. Select a Suitable Container
Carrots grow best when they can develop straight, unrestricted roots. The right container is critical:
-
Use a pot at least 8–12 inches deep for short varieties.
-
Wider pots are better than narrow ones, allowing for more spacing between roots.
-
Make sure the container has drainage holes to prevent waterlogging.
Terracotta, plastic, or even recycled buckets can all work as long as they meet the depth and drainage requirements.
3. Use the Right Soil Mix
Carrots need loose, well-draining soil so the roots can grow straight and smooth. Regular garden soil is too heavy and may contain clumps or debris that cause forked roots.
For container-grown carrots:
-
Use a light potting mix with added sand or perlite.
-
Avoid fertilizers high in nitrogen, which encourage leafy growth but reduce root development.
-
You can make your own mix: 2 parts potting soil, 1 part sand or perlite, and 1 part compost.
Fill your container almost to the top, leaving about an inch of space.
4. Sow Seeds Directly into the Container
Carrots don’t like to be transplanted, so it’s best to sow them directly where they’ll grow. Here’s how:
-
Moisten the soil slightly before planting.
-
Sprinkle the seeds thinly across the surface, then cover with ¼ inch of soil.
-
Gently pat down and mist with water using a spray bottle.
Since carrot seeds are tiny, spacing may be uneven at first, but you’ll thin them later.
5. Ensure Warmth and Light for Germination
Carrot seeds can take 1–3 weeks to germinate, and they like warm, moist conditions to sprout. To speed up germination:
-
Place the container on a sunny windowsill that gets at least 6 hours of light daily.
-
Keep the soil consistently moist, but not soggy.
-
Cover the pot loosely with plastic wrap or a humidity dome to trap warmth and moisture, removing it once sprouts appear.
If your windowsill is chilly, place the pot on a seedling heat mat to encourage quicker germination.
6. Thin Seedlings for Healthy Growth
Once seedlings are about 2 inches tall, thin them out so that each plant has enough room to grow straight roots.
-
Keep the strongest seedlings, removing extras so they’re spaced 1–2 inches apart.
-
Use scissors to snip off the unwanted seedlings at soil level to avoid disturbing the roots of nearby plants.
Thinning is essential—crowded carrots will grow stunted or forked.
7. Water Consistently and Gently
Carrots need consistent moisture, especially during root development:
-
Water gently to avoid washing away soil.
-
Keep the soil evenly moist but not soggy.
-
Use a small watering can or spray bottle for controlled watering.
Dry soil can lead to cracked roots, while overwatering can cause rot, so strike a balance.
8. Provide Light and Rotate Regularly
Windowsill carrots need full sun, so aim for at least 6 hours of direct sunlight daily. If sunlight is limited, supplement with a grow light placed 6–12 inches above the seedlings.
Rotate the container every few days so that the plants grow evenly and don’t lean toward the light.
9. Harvest at the Right Time
Most container-friendly carrots are ready to harvest in 60–75 days, depending on the variety. You’ll know it’s time when:
-
The tops of the carrots are about ½ to 1 inch in diameter above the soil.
-
The foliage looks lush and mature.
To harvest:
-
Gently loosen the soil around each carrot with your fingers.
-
Pull upward firmly, trying not to snap the root.
Freshly picked, homegrown carrots are sweet and flavorful—perfect for snacking or cooking.
Final Thoughts
You don’t need a backyard or fancy tools to grow your own carrots. With a sunny windowsill, a good container, and the right care, you can enjoy fresh, crunchy carrots straight from your indoor garden. It’s a simple and satisfying way to connect with your food—even in the smallest of spaces.


