Growing potatoes at home is a rewarding project, and with the right irrigation system, it becomes even easier and more productive. Using a fertilizer spreader as a base for a homemade drip irrigation system is a simple and affordable method that ensures your potato plants receive consistent moisture. This guide will show you step-by-step how to create an efficient watering system using everyday materials, so you can successfully grow healthy, delicious potatoes at home.
Why Use Drip Irrigation for Potatoes?
Drip irrigation is one of the best methods for watering potato plants because:
-
Consistent Moisture: Potatoes need even moisture, especially as they form tubers.
-
Water Efficiency: Drip systems use less water compared to traditional overhead watering.
-
Disease Prevention: Keeping foliage dry reduces the risk of fungal diseases like blight.
-
Simplicity: A low-cost, gravity-fed system is easy to maintain and operate.
By adapting a fertilizer spreader, you can create a simple drip irrigation setup that’s perfect for home gardening.
Materials You Will Need
Here’s what you’ll need to build this homemade system:
-
Plastic fertilizer spreader tank (cleaned and unused or repurposed)
-
Flexible drip irrigation tubing (¼ inch or similar)
-
Drip emitters or small holes in tubing
-
Hose connectors (optional for easier setup)
-
Support stand or hooks to elevate the tank
-
Potatoes (seed potatoes or sprouted ones)
-
Growing containers or raised beds (if not planting directly in the ground)
-
Potting soil mixed with compost
Once you gather these items, you’re ready to build your system and start growing.
Step 1: Prepare the Fertilizer Spreader Tank
The fertilizer spreader tank will act as the water reservoir for your irrigation system.
-
Clean the tank thoroughly to remove any residues.
-
If the tank has a wide opening at the top, it will be easy to refill with water.
-
Drill a hole near the bottom of the tank if one doesn’t already exist, just large enough to fit the drip tubing snugly.
-
Insert the drip tubing into the hole and seal it with waterproof adhesive or fittings to prevent leaks.
Elevating the tank on a stand, stool, or wall hook will allow gravity to push the water through the tubing efficiently.
Step 2: Install the Drip Tubing
Run the drip tubing from the tank to your potato planting area.
-
Lay the tubing along the rows or containers where your potatoes are planted.
-
Punch small holes in the tubing directly next to each potato plant, or attach drip emitters at each location.
-
Ensure the tubing is positioned close to the soil to deliver water directly to the roots.
If your garden layout is large, use additional tubing branches to cover more plants evenly.
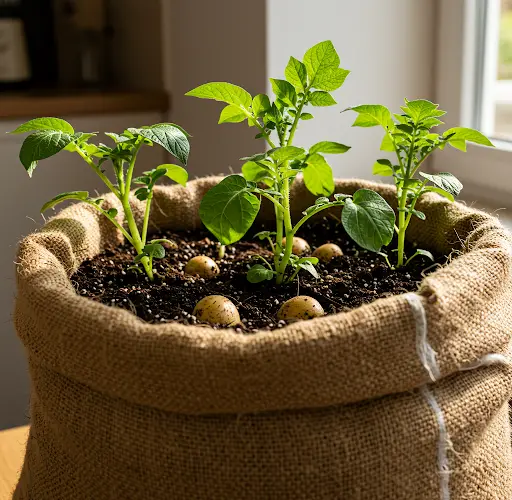
Step 3: Plant Your Potatoes
Prepare your growing containers or raised beds by filling them with a loose, rich soil mix.
-
Potatoes grow best in soil that is well-draining and rich in organic matter.
-
Plant seed potatoes 4–6 inches deep, with the sprout or “eye” facing upward.
-
Space each potato 10–12 inches apart to allow room for tuber development.
Once planted, lightly water the soil to settle it around the potatoes.
Step 4: Operating the Drip Irrigation System
Fill the fertilizer spreader tank with clean water.
-
Open the valve or connector so that water starts flowing slowly through the tubing.
-
Watering time will vary depending on the size of your tank and the number of plants, but aim for a slow, steady drip for about 20–30 minutes, two to three times per week.
-
As the potato plants grow and the weather gets warmer, you may need to increase watering frequency slightly.
The slow drip ensures water reaches deep into the soil, encouraging healthy root and tuber formation.
Step 5: Maintaining the System
-
Check the tubing regularly for blockages or leaks.
-
Flush the tank and lines every few weeks to prevent mineral buildup.
-
Keep an eye on your plants and adjust watering schedules based on weather conditions. If the topsoil dries out too quickly or stays soggy, adjust the drip rate.
Regular maintenance ensures a long-lasting, effective system that can be reused for future crops.
Additional Tips for Growing Potatoes at Home
-
Hilling: As the potato plants grow taller, mound soil or mulch around the base to encourage more tuber formation.
-
Sunlight: Potatoes need at least 6–8 hours of direct sunlight daily.
-
Feeding: Side-dress with organic fertilizer once plants are well-established to boost growth.
-
Pest Management: Watch for pests like Colorado potato beetles and remove them by hand or use natural deterrents.
Harvest potatoes when the plants flower and the foliage starts to yellow and die back. Gently dig around the base to pull up your homegrown bounty.
Conclusion
Setting up a drip irrigation system using a fertilizer spreader is an easy, affordable way to keep your potato plants healthy and hydrated. By providing consistent moisture, you’ll encourage better tuber development and enjoy a more abundant harvest. This simple project requires minimal materials, and once in place, it makes growing potatoes at home almost effortless. Whether you’re planting in containers, raised beds, or a small backyard plot, this method is a reliable way to produce delicious, organic potatoes.
Happy gardening!


