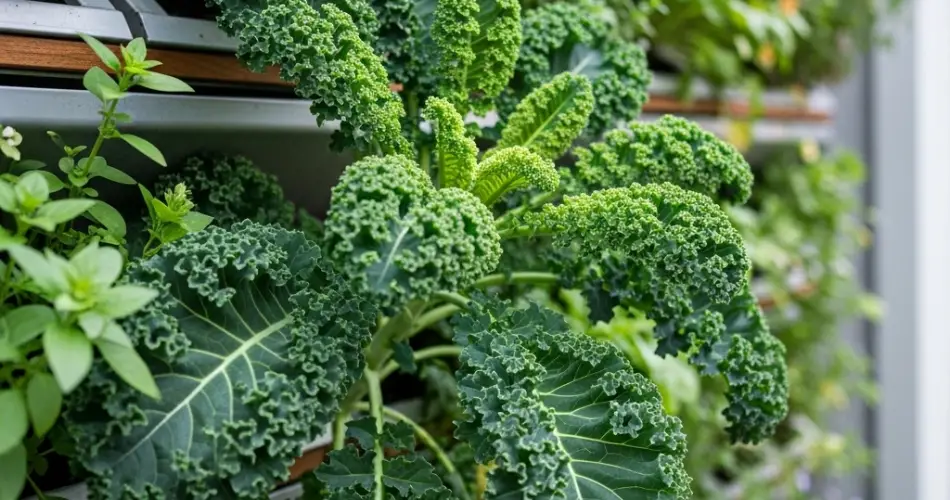
Kale is one of the most nutritious leafy greens you can grow at home—and it doesn’t require a big backyard to thrive. With a handful of plastic bottles and a bit of creativity, you can build a productive vertical kale garden right on your wall or fence. This method is perfect for urban spaces and offers a sustainable way to recycle used plastic bottles while growing your own fresh food.
Creating a wall garden for kale using plastic bottles is not only space-efficient but also fun and affordable. With proper care, your vertical garden can yield a steady supply of crisp, vitamin-rich leaves for soups, smoothies, salads, and sautés.
Why Kale Works Well in Vertical Bottle Gardens
Kale is well-suited for vertical growing for several reasons:
-
It has a compact, upright growth habit that doesn’t sprawl.
-
Its root system is shallow, so it thrives in containers.
-
It is hardy and adaptable, growing well in cooler temperatures and partial sun.
-
It regrows after harvesting, making it ideal for continuous picking.
With the right setup, kale can flourish in bottle planters just as well as in ground beds—plus, it looks stunning growing up a sunny wall or fence.
Materials You’ll Need
To get started, gather these supplies:
-
Several 1.5 or 2-liter plastic bottles
-
A sharp knife or cutter
-
A drill or hot nail (for holes)
-
Zip ties, twine, or wire
-
A sturdy wall, fence, or frame for mounting
-
Potting mix enriched with compost
-
Kale seeds or seedlings
-
Watering can or spray bottle
You can also customize your project with paint or labels to give it a colorful or organized look.
Preparing the Bottles
-
Wash and dry the bottles thoroughly.
-
Cut a rectangular window into the side of each bottle—this is where the kale will grow.
-
Drill or puncture drainage holes at the bottom to allow excess water to escape.
-
If hanging vertically, make two holes near the top on opposite sides for threading string or wire.
Depending on your design, bottles can be mounted horizontally or vertically. Make sure the opening is accessible for planting and watering.
Assembling the Wall Garden
Choose a location that gets at least 4–6 hours of sunlight per day. Kale prefers cool temperatures and can tolerate some shade, so a partially shaded spot is suitable in warmer climates.
You can attach the bottles to:
-
A wooden pallet or board
-
A wire mesh or trellis
-
A balcony railing or wall-mounted grid
-
Directly onto a fence
Use zip ties, twine, or wire to fasten the bottles securely. If stacking bottles vertically, make sure there’s enough space between each row to allow airflow and light to reach all plants.
Filling and Planting
Fill each bottle with a lightweight, nutrient-rich potting mix. Add some compost or slow-release organic fertilizer to provide a steady nutrient supply.
If starting from seeds:
-
Sow 2–3 seeds per bottle about ½ inch deep.
-
Water gently and keep the soil moist until germination (usually within 7–10 days).
-
Thin out to leave the strongest one or two seedlings per bottle.
If using seedlings, plant them carefully, ensuring the roots are well-settled in the soil and the leaves are above the bottle rim.
Caring for Bottle-Grown Kale
-
Water regularly, especially during dry or hot days. Bottles can dry out quickly due to their limited soil volume.
-
Avoid overwatering—ensure water drains freely to prevent root rot.
-
Apply a diluted liquid fertilizer or compost tea every 2–3 weeks to support healthy growth.
-
Watch for common pests like aphids or cabbage worms. Handpick pests or use organic sprays like neem oil.
Kale grows best in cool conditions, so this project is ideal for growing in early spring, late fall, or mild winters in tropical climates. In hot weather, use shade netting or grow in a location with morning sun and afternoon shade.
Harvesting Kale
Kale is typically ready to harvest 6–8 weeks after planting. You don’t need to wait for full maturity to start enjoying your greens.
Pick the outer leaves first, allowing the center to continue producing new growth. Regular harvesting not only provides continuous food but also encourages the plant to grow bushier and healthier.
For baby kale, harvest when leaves are still tender and small—perfect for raw salads. For mature kale, wait until the leaves reach full size and have a deeper color and texture, ideal for cooking.
Best Kale Varieties for Bottle Gardens
Compact and hardy varieties perform best in container gardens:
-
Dwarf Blue Curled: Small, ruffled leaves and excellent cold tolerance
-
Red Russian: Flat, tender leaves with reddish stems—great for salads
-
Lacinato (Dino) Kale: Upright, narrow leaves and deep green color, ideal for cooking
These varieties offer both aesthetic appeal and versatility in the kitchen.
Final Thoughts
Growing kale in a vertical garden made from plastic bottles is a clever, sustainable way to produce your own food in tight spaces. It’s cost-effective, eco-friendly, and surprisingly easy to manage. Whether you’re a city gardener or simply looking to reduce waste while growing something nutritious, a bottle wall garden is a satisfying and productive project worth trying. With a little care and creativity, you’ll be harvesting your own kale—right from the wall.


