Raised garden beds are a fantastic solution for anyone looking to grow vegetables, herbs, or flowers in a controlled and organized space. Not only do they help improve soil drainage and reduce weed growth, but they also make gardening more accessible and aesthetically pleasing. In this article, we’ll show you how to build a simple, sturdy, and affordable raised garden bed using wood. The process is beginner-friendly, requires minimal tools, and can be completed in just a short time.
Why Choose a Raised Garden Bed?
Before diving into the step-by-step instructions, it’s important to understand the benefits of using raised beds in your garden:
-
Improved Soil Quality: You can fill the bed with high-quality soil, ideal for plant growth.
-
Better Drainage: Water drains more efficiently, reducing the risk of root rot.
-
Weed Control: Weeds are less likely to invade a raised space.
-
Pest Control: It’s easier to manage and protect your plants from pests.
-
Accessibility: Raised beds are easier to work with, especially for those with limited mobility.
-
Aesthetic Appeal: Neatly contained garden beds enhance the look of your outdoor space.
Materials You’ll Need
To create a durable wooden raised bed, gather the following materials:
-
4 untreated wooden boards (planks or beams) — size can vary depending on your desired bed dimensions, but a common option is 1.5 m long and 20–25 cm high
-
Screws or nails suitable for outdoor use
-
A drill or hammer
-
A saw (if cutting the wood to size)
-
Weed fabric or cardboard (optional, for lining the base)
-
Soil and compost
-
Measuring tape and pencil
Step-by-Step Instructions
Step 1: Choose a Location
Pick a flat, sunny spot in your yard or garden. Make sure the area receives at least 6 hours of sunlight daily — ideal for most vegetables and flowering plants. Avoid low-lying areas prone to flooding.
Step 2: Prepare the Wood
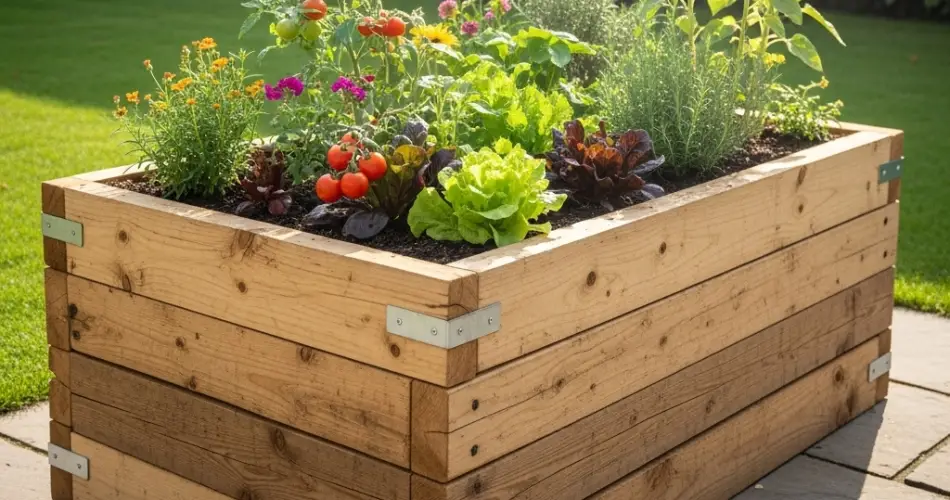
Use untreated, weather-resistant wood such as pine, cedar, or larch. Cut the boards to your desired dimensions if they’re not already pre-cut. For a basic rectangular bed, you’ll need two long boards for the sides and two shorter boards for the ends.
Step 3: Assemble the Frame
Lay out the boards in a rectangle on the ground. Attach the corners together using screws or nails. A drill will make the job easier and quicker. For added stability, you can secure wooden corner stakes inside the frame and screw the boards into them.
Step 4: Line the Bottom (Optional)
If you want to prevent weeds from growing up into the bed or stop soil from spilling out, line the bottom of the bed with weed fabric or a layer of cardboard. This layer will also help retain moisture while still allowing drainage.
Step 5: Place and Level the Bed
Move the assembled frame to your chosen location. Use a level to ensure it sits evenly on the ground. You can dig a shallow trench for the frame to sit in if needed for extra stability.
Step 6: Fill the Bed
Fill your raised bed with a mix of garden soil, compost, and organic matter. A typical mix is 60% topsoil, 30% compost, and 10% other organic amendments like peat moss or vermiculite. This nutrient-rich blend will help your plants thrive.
Step 7: Start Planting
Now that your raised bed is ready and filled with fresh soil, you can begin planting! Whether you’re growing lettuce, tomatoes, herbs, or flowers, be sure to follow spacing guidelines for each plant. Water thoroughly after planting.
Maintenance Tips
-
Water regularly: Raised beds can dry out more quickly than ground soil.
-
Add mulch: Mulching helps retain moisture and suppress weeds.
-
Replenish soil annually: Over time, the soil level may sink. Top up with compost or fresh soil each season.
-
Rotate crops: To avoid depleting the soil of specific nutrients, rotate plant families each growing season.
Customization Ideas
Once you’ve mastered the basics, consider personalizing your raised garden bed:
-
Add trellises for climbing plants like beans or cucumbers.
-
Paint or stain the wood for a decorative touch (use non-toxic, plant-safe products).
-
Build multiple beds for crop rotation and design symmetry.
-
Install drip irrigation or soaker hoses for easier watering.
Final Thoughts
Building a wooden raised garden bed is an excellent way to upgrade your garden quickly and affordably. With just a few materials and a bit of effort, you can create a productive and attractive planting area that suits any outdoor space. Whether you’re a seasoned gardener or a beginner, this DIY project will enhance your growing experience and help your plants flourish.


