Lavender is a highly valued herb known for its fragrant blooms, calming properties, and wide range of uses — from herbal teas and essential oils to garden borders and ornamental landscaping. One of the most efficient and budget-friendly ways to propagate lavender is by using a simple rooting system built from a plastic bottle.
This method is not only sustainable, using everyday materials you likely already have at home, but it also provides a stable and humid environment that encourages root development. Whether you’re a beginner or an experienced gardener, building a lavender rooting system in a bottle is a practical solution for small spaces and urban gardening.
Why Use a Plastic Bottle for Lavender Propagation?
Plastic bottles create a mini greenhouse effect. They help maintain humidity around the cutting, regulate temperature, and reduce transplant shock — all of which contribute to faster, healthier root development.
Additional benefits include:
-
Recycling: Gives used bottles a second life.
-
Compact size: Ideal for windowsills or balconies.
-
Visibility: Clear plastic allows you to monitor moisture and root progress.
What You’ll Need
To build your lavender rooting system, gather the following materials:
-
1 clear plastic bottle (1 to 1.5 liters)
-
Sharp scissors or utility knife
-
A healthy lavender plant
-
Lightweight potting mix (or a mix of perlite and coconut coir/peat moss)
-
Rooting hormone (optional)
-
Spray bottle filled with clean water
-
Small stick or pencil
Optional: rubber bands or tape for securing the bottle halves.
Step 1: Prepare the Bottle
Clean the bottle thoroughly and remove any labels. With sharp scissors or a knife, cut the bottle in half horizontally. This will create two sections: the base for planting and the top as a humidity dome.
Next, poke several small holes in the bottom half of the bottle to allow for water drainage. You can also place a thin layer of gravel or coarse sand at the bottom to improve drainage.
Step 2: Take and Prepare Lavender Cuttings
Choose a healthy, non-flowering lavender stem for propagation. It’s best to take cuttings in the morning when the plant is fully hydrated. Using clean scissors or pruners, cut a 4–6 inch stem just below a leaf node.
Strip the leaves from the lower two inches of the stem. This portion will be placed in the soil. If you’re using rooting hormone, dip the cut end lightly before planting. Though optional, rooting hormone can speed up the process and increase success rates, especially in woody stems.
Step 3: Plant the Cutting
Fill the bottom half of the bottle with moistened potting mix. Use a stick or pencil to make a small hole in the center, about 2 inches deep. Insert the lavender cutting carefully, ensuring the leafless section is buried and the upper leaves remain above the surface.
Gently press the soil around the base of the cutting to hold it in place. Mist the soil lightly with the spray bottle to keep it evenly moist.
Step 4: Cover with the Bottle Dome
Take the top half of the bottle and place it over the planted cutting to act as a humidity dome. This cover helps retain moisture and creates a greenhouse-like environment for the cutting. You can secure the two halves using tape or rubber bands if needed.
Ensure the cap is off or loosened slightly to allow for limited airflow and prevent excessive condensation buildup.
Step 5: Provide the Right Environment
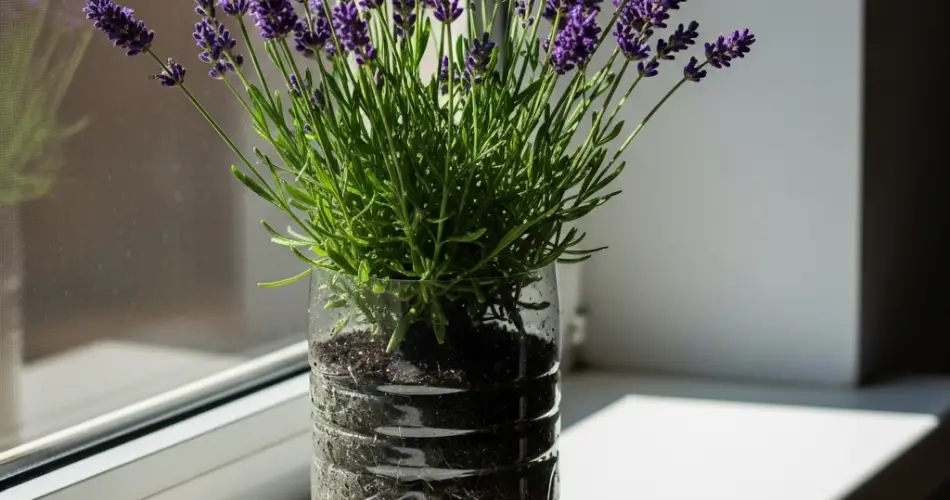
Place your bottle system in a bright, warm spot that gets indirect sunlight. Direct sunlight may overheat the interior and damage the cutting. A windowsill or shaded balcony is ideal.
Monitor the moisture level daily. If the condensation disappears or the soil begins to dry out, lightly mist the inside again. However, be cautious not to oversaturate, as too much moisture can lead to mold or rot.
Step 6: Monitor and Root Development
In about 3 to 4 weeks, you should start to see signs of root growth. You can gently tug on the cutting to feel for resistance — a sign that roots are developing. At this point, gradually begin acclimating the plant to outdoor air.
Open the dome slightly for a few hours each day to allow the plant to harden off. After about a week of this transition, you can fully remove the dome.
Step 7: Transplanting
Once the lavender cutting has rooted and shows new growth, it’s ready for transplanting. Move it to a larger container or into your garden. Lavender prefers well-drained soil and full sun, so make sure the new location meets those conditions.
Water lightly after transplanting, then allow the soil to dry slightly between waterings to mimic lavender’s natural drought-tolerant conditions.
Tips for Success
-
Use young, flexible cuttings rather than older woody stems for easier rooting.
-
Sanitize tools before cutting to prevent disease.
-
If using multiple bottles, label them with the variety and date.
-
Avoid overwatering — moisture is key, but soggy soil causes rot.
Final Thoughts
Building a lavender rooting system from a plastic bottle is a simple, low-cost propagation technique that works well for indoor or small-space gardeners. It promotes healthy root growth, conserves resources, and gives you the satisfaction of growing beautiful, fragrant lavender plants from scratch. With patience and care, you’ll have new lavender starts ready to grace your garden, patio, or windowsill in just a few weeks.


