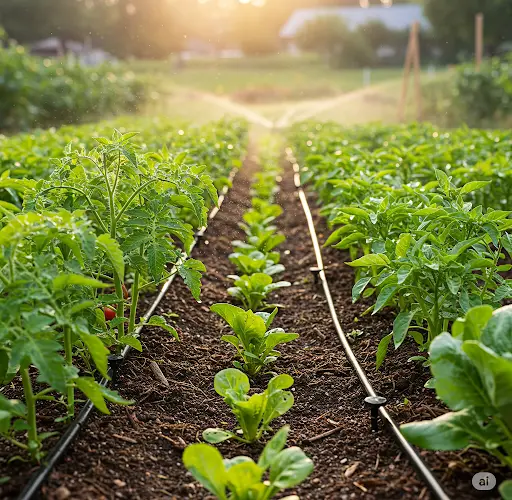
Keeping your garden or potted plants consistently watered can be a challenge—especially if you’re away from home or have a busy schedule. Irregular watering can lead to wilting, root rot, or poor growth, particularly in vegetables and flowers that need steady moisture.
Luckily, there’s a simple, low-cost solution that delivers water gradually and evenly over time: a DIY can drip system. With just a few basic materials, you can set up an effective, long-lasting irrigation method that keeps your plants hydrated for up to a month—without daily effort.
Here’s how to create and install this system, along with tips to maximize its efficiency for different types of plants and garden beds.
Why Use a Can Drip System?
A can drip system is an easy-to-make self-watering setup using small metal or plastic containers (like food cans) buried near your plants. These cans release water slowly into the soil, keeping moisture levels steady and reducing waste. Here are a few benefits:
-
Even water distribution to plant roots
-
Prevents overwatering or underwatering
-
Saves time and effort
-
Low-cost and sustainable, using recycled materials
-
Ideal for hot climates or when you’re away
This method works particularly well for vegetables like tomatoes, cucumbers, peppers, and eggplants, as well as for flower beds, shrubs, and even small trees.
Materials You’ll Need
To make your can drip system, gather the following items:
-
Empty metal or plastic food cans (medium or large size)
-
Hammer and nail (or a small drill)
-
Water
-
Optional: lid or cover to reduce evaporation
-
Mulch (straw, leaves, or compost)
Make sure the cans are clean and free from any food residue before use.
Step-by-Step: How to Make the Can Drip System
Step 1: Prepare the Can
Using a hammer and nail (or a drill with a small bit), punch several small holes in the bottom of the can. About 5–8 holes spaced evenly will work well. These will slowly release water into the soil.
If you plan to use this system in very dry or sandy soil, make the holes slightly larger or add one or two more. For heavier clay soils, fewer holes may be better to prevent water from pooling too quickly.
Step 2: Choose the Placement
Decide where the can will go. Place it near the base of your plant, about 2–4 inches away from the main stem. For rows of plants, you can space cans every 1–2 feet, depending on how closely your plants are grouped.
Step 3: Bury the Can
Dig a hole slightly deeper than the can so that when placed inside, the rim is at or just below soil level. This keeps it from tipping over and allows water to soak directly into the root zone.
Fill the can with water and observe. If the water drains too quickly or too slowly, adjust the number or size of holes as needed.
Step 4: Cover and Mulch
To minimize evaporation, you can place a flat stone, lid, or piece of plastic loosely over the can. Then, mulch around the base with straw, dry leaves, or compost. Mulching helps hold moisture in the soil and keeps roots cool.
How It Works
Once installed and filled, the can will slowly release water through the holes in the bottom. Gravity and soil moisture levels control the flow, allowing plants to absorb moisture steadily over time. This system is especially helpful in warm weather, where top watering often evaporates quickly before reaching the roots.
Depending on your soil type, plant needs, and climate, you may need to refill the can every few days or once a week. In some cases—especially in cooler or shaded areas—it can last up to a month without needing a refill.
Tips for Success
-
Group thirsty plants around one can to maximize efficiency.
-
Use larger cans (like coffee or juice cans) for bigger plants or shrubs.
-
Paint metal cans black if you want to warm up the water slightly in cooler climates.
-
Don’t use cans with sharp edges—file them down or cover with tape to avoid injury during setup or gardening.
-
Test before vacation by setting up the system a few days in advance and observing the drainage rate.
Great for Containers and Raised Beds
This system isn’t limited to garden plots—it works just as well in raised beds or large containers. For potted plants, use smaller containers like yogurt cups or soda bottles with holes in the bottom and bury them a few inches deep.
This ensures that even your indoor or balcony plants benefit from consistent watering without relying on complex irrigation setups or electricity.
Final Thoughts
Uniform watering is one of the keys to healthy, productive plants. With a simple can drip system, you can reduce water waste, save time, and ensure your garden thrives—even when you’re not around.
Best of all, this system requires no special tools, no electricity, and almost no maintenance. Just a few recycled cans, some water, and a bit of setup can give your plants exactly what they need, when they need it.
Try it this season—and see the difference steady hydration can make in your garden’s health and productivity.


