Orchids are among the most beloved flowers due to their exotic beauty and long-lasting blooms. However, many people do not realize that even after an orchid has finished flowering, it can still be propagated from its flower stalk. This method is an easy and effective way to grow new orchids from an existing plant. In this guide, I will share step-by-step instructions on how to propagate orchids from flower stalks using natural ingredients like aloe vera and ginger.
Step 1: Selecting the Right Flower Stalk
Once your orchid has bloomed and the last flowers are about to fall, it is time to prepare for propagation. Carefully examine the flower stalk and identify any sections that have not yet bloomed. These sections hold the potential for new growth.
Use a sharp, sterile pair of scissors or pruning shears to cut off the flower stalk that has bloomed. Be sure to make a clean cut and avoid crushing the stalk, as this could damage the plant tissue and hinder new growth. Cutting the flower stalk at the right spot ensures that the orchid remains healthy and ready for propagation.
Step 2: Preparing the Sprout
To encourage new growth, carefully peel off the protective film surrounding the young shoots on the flower stalk. Removing this outer layer allows the sprouts to grow more easily and absorb nutrients effectively. This is a crucial step in ensuring successful propagation.
Step 3: Using Aloe Vera for Growth Stimulation
Aloe vera is an excellent natural stimulant that provides essential nutrients and moisture to young orchid shoots. To use aloe vera for propagation:
- Take a fresh aloe leaf and cut it open to expose the gel inside.
- Insert the flower stalk directly into the aloe leaf, ensuring that the gel makes full contact with the bud.
- Repeat this process with another aloe leaf if necessary to enhance nutrient absorption.
Aloe vera’s natural properties help protect the orchid from infections, provide hydration, and encourage healthy sprout development.
Step 4: Creating a Nutrient Solution with Aloe Vera and Ginger
To further boost orchid propagation, prepare a nutrient-rich solution using aloe vera and ginger. Ginger contains powerful antioxidants and antibacterial properties that help strengthen the plant while promoting root growth.
- Take 30 grams of fresh ginger and one aloe vera leaf.
- Blend them together with 300ml of water until smooth.
- Strain the mixture to remove any solid residue, leaving a clear liquid.
- Add additional water to make a total of 1 liter of solution.
This natural fertilizer is packed with essential nutrients that will aid in the propagation process.
Step 5: Watering the Orchid with the Nutrient Solution
Once the solution is ready, it is time to apply it to the orchid:
- Pour the aloe vera and ginger solution onto the roots of the orchid to provide essential nutrients.
- Submerge the orchid pot in the solution for approximately 30 minutes to allow the plant to absorb the nutrients effectively.
Soaking the orchid in this mixture hydrates the roots, enhances root development, and stimulates sprout growth.
Step 6: Protecting the Cut Area with Toothpaste
After soaking, carefully remove the aloe vera leaf from the flower stalk and gently pat the area dry. To prevent infections and promote healing, apply a small amount of toothpaste to the cut. Any type of toothpaste will work, as it creates a protective barrier over the cut and prevents bacteria from entering. Allow the toothpaste to dry completely before proceeding.
Step 7: Weekly Care and Maintenance
To ensure the orchid continues to grow healthily, mist it with the aloe vera and ginger solution once a week. This consistent care routine helps to stimulate root growth and strengthen the plant over time.
Step 8: Monitoring Growth Progress
After one month, you will start to see new sprouts growing from the flower stalk. However, at this stage, the small orchid may not have developed roots yet. Continue spraying the aloe vera and ginger solution once a week to encourage root formation.
Step 9: Transplanting the Young Orchid
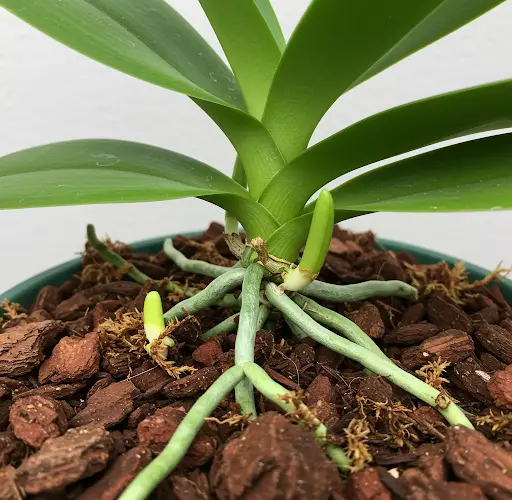
After approximately two months, the small orchid will have developed strong roots and healthy growth. At this stage, it is ready to be transplanted into its own pot.
- Use a well-draining potting mix, such as pine bark, to ensure good airflow around the roots.
- Plant the young orchid in the pot, making sure the roots are covered but not deeply buried.
- Lightly water the newly potted orchid with the aloe vera and ginger solution to help it adapt to its new environment.
- Place the pot in a location with indirect sunlight and good ventilation.
Final Results and Ongoing Care
With proper care, the propagated orchid will continue to grow stronger and healthier. Over the following months, you will notice new leaves, roots, and possibly even flower buds forming. By using this natural and organic propagation method, you can successfully grow new orchids at home without relying on synthetic fertilizers or chemicals.
Regularly mist the orchid with the aloe vera and ginger solution once every two weeks to maintain healthy growth. Ensure the orchid is placed in an area with indirect sunlight and adequate humidity to support its development.
Conclusion
Propagating orchids from flower stalks is a simple yet effective way to expand your orchid collection without purchasing new plants. By using natural ingredients like aloe vera and ginger, you can encourage healthy growth while protecting your orchids from disease. With patience and consistent care, your orchids will thrive, producing vibrant blooms and strong roots.
Try this method at home and enjoy watching your orchids flourish!


