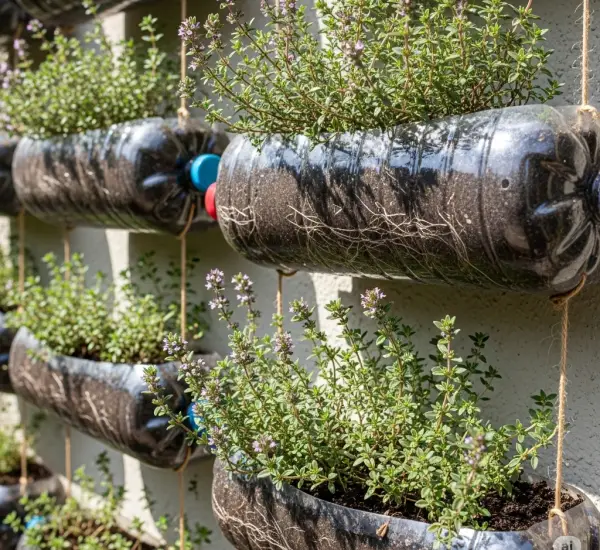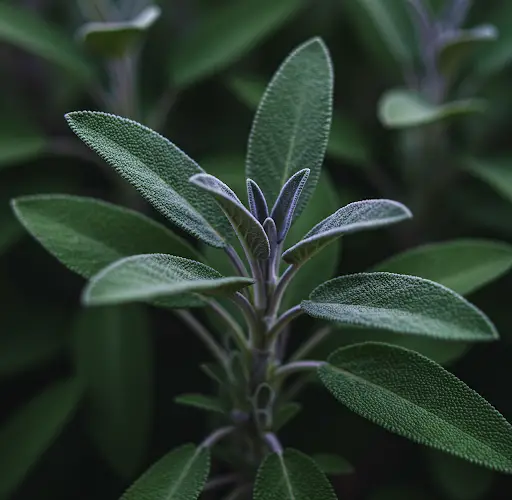
Sage is a wonderfully aromatic herb that adds depth and richness to a variety of dishes, especially meats, soups, stews, and sauces. Its soft, silvery-green leaves and earthy flavor make it a favorite in many kitchens. Whether you’re a seasoned gardener or a beginner, growing sage at home is easy and highly rewarding. What’s even better is that you don’t need a large garden to grow this flavorful herb. Using plastic bottles, you can easily grow sage indoors or on your balcony, even if you have limited space.
In this article, we’ll guide you through the process of growing sage in plastic bottles, offering you a sustainable and space-saving solution to enjoy fresh sage at your fingertips.
Why Grow Sage in Plastic Bottles?
There are several reasons why growing sage in plastic bottles is a fantastic option:
-
Space-Saving: Plastic bottles are compact and easy to place on windowsills, balconies, or countertops. This makes them ideal for apartment dwellers or anyone with limited garden space.
-
Eco-Friendly: By reusing plastic bottles, you contribute to reducing waste and make use of materials that might otherwise end up in landfills.
-
Cost-Effective: Plastic bottles are inexpensive, often free if you’re reusing bottles from home. This makes it an affordable way to grow herbs without spending money on planters or pots.
-
Portable: Plastic bottles are lightweight, so you can easily move them to catch the sun or protect your plants from extreme weather conditions.
Materials You’ll Need
To grow sage in plastic bottles, gather the following materials:
-
Plastic Bottles: One or more empty plastic bottles (2-liter soda bottles work well). Choose bottles that are large enough to allow sage’s root system to grow comfortably.
-
Sharp Knife or Scissors: You’ll need these to cut the bottles and make drainage holes.
-
Potting Soil: A well-draining potting mix is essential for sage. Sage prefers dry, loose soil that doesn’t hold too much moisture.
-
Sage Seeds or Seedlings: You can start sage from seeds or buy small seedlings from a local nursery or garden center.
-
Watering Can or Spray Bottle: For gentle watering.
-
Sunny Spot: Sage requires plenty of sunlight. Make sure you have access to a sunny windowsill or balcony that gets at least 6 hours of direct sunlight per day.
Step-by-Step Guide to Growing Sage in Plastic Bottles
Step 1: Prepare the Plastic Bottles
Start by cleaning your plastic bottles thoroughly to remove any dirt or chemicals. If there are labels on the bottles, peel them off so that the plants can “breathe” and avoid any harmful residues. Once cleaned, use a sharp knife or scissors to cut the bottles in half. You can cut the bottle vertically for a larger planting space or horizontally for a shallower container.
If you cut the bottle vertically, the top half can be used as a cover to create a mini greenhouse effect, which will help retain moisture and warmth.
Step 2: Create Drainage Holes
Sage requires good drainage, as it doesn’t like to sit in waterlogged soil. Use your knife to punch several drainage holes in the bottom of the plastic bottle. This will allow any excess water to escape and prevent root rot.
Step 3: Fill the Bottle with Potting Soil
Fill the bottom half of the bottle with a well-draining potting mix. Sage prefers light, loose soil, so avoid heavy garden soil that can trap too much moisture. You can add perlite or sand to the potting mix to improve drainage. Fill the bottle about three-quarters full, leaving enough space for the sage seeds or seedlings.
Step 4: Plant the Sage Seeds or Seedlings
If you’re using sage seeds, sprinkle them evenly on top of the soil and press them lightly into the surface. Cover the seeds with a thin layer of soil, about 1/4 inch deep. If you’re planting seedlings, create a small hole in the soil, place the seedling in the hole, and cover the roots with soil.
Space the seeds or seedlings at least a few inches apart, as sage plants can grow quite large over time. If you plant multiple seedlings in the same container, give them enough space to grow without crowding each other.
Step 5: Water the Plant
After planting, water the sage lightly with a watering can or spray bottle. The soil should be moist but not soaked. Sage prefers dry conditions, so it’s essential not to overwater it. Water the plant whenever the top inch of the soil feels dry to the touch. Avoid letting the plant sit in standing water, as this can lead to root rot.
Caring for Sage in Plastic Bottles
1. Provide Plenty of Sunlight
Sage is a sun-loving herb, so it requires at least 6 hours of direct sunlight each day to thrive. Place your plastic bottle containers on a sunny windowsill or balcony where the plants can receive plenty of light. If you’re growing sage indoors and natural light is limited, consider supplementing with grow lights to ensure healthy growth.
2. Watering
Sage doesn’t like overly wet soil. Water the plant when the top inch of soil feels dry, but don’t let the soil become soggy. If your plastic bottle has a cover or lid, remove it periodically to allow the plant to breathe and to prevent excess moisture buildup.
3. Occasional Fertilizing
Sage doesn’t require frequent fertilization, but it can benefit from occasional feeding. Use a balanced liquid fertilizer or organic compost every 4–6 weeks to provide essential nutrients for healthy growth. Avoid over-fertilizing, as sage thrives in leaner soil and too much fertilizer can cause the plant to become leggy.
4. Pruning
Pruning is essential to keep sage healthy and encourage bushier growth. Trim the plant regularly by cutting back the older, woody stems. Harvest the leaves by snipping them off with clean scissors or garden shears. Regular pruning also helps to keep the plant compact and prevents it from becoming too leggy.
Harvesting Sage
Sage leaves are ready to harvest once the plant has reached a sufficient size, typically after a few months of growth. The best time to harvest sage is in the morning, after the dew has dried but before the heat of the day, as this is when the flavor is most concentrated.
To harvest, simply cut the outer leaves with scissors, starting from the top and working your way down. You can continue to harvest leaves throughout the growing season, but avoid cutting too much at once. Always leave enough of the plant so it can continue growing.
Troubleshooting Sage in Plastic Bottles
1. Yellowing Leaves
Yellowing leaves can indicate overwatering or poor drainage. Ensure your plastic bottle has enough drainage holes, and allow the soil to dry out between waterings.
2. Leggy Growth
If your sage plant is growing tall and spindly instead of bushy, it may not be receiving enough sunlight. Move it to a sunnier location or use grow lights to supplement the natural light.
3. Pests
Sage is generally pest-resistant, but aphids or spider mites can occasionally appear. If this happens, rinse the leaves with water or treat the plant with a mild insecticidal soap.
Conclusion
Growing sage in plastic bottles is a cost-effective, space-saving, and eco-friendly way to cultivate this aromatic herb at home. Whether you’re growing sage indoors or outdoors, it’s a simple and sustainable gardening method that can yield fresh herbs year-round. By following these steps, you can enjoy homegrown sage to enhance your culinary creations, all while minimizing your environmental impact. So, repurpose those plastic bottles, and start your own mini herb garden today!