Beans are one of the easiest and most productive crops to grow at home, and they don’t require a traditional garden plot. With just a few simple tools—most notably plastic containers—you can grow a lush, high-yielding bean garden right on your balcony, patio, or even windowsill.
This method is incredibly beginner-friendly, budget-conscious, and perfect for those working with limited space. Whether you’re aiming for green beans, yardlong beans, or bush beans, growing them in plastic containers offers surprising advantages—and excellent harvests.
Here’s a step-by-step guide to growing beans in containers, using materials you likely already have at home.
Why Use Plastic Containers for Growing Beans?
Plastic containers are widely available and easy to repurpose. Whether it’s an old water jug, food-grade bucket, or storage bin, these containers offer a lightweight and versatile alternative to garden beds.
Benefits of growing beans in plastic containers:
-
Space-efficient – ideal for small balconies and porches
-
Easy to move and rearrange for better sunlight exposure
-
Better drainage control
-
Prevents soil-borne pests and diseases
-
Cost-effective and eco-friendly reuse of plastic waste
Materials You’ll Need
-
Plastic containers (minimum 10–12 inches deep)
-
Bean seeds (choose bush beans for small spaces or pole beans for trellised growth)
-
Potting mix or homemade soil blend
-
Compost or aged manure
-
A small trellis or vertical support (if growing climbing varieties)
-
Watering can or spray bottle
Preparing the Containers
Start by cleaning your plastic containers thoroughly to remove any residue or chemicals. Then, drill or cut 4–6 drainage holes in the bottom to prevent waterlogging.
For best results, use containers that are at least 10 inches deep and wide, with more depth for climbing varieties. You can also cut larger containers like water jugs or barrels in half to create multiple planting units.
Making the Ideal Soil Mix
Beans grow best in light, well-draining soil enriched with organic nutrients. You can mix your own by combining:
-
50% garden soil or coconut coir
-
30% compost or well-rotted manure
-
10% sand or perlite for drainage
-
10% rice husks or shredded leaves for aeration
Beans don’t require heavy fertilization, but adding a few crushed eggshells and banana peel pieces to the mix provides extra calcium and potassium, supporting stronger growth and flower production.
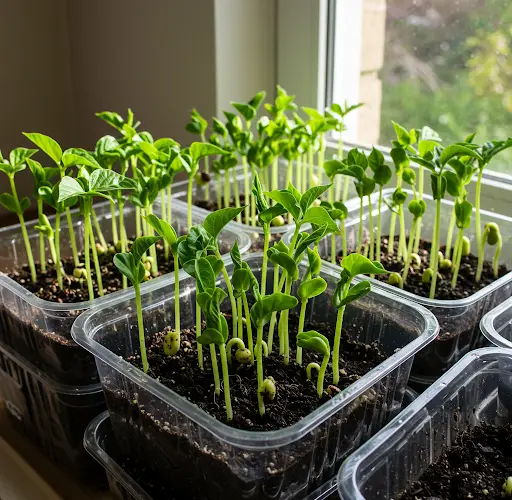
Sowing the Seeds
-
Moisten the soil lightly before planting.
-
Plant each bean seed 1 to 1.5 inches deep and about 3–4 inches apart.
-
If growing pole beans, insert your support sticks or trellis at this stage.
-
Place the container in a location with at least 6–8 hours of sunlight per day.
Cover lightly with soil and water gently. Seeds typically germinate within 5–7 days in warm temperatures.
Watering and Care
Beans love moisture, but they hate soggy roots. Here’s how to keep them happy:
-
Water every 2–3 days, or when the top inch of soil feels dry
-
Use mulch (like dry leaves or straw) to retain soil moisture and suppress weeds
-
Rotate the container or trellis weekly to encourage even light distribution
-
Avoid watering directly on the leaves to reduce the risk of fungal diseases
Natural Growth Boosters
You don’t need chemical fertilizers. Homemade liquid feeds can support healthier plants and bigger harvests. Here are two easy options:
-
Banana Peel Tea: Soak banana peels in water for 2 days and use the liquid to water your beans once a week. Rich in potassium.
-
Fermented Rice Water: Promotes beneficial microbes in the soil. Use once every two weeks.
These natural fertilizers not only nourish the plants but also improve the sweetness and texture of the beans.
Supporting Climbing Beans
If you’re growing pole beans, you’ll need to support their vertical growth. Use:
-
Bamboo sticks
-
Old mop handles
-
Trellis frames
-
Twine lines tied to a top beam
Train the vines gently around the support as they grow. Within a few weeks, the plants will climb rapidly and begin flowering.
Harvesting Your Beans
Depending on the variety, beans are ready to harvest 50–70 days after planting. Pick the pods when they are:
-
Firm and brightly colored
-
About the length recommended for your variety
-
Still tender and not too swollen with seeds
Regular harvesting encourages the plant to produce even more pods. Harvest every 2–3 days during peak season.
Final Tips for Success
-
Avoid overwatering—beans prefer slightly dry conditions once established
-
Don’t crowd too many plants in one container
-
Replenish nutrients with compost tea every few weeks
-
Reuse containers season after season by refreshing the soil mix
Conclusion
Growing beans in plastic containers is a fantastic way to enjoy fresh, homegrown produce—no backyard required. With minimal space and simple care, this method yields a surprisingly large harvest. Once you try it, you’ll wonder why you didn’t start sooner.
Whether you’re a beginner gardener or someone looking to maximize your patio or balcony space, this easy bean-growing technique is definitely worth a try.


