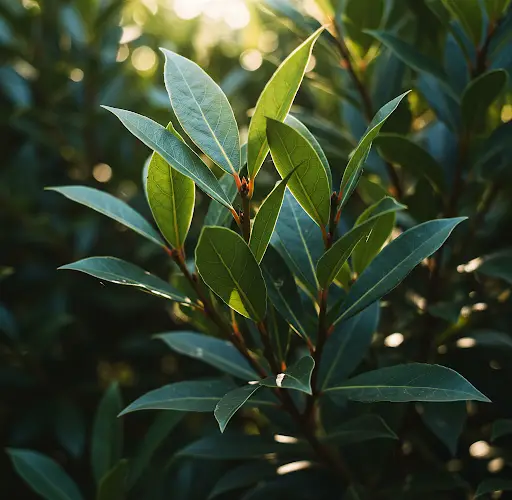
Bay laurel (Laurus nobilis) is a versatile, aromatic evergreen shrub native to the Mediterranean region. Known for its glossy, aromatic leaves, bay laurel is commonly used to add flavor to a variety of dishes such as soups, stews, and marinades. While it’s traditionally grown outdoors in larger gardens, bay laurel can also thrive indoors in small containers, such as plastic bottles. This makes it an excellent option for those with limited space or those looking for a sustainable and cost-effective way to grow herbs at home.
In this article, we’ll walk you through the process of growing bay laurel in plastic bottles, providing a space-saving solution to enjoy fresh bay leaves year-round.
Why Grow Bay Laurel in Plastic Bottles?
There are many benefits to growing bay laurel in plastic bottles:
-
Space-Saving: Plastic bottles are compact and easy to place on windowsills, balconies, or countertops. This makes them an ideal option for those with limited garden space, such as apartment dwellers.
-
Eco-Friendly: By reusing plastic bottles, you’re contributing to reducing plastic waste. This is a sustainable gardening solution that’s both affordable and eco-conscious.
-
Cost-Effective: Plastic bottles are inexpensive, often free if you’re reusing bottles from home. This means you don’t need to invest in costly planters or pots to grow bay laurel.
-
Portable: Plastic bottles are lightweight, making it easy to move your plants around to find the perfect spot for sunlight or to protect them from adverse weather conditions.
Materials You’ll Need
Before you start, gather the following materials:
-
Plastic Bottles: One or more empty plastic bottles (2-liter soda bottles work well). Choose bottles that are large enough to accommodate the growing root system of bay laurel.
-
Sharp Knife or Scissors: For cutting the bottles and making drainage holes.
-
Potting Soil: Bay laurel prefers well-draining soil. A general-purpose potting mix with good drainage will work well, or you can add perlite to the soil to enhance drainage.
-
Bay Laurel Seeds or Seedlings: You can start bay laurel from seeds or purchase small seedlings from a local nursery or garden center.
-
Watering Can or Spray Bottle: To water the plants gently and avoid over-watering.
-
Sunny Spot: Bay laurel needs plenty of sunlight. A sunny windowsill or balcony that receives at least 6 hours of direct sunlight per day is ideal.
Step-by-Step Guide to Growing Bay Laurel in Plastic Bottles
Step 1: Prepare the Plastic Bottles
Start by cleaning the plastic bottles thoroughly. Wash them to remove any dust, dirt, or leftover liquids. After cleaning, use a sharp knife or scissors to cut the bottle in half. You can cut it vertically for a larger planting space or horizontally for a shallower container. If you cut the bottle vertically, the top half can act as a greenhouse lid to help retain moisture.
Step 2: Create Drainage Holes
Bay laurel needs good drainage to thrive, as it doesn’t like waterlogged roots. Use your knife to punch several small holes in the bottom of the plastic bottle. This will allow excess water to escape and prevent root rot, which can occur if the roots are consistently soaked in water.
Step 3: Add Potting Soil
Fill the bottom half of the plastic bottle with well-draining potting soil. Bay laurel prefers soil that is not too heavy, so avoid using regular garden soil. You can add perlite or coarse sand to the potting mix to improve drainage. Fill the bottle about three-quarters full, leaving enough room to plant the bay laurel seeds or seedlings.
Step 4: Plant the Bay Laurel Seeds or Seedlings
If you’re starting with seeds, plant them by sprinkling them lightly over the soil surface. Gently press them down into the soil, then cover them with a thin layer (about 1/4 inch) of soil. Bay laurel seeds can be slow to germinate, so be patient.
If you’re using seedlings, create small holes in the soil and gently place the seedling in each hole, covering the roots with soil. Leave a few inches between each seedling to allow enough space for the plant to grow.
Step 5: Water the Plant
After planting, water the soil gently using a watering can or spray bottle. The soil should be moist but not soaked. Overwatering can lead to root rot, so make sure to allow excess water to drain away. Bay laurel plants prefer slightly drier conditions, so avoid keeping the soil consistently wet. Water when the top inch of soil feels dry to the touch.
Caring for Bay Laurel in Plastic Bottles
1. Provide Plenty of Sunlight
Bay laurel plants need full sunlight to grow well. They require at least 6 hours of direct sunlight each day, so place your plastic bottle containers in a sunny spot. A south-facing windowsill or balcony is ideal. If growing bay laurel indoors and natural light is limited, consider supplementing with grow lights.
2. Watering
Bay laurel does not like to sit in waterlogged soil, so make sure your plastic bottle has adequate drainage. Water the plant only when the top layer of soil feels dry. It’s better to underwater than overwater, as bay laurel is more tolerant of dry conditions. Be sure to let any excess water drain away to avoid root rot.
3. Occasional Fertilizing
While bay laurel doesn’t require frequent feeding, it will benefit from occasional fertilization. Use a balanced liquid fertilizer or organic compost every 4-6 weeks during the growing season. Avoid over-fertilizing, as too much fertilizer can lead to weak, leggy growth.
4. Pruning
Bay laurel responds well to pruning, which helps maintain its shape and encourages healthy growth. Prune the plant regularly to remove any dead or damaged leaves, as well as to shape the plant. You can also trim back the top of the plant to encourage bushier growth. Always use clean, sharp scissors to avoid damaging the plant.
Harvesting Bay Laurel
Bay laurel leaves are ready to harvest once the plant is large enough and has several mature leaves. You can harvest leaves throughout the year, but it’s best to do so in the morning after the dew has dried but before the heat of the day. To harvest, simply cut a few leaves from the outer branches with scissors. Always leave enough leaves on the plant so it can continue to grow.
You can use the fresh leaves in cooking, or you can dry them for later use. To dry the leaves, hang them upside down in a cool, dry place or lay them out on a clean surface to air dry.
Troubleshooting Bay Laurel in Plastic Bottles
1. Yellowing Leaves
Yellowing leaves can indicate overwatering or poor drainage. Make sure your plastic bottle has adequate drainage holes and water only when the top inch of soil feels dry.
2. Leggy Growth
If your bay laurel plant becomes tall and leggy, it may not be getting enough sunlight. Move it to a sunnier location, or consider using a grow light to supplement the natural light.
3. Pests
Bay laurel is relatively pest-resistant, but occasionally, aphids or spider mites may appear. If this happens, rinse the leaves with water or use a mild insecticidal soap.
Conclusion
Growing bay laurel in plastic bottles is an easy, space-saving, and eco-friendly way to cultivate this flavorful herb at home. By following these simple steps, you can enjoy fresh bay leaves in your kitchen all year round, whether you’re growing them indoors on a windowsill or outdoors on a balcony. With minimal care, your bay laurel plant will thrive and provide you with a steady supply of aromatic leaves to enhance your culinary creations. So, repurpose those plastic bottles and start your own mini herb garden today!


