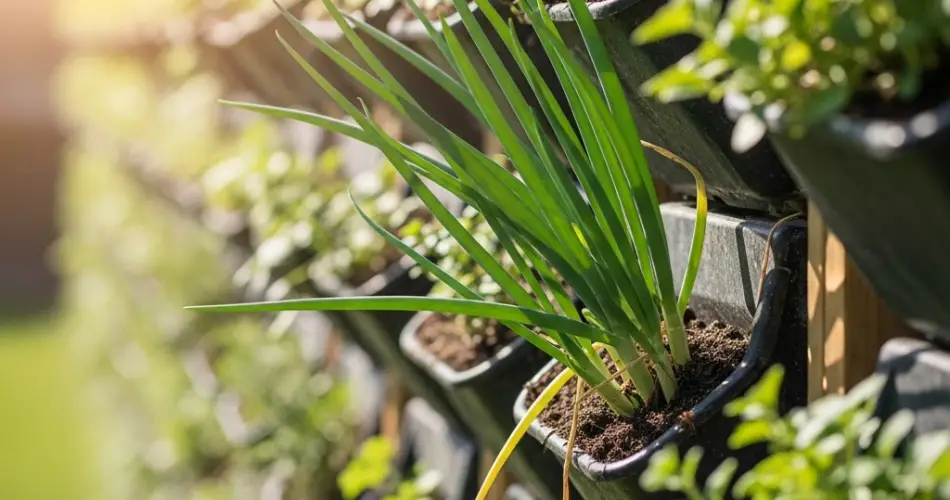
Scallions, also known as green onions or spring onions, are a favorite among home gardeners for their quick growth, mild flavor, and continuous harvest potential. They don’t require much space, and with a bit of creativity, they can be grown vertically using recycled plastic bottles. This space-saving method is ideal for balconies, patios, or small backyard walls, turning limited space into a productive green corner.
Reusing plastic bottles not only reduces waste but also provides an affordable way to grow healthy vegetables at home. Here’s a comprehensive guide to growing scallions in vertical rows using plastic bottles.
Materials Needed
-
1.5 to 2-liter plastic bottles (clean and dry)
-
Sharp cutter or scissors
-
Candle and nail or a small drill (to create holes)
-
Twine, wire, or zip ties (for mounting)
-
Good-quality potting mix
-
Compost or organic fertilizer
-
Scallion bulbs or seeds
-
Spray bottle or watering can
-
Wall, rack, or fence for mounting
Step 1: Prepare the Bottles
Begin by collecting clean, empty plastic bottles. Remove any labels and make sure the bottles are dry. Cut out openings along the sides to create planting pockets. Depending on the size of the bottle, you can cut 3–5 evenly spaced holes along one side, large enough for a scallion bulb or two.
Poke drainage holes at the bottom and on the opposite side of the planting pockets using a heated nail or drill. These ensure that water doesn’t accumulate inside and cause root rot.
If you’re creating hanging rows, make two holes near the top of each bottle to insert wire or twine. For wall-mounted setups, make holes in the back side of the bottle to fasten it with zip ties or wire to a sturdy structure.
Step 2: Choose Your Scallions
You can grow scallions from either seeds or kitchen leftovers. If you’re using kitchen scraps, save the white root ends of scallions after cutting the green parts. These regrow quickly and are perfect for vertical gardening. For seed-based planting, choose fast-growing varieties suited to your climate.
Using root ends offers faster results, while seeds take more time but give you a fresh start and more uniform growth.
Step 3: Fill with Soil
Prepare a nutrient-rich potting mix by combining soil with compost or well-rotted manure. Scallions prefer loose, well-draining soil. You can also mix in a small amount of sand or coco peat to improve drainage.
Fill the bottles with soil, making sure it reaches just below each planting hole. Pat the soil lightly to settle it without compacting.
Step 4: Plant the Scallions
If using root ends, insert one into each side opening with the roots facing down. Firm the soil gently around them to keep them upright.
If starting from seed, sow 2–3 seeds per hole and lightly cover with a thin layer of soil. Keep the top of the bottle open to allow light and air circulation.
Planting in staggered rows gives better coverage and makes harvesting easier.
Step 5: Mount and Arrange the Bottles
Hang or mount the bottles vertically on a wall, rack, or wooden frame where they’ll receive 4–6 hours of indirect sunlight per day. Too much intense sun can dry out the soil quickly, so partial sun or filtered light is ideal for scallions.
You can arrange the bottles in vertical rows or create horizontal tiers depending on the space available. Make sure there’s enough space between bottles for air circulation and ease of watering.
Step 6: Watering and Fertilizing
Scallions need consistent moisture but should never sit in soggy soil. Water the bottles gently once a day or every other day, depending on your local weather. Early morning or late afternoon watering is ideal to avoid quick evaporation.
Feed the plants every two weeks with diluted organic fertilizer or compost tea. Because scallions are light feeders, they don’t need heavy doses of nutrients, but regular feeding helps maintain steady growth.
Step 7: Ongoing Care and Harvest
Scallions are low-maintenance. Remove any yellowing leaves and check for pests like aphids or thrips. If pests appear, a spray of neem oil or a gentle soap solution can help control infestations.
Scallions are usually ready to harvest in 3–5 weeks if grown from root ends, or about 8 weeks from seed. To harvest, snip the greens as needed from the top or pull the entire plant from the bottle pocket. If you leave the roots in place, they will regrow for several rounds of harvesting.
Final Tips
-
Rotate bottle rows if some areas receive less sunlight.
-
Refill the soil or compost after a few months to maintain fertility.
-
Always check drainage holes to prevent clogging.
-
You can mix scallions with herbs or leafy greens for a decorative vertical garden.
Growing scallions in vertical plastic bottle rows is a smart and sustainable way to enjoy fresh, homegrown greens without needing a large garden. With minimal space and maintenance, you can harvest crisp, flavorful scallions regularly while doing your part to reduce plastic waste.


