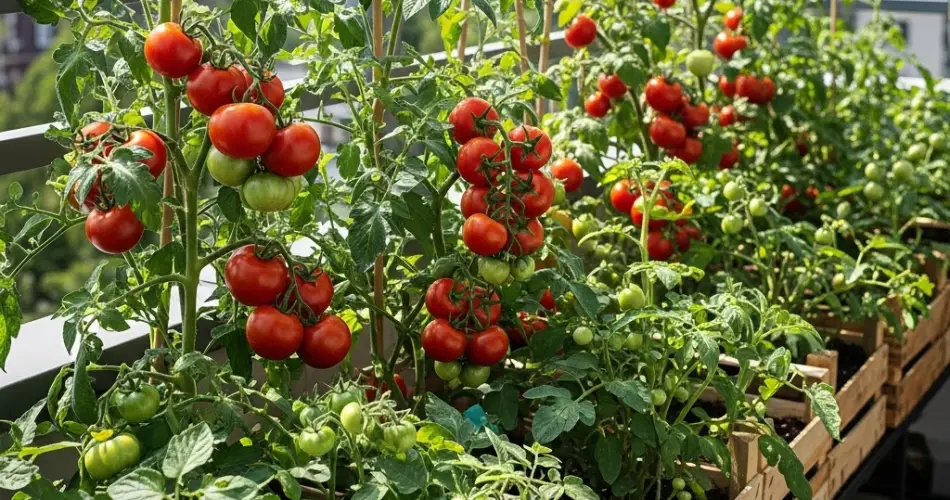
Tomatoes are among the most popular and rewarding vegetables to grow at home. With just a bit of sunlight, care, and creativity, even balcony gardeners can enjoy a steady harvest of juicy, sun-ripened tomatoes throughout the season. One of the most practical methods for small-space cultivation is using wooden crates. This container-friendly approach helps maximize space, provides good drainage, and adds a rustic charm to your urban garden setup.
Crate gardening allows you to tailor the soil, manage watering easily, and move plants as needed. Whether you’re a beginner or an experienced grower, this method is simple, efficient, and highly productive.
Why Use Crates for Growing Tomatoes?
Wooden crates offer several advantages when growing tomatoes, especially on balconies where space is limited:
-
Good drainage: Prevents waterlogging and root rot, which tomatoes are prone to.
-
Custom soil control: You can fill crates with nutrient-rich, light soil that tomatoes love.
-
Mobility: Crates are easy to move to optimize sun exposure.
-
Sustainability: Repurposing crates is eco-friendly and cost-effective.
-
Air circulation: Open wooden structures improve ventilation, reducing disease risks.
As long as the crate is deep and wide enough, it will comfortably support a productive tomato plant.
Choosing the Right Tomato Varieties
Tomatoes come in many shapes and sizes. For balcony crate gardening, compact and container-friendly varieties perform best. Here are a few recommended types:
-
Bush or determinate tomatoes: Ideal for crates due to their limited height. Try ‘Patio Princess’, ‘Bush Early Girl’, or ‘Roma’.
-
Cherry tomatoes: Small and prolific, like ‘Tiny Tim’, ‘Balcony’, or ‘Sweet 100’.
-
Dwarf varieties: Bred for containers, such as ‘Totem’ or ‘Window Box Roma’.
Avoid large indeterminate varieties unless you have a large crate and space for staking or trellising.
Materials You’ll Need
Before you get started, gather the following:
-
A sturdy wooden crate (at least 12–16 inches deep and wide)
-
Landscape fabric or coconut liner (optional, for soil retention)
-
Quality potting mix
-
Compost or aged organic fertilizer
-
Tomato seedlings or seeds
-
Plant stakes or small tomato cages
-
Watering can or hose with a gentle spray nozzle
Make sure your crate has drainage holes or slats to allow excess water to escape.
Preparing Your Crate
-
Line the inside with landscape fabric or a coconut liner to hold the soil in while allowing drainage.
-
Fill the crate with a loose, rich soil mix. Combine:
-
2 parts potting soil
-
1 part compost or aged manure
-
A handful of perlite or vermiculite for aeration
-
-
Mix in a balanced organic fertilizer to promote root development and flowering.
Moisten the soil lightly before planting.
Planting Tomatoes in Crates
-
Choose healthy seedlings or start your seeds indoors 4–6 weeks before the last frost.
-
Dig a deep hole in the soil. Tomatoes benefit from being planted deeply—covering part of the stem encourages stronger root development.
-
Place the seedling in the hole, burying it up to the first set of leaves.
-
Water gently to settle the soil and eliminate air pockets.
Place your crate in a sunny area of the balcony—tomatoes need at least 6–8 hours of direct sun each day for optimal growth and fruiting.
Supporting and Maintaining Your Tomato Plants
Even compact varieties benefit from support. Insert a stake or cage at planting time to avoid disturbing the roots later.
-
Tie the plant gently to the support as it grows using soft twine or plant ties.
-
Water consistently: Tomatoes prefer evenly moist soil. Avoid letting the soil dry out completely, which can lead to blossom end rot or cracked fruits.
-
Fertilize every 2–3 weeks with a liquid organic fertilizer once flowering begins.
Prune lightly by removing suckers (small shoots between the main stem and branches) to focus energy on fruit production, especially for indeterminate types.
Pest and Disease Prevention
Tomatoes in containers are generally less prone to pests, but some common issues to watch for include:
-
Aphids and whiteflies: Treat with neem oil or insecticidal soap.
-
Fungal diseases: Ensure good airflow and avoid wetting the leaves.
-
Blossom end rot: Maintain even watering and add calcium if needed.
Remove any diseased leaves and dispose of them properly to keep your plant healthy.
Harvesting Your Tomatoes
Tomatoes are ready to harvest when they are fully colored, slightly soft to the touch, and aromatic. Gently twist the fruit or use scissors to cut it from the vine, leaving the stem attached if possible.
-
Cherry tomatoes ripen quickly and should be harvested frequently.
-
Larger varieties may take 60–80 days from planting, depending on conditions.
Harvesting regularly encourages the plant to produce more fruit.
Final Thoughts
Growing juicy tomatoes in crates on your balcony is a rewarding way to enjoy fresh produce, even in a small urban setting. Crates offer the perfect container for these sun-loving plants, providing good soil depth, drainage, and mobility. With the right care, your balcony can become a productive tomato patch, delivering sweet, flavorful harvests all season long. Whether you’re planting a single crate or a full row, tomatoes are a delightful addition to your homegrown garden.


