Great Invention: DIY Flower Pots with Plastic Bottles Combined with a Fish Tank
Upcycling plastic bottles into flower pots is already a fantastic way to contribute to environmental sustainability. But when combined with a fish tank, it creates a self-sustaining ecosystem that benefits both plants and fish. This DIY invention not only maximizes space but also creates a natural filtration system where plants thrive on fish waste, and the water stays clean without much effort. In this article, we’ll guide you through the step-by-step process of creating your very own DIY aquaponic system using plastic bottles and a fish tank.
Why Combine Flower Pots with a Fish Tank?
This innovative method brings multiple benefits:
1. Natural Water Filtration:
- Fish produce waste, which contains nutrients beneficial for plant growth.
- Plants absorb excess nitrogen and filter the water, keeping it clean for the fish.
2. Sustainable Gardening:
- Reduces water usage since the same water nourishes both plants and fish.
- Encourages upcycling of plastic bottles, reducing waste.
3. Space-Efficient Solution:
- Perfect for small apartments, balconies, or urban gardening.
- Can be placed indoors or outdoors, depending on the plant and fish choice.
4. Easy Maintenance:
- No need for regular watering, as the system self-sustains.
- Fewer pests compared to traditional soil-based gardening.
Materials Needed
To create this unique DIY flower pot + fish tank system, you’ll need:
✔️ A fish tank (size depends on your space and number of fish).
✔️ Plastic bottles (2-3 liters work best).
✔️ A small water pump (optional but useful for better water circulation).
✔️ Tubing to transfer water between the tank and plants.
✔️ Gravel or clay pebbles for plant support.
✔️ Aquaponic-friendly plants (herbs, lettuce, and flowers work well).
✔️ Fish (goldfish, guppies, or betta fish are great choices).
✔️ A drill or heated needle to make small holes.
Step-by-Step Guide to Creating Your DIY System
Step 1: Prepare the Plastic Bottles
- Cut the bottles:
- Take a clean plastic bottle and cut it in half (around the middle).
- Use the top half as the plant holder and discard the cap (or drill holes for drainage).
- The bottom half can be repurposed as additional planters or used elsewhere.
- Make Drainage Holes:
- Drill or poke small holes in the bottle cap or base for excess water to drain into the fish tank.
- Add Planting Medium:
- Fill the bottle with gravel, clay pebbles, or coconut husk instead of soil (soil can clog the system).
Step 2: Setting Up the Fish Tank
- Choose a Location:
- Keep the tank in a well-lit area but avoid direct sunlight to prevent excessive algae growth.
- Prepare the Tank:
- Add dechlorinated water to ensure fish safety.
- Add a substrate (gravel or sand) at the bottom for beneficial bacteria growth.
- If using a water pump, position it to circulate water through the tubing to the plant containers.
- Introduce the Fish:
- Choose hardy fish that adapt well to changing water conditions.
- Feed them sparingly to avoid excessive waste buildup.
Step 3: Connecting the System
- Place the Bottles Above the Fish Tank:
- Arrange the cut plastic bottles so that their bottom parts rest slightly above the tank.
- Secure them using a frame, wires, or hanging setup.
- Set Up Water Circulation:
- If using a pump, attach tubing to carry water from the fish tank to the bottles.
- The water should drip through the plant roots and drain back into the tank.
- If you opt for a manual method, scoop tank water into the bottles daily.
Step 4: Planting and Maintaining the System
- Choose the Right Plants:
- Ideal plants include basil, mint, lettuce, spinach, pothos, or flowers.
- Avoid plants that require a lot of soil or deep roots.
- Monitor Water Quality:
- Change 10-20% of the water weekly to maintain a healthy balance.
- Test for pH, ammonia, and nitrate levels periodically.
- Feed Your Fish Properly:
- Overfeeding can cause excess waste and poor water conditions.
- Prune Plants Regularly:
- Trim plants to prevent overgrowth and allow proper air circulation.
Creative Ideas to Personalize Your DIY Planter Fish Tank
- Add LED Lights: Create a beautiful aesthetic with submerged lights in the fish tank.
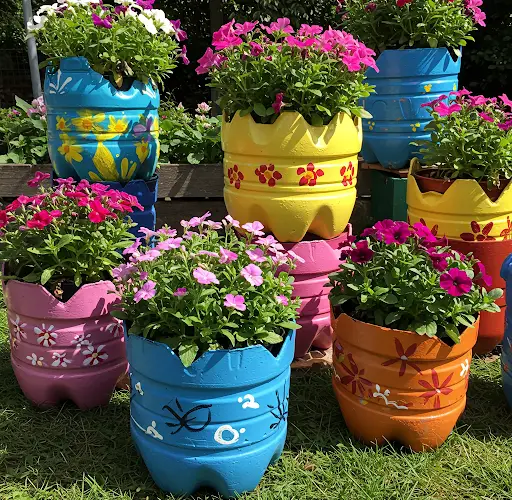
- Paint the Bottles: Decorate the plastic bottles with eco-friendly paints for a stylish look.
- Use a Multi-Level Design: Stack bottles at different heights for an artistic effect.
- Incorporate More Fish Varieties: Experiment with different small fish species to make it colorful.
Final Thoughts: A Green & Innovative Way to Garden
By recycling plastic bottles and incorporating a fish tank, you create an eco-friendly, low-maintenance gardening system. This innovative approach saves space, reduces waste, conserves water, and provides fresh herbs or flowers effortlessly.
Whether you’re a gardening enthusiast or someone looking for a sustainable home project, this DIY aquaponic planter is an exciting and rewarding way to connect with nature.
🌱 Start today and watch your plants and fish thrive together! 🐟💚


