Starting pepper seeds early is the key to a productive and flavorful harvest. While peppers love warmth and sunshine, their seeds take time to germinate and require the right conditions to sprout successfully. A simple and space-saving way to give your peppers a strong head start is by germinating them in cut plastic bottles.
This method provides a controlled microenvironment that encourages rapid and healthy seedling growth. Using recycled bottles not only saves space and money but also allows you to reuse plastic waste in a practical and eco-friendly way.
Why Start Pepper Seeds in Bottles?
Pepper seeds are notoriously slow to germinate, often taking 7–21 days depending on variety and temperature. Germinating them in bottles helps:
-
Maintain warm, consistent humidity
-
Shield seeds from pests and sudden temperature shifts
-
Allow easy monitoring of sprouting progress
-
Save indoor space and simplify organization
-
Reuse everyday materials for sustainable gardening
This method is ideal for balconies, windowsills, patios, or any area with limited space where traditional seed trays or pots may not be feasible.
Materials You’ll Need
To begin germinating pepper seeds in bottles, gather the following items:
-
Clear plastic bottles (1-liter or 1.5-liter)
-
Sharp knife or scissors
-
Potting mix or seed-starting mix
-
Pepper seeds (any variety)
-
Spray bottle or gentle watering can
-
Marker (optional for labeling)
-
Small stones, coco coir, or rice hulls (optional for drainage)
Preparing the Bottles
-
Clean and Dry
Rinse your plastic bottles thoroughly and allow them to dry. Remove labels to allow maximum sunlight into the container. -
Cut the Bottle
Using scissors or a knife, cut the bottle horizontally about 10–12 cm from the base. This lower portion will act as a seed-starting pot. You can reuse the top half as a humidity dome. -
Create Drainage Holes
Poke several small holes in the bottom of each cut bottle. Proper drainage is essential to prevent water buildup and potential rot. -
Optional Drainage Layer
Add a thin layer of small pebbles or coco coir at the bottom for improved drainage and airflow.
Preparing the Soil
Pepper seedlings thrive in light, nutrient-rich, and well-draining soil. Prepare a suitable mix using:
-
1 part compost or vermicompost
-
1 part garden soil (sifted)
-
1 part coco peat or sand for aeration
Moisten the soil lightly before filling the bottles—it should be damp but not soggy.
Sowing the Seeds
-
Fill the Bottle Base
Add soil to the bottom part of the bottle, leaving about 2–3 cm from the top. -
Plant the Seeds
Sow 2–3 pepper seeds per bottle about 0.5–1 cm deep. Cover gently with a thin layer of soil. -
Water Lightly
Use a spray bottle to moisten the topsoil evenly without displacing the seeds. -
Cover the Bottle (Optional)
If desired, place the top half of the bottle back over the base to create a mini greenhouse. This will trap humidity and warmth, aiding faster germination.
Warmth and Light Requirements
Pepper seeds germinate best at 24–30°C (75–86°F). Place the bottles in a warm, bright area such as a sunny windowsill or under a grow light. Avoid placing them in direct hot sun if the top is covered, as the greenhouse effect can overheat the seedlings.
If needed, you can place the bottles on top of a refrigerator or use a heating mat to maintain a consistent temperature.
Germination and Early Growth
Seeds should begin to germinate within 7–14 days, depending on the pepper variety and conditions. Once the seedlings emerge:
-
Remove the dome or uncover the bottle for several hours daily to improve air circulation.
-
Keep the soil evenly moist, watering lightly as needed.
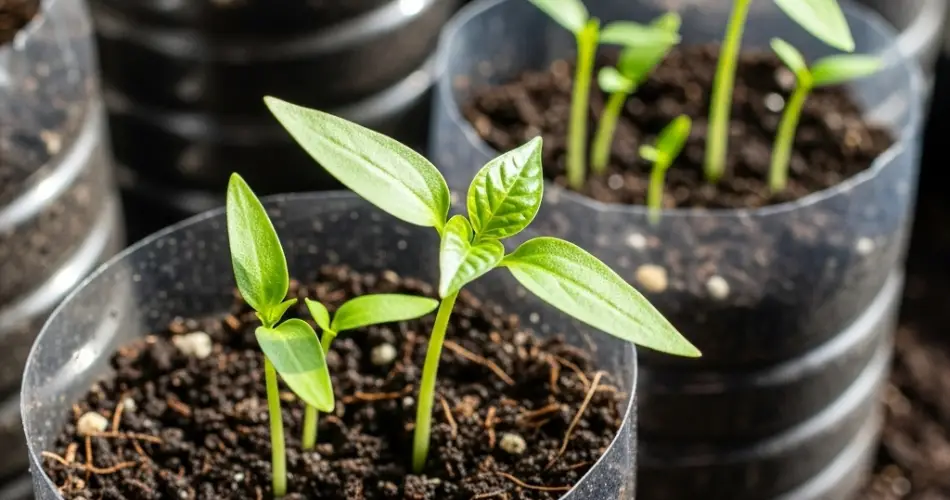
Once the seedlings have at least 2 true leaves (the second set of leaves after the seed leaves), thin out weaker sprouts by snipping them at the base—leave only the strongest seedling in each bottle.
Transplanting Pepper Seedlings
When your pepper seedlings are 10–15 cm tall and the weather is consistently warm, they’re ready to be transplanted into larger containers or your garden.
To transplant:
-
Water the seedlings a few hours before moving them to ease removal.
-
Gently loosen the soil in the bottle and remove the seedling with its root ball intact.
-
Plant it in a pot, raised bed, crate, or directly in garden soil, burying it to the same depth as it was growing.
Choose a location with full sun and good airflow for continued healthy growth.
Continued Care
-
Sunlight: Peppers need 6–8 hours of full sun daily.
-
Water: Keep the soil consistently moist, especially during dry spells.
-
Feeding: Use a balanced organic fertilizer every 2–3 weeks. Once flowering begins, switch to one with more potassium and phosphorus.
Mulching can help retain moisture and suppress weeds. Support taller varieties with stakes or small cages as they grow.
Final Thoughts
Germinating pepper seeds in bottles is a practical and eco-conscious way to jumpstart your growing season. It ensures better success with germination, simplifies care during early growth, and makes transplanting easier. Whether you’re growing hot chilies, sweet bell peppers, or colorful ornamentals, this method sets your plants up for a strong, fruitful season.


