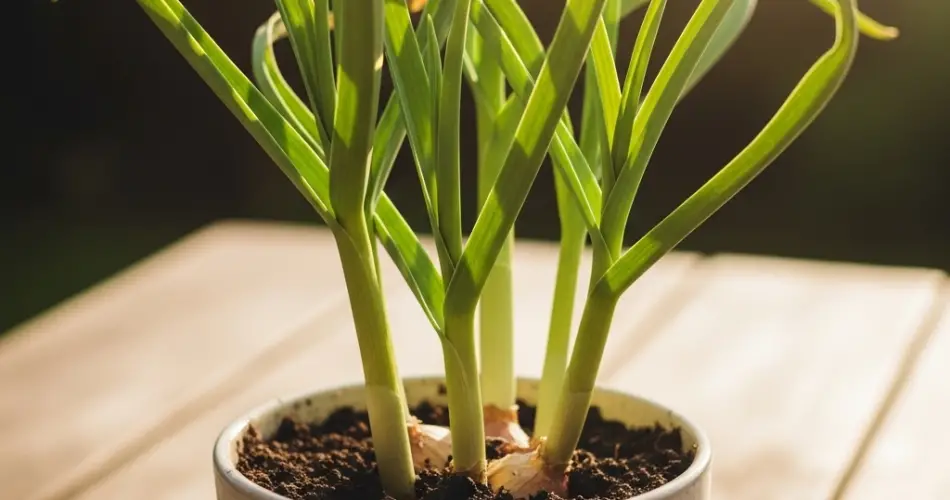
Growing garlic in pots is a fulfilling and practical way to produce one of the most essential and flavorful ingredients in the kitchen. Even if you lack a backyard or garden plot, garlic thrives in containers when given the right conditions. It’s a slow-growing crop but requires minimal maintenance, and the reward—fresh, homegrown garlic bulbs—is more than worth the wait.
With just a pot, soil, and a few garlic cloves, anyone can grow this pungent crop on a balcony, patio, or sunny windowsill.
Choosing the Right Container
Garlic has a modest root system, but the bulbs need space to form underground. Choose a container that is at least 20–25 cm (8–10 inches) deep and wide enough to plant multiple cloves with some space between them. A rectangular planter, a round pot with a diameter of at least 30 cm (12 inches), or even a repurposed storage tub with drainage holes will work well.
Drainage is crucial—garlic hates soggy roots. Make sure your container has several holes at the bottom. You can also place a layer of small rocks or broken clay pieces to improve drainage.
Selecting Garlic for Planting
Use garlic bulbs from a trusted garden center or organic market. Avoid supermarket garlic if it’s been treated to prevent sprouting. Choose firm, healthy bulbs, and break them into individual cloves just before planting. Leave the papery skins on each clove.
Hardneck and softneck are the two main types of garlic. Hardneck varieties are more cold-hardy and produce a central flowering stalk called a scape, while softneck types store longer and are better suited for milder climates.
Preparing the Soil
Garlic prefers loose, well-drained, fertile soil. A mix of potting soil, compost, and a bit of sand or perlite for drainage is ideal. Aim for a soil pH between 6.0 and 7.0. Work in plenty of organic matter, such as aged compost or worm castings, to provide essential nutrients throughout the growing season.
Avoid heavy clay soils or those that retain too much moisture, as garlic bulbs can rot in wet conditions.
Planting the Cloves
Plant garlic in autumn for a summer harvest or in early spring if you live in a warmer climate. Autumn planting gives the bulbs more time to develop, often resulting in larger heads.
To plant, push each clove into the soil, pointy end up, about 5 cm (2 inches) deep. Space the cloves 10–15 cm (4–6 inches) apart. Water gently after planting.
Position the pot in a sunny location—garlic needs at least 6 hours of sunlight a day to grow strong bulbs.
Watering and Care
Garlic prefers evenly moist soil. Water the pot when the top inch of soil feels dry. Be careful not to overwater, especially in cooler months, as wet conditions can cause fungal diseases and bulb rot.
As the garlic grows, reduce watering slightly when the foliage starts to yellow and dry. This signals the plant is nearing maturity and helps the bulbs cure naturally in the soil before harvest.
Applying a layer of mulch, such as straw or dry leaves, helps conserve moisture, suppress weeds, and protect young shoots in colder weather.
Fertilizing Garlic
Garlic isn’t a heavy feeder, but it benefits from a balanced fertilizer or compost tea every 3–4 weeks during its growing phase. Avoid high-nitrogen fertilizers later in the season, as they encourage leafy growth rather than bulb formation.
If you’ve started with nutrient-rich soil, additional feeding might only be needed once or twice during the growing period.
Dealing with Pests and Problems
Garlic is relatively pest-resistant, thanks to its strong smell. However, watch for fungal diseases like white rot or rust, especially in humid conditions. Ensure good airflow around the pot and avoid wetting the leaves when watering.
Aphids may occasionally appear on the flower stalks (scapes), but they can be managed by removing infested leaves or spraying with a mild soap solution.
Harvesting Garlic
Garlic takes 7 to 9 months to mature. It’s ready to harvest when the lower leaves turn yellow and dry out, usually in early to mid-summer if planted in autumn. Use a small trowel or your hands to gently loosen the soil and lift the bulbs—avoid pulling them by the stems, which can damage the bulbs.
After harvesting, let the garlic cure in a dry, well-ventilated area out of direct sunlight for about two weeks. Once dry, trim the roots and stems, and store the bulbs in a cool, dry place.
Regrowing from Your Harvest
You can reserve a few of your best, largest bulbs to plant again in the next growing cycle. Over time, your garlic harvests can become increasingly adapted to your specific container environment and local conditions.
Growing garlic in pots is a simple and satisfying project for home gardeners of all levels. With just a bit of space, the right container, and some patience, you can enjoy the rich flavor and health benefits of fresh garlic straight from your own mini garden. It’s a slow crop—but the payoff is delicious and rewarding.


