Dill (Anethum graveolens) is a flavorful and aromatic herb commonly used in pickling, seasoning, and herbal remedies. While traditionally grown in garden beds or containers, dill can also be successfully cultivated in upcycled plastic bottles—making it a perfect herb for compact spaces, windowsills, and balcony gardens. With just a bit of preparation, you can turn an ordinary plastic bottle into a mini greenhouse that supports dill’s growth from a simple stalk to a vibrant seedling.
This method is ideal for gardeners with limited space or those looking for sustainable, low-cost growing solutions.
Why Grow Dill in a Bottle Garden?
Growing dill in a plastic bottle garden offers several benefits. It’s a space-saving solution for urban gardeners, allows better control over watering and light, and gives you the opportunity to reuse plastic bottles instead of throwing them away. The bottle acts as a mini greenhouse, keeping humidity and temperature stable—both of which are important for dill’s early growth phase.
This setup also lets you start with cuttings instead of seeds, which can significantly shorten the time it takes to grow a harvestable plant.
Materials You’ll Need
-
A healthy dill stalk (cutting)
-
A clear plastic bottle (1 or 1.5 liters works well)
-
Bottled or filtered water
-
Clean scissors or pruning shears
-
A sharp knife or cutter
-
Well-draining potting mix (for later transplanting)
-
Optional: rooting hormone
Step 1: Prepare the Dill Cutting
Start with a fresh dill stalk from an existing plant. Choose one that is green, sturdy, and non-flowering. Using clean scissors or pruning shears, cut a 4–6 inch (10–15 cm) piece of stem just below a leaf node.
Remove the leaves from the bottom half of the stalk, leaving only a few at the top. This reduces moisture loss and encourages the plant to focus on root development.
If you like, you can dip the cut end in rooting hormone to speed up the rooting process, though dill typically roots well without it.
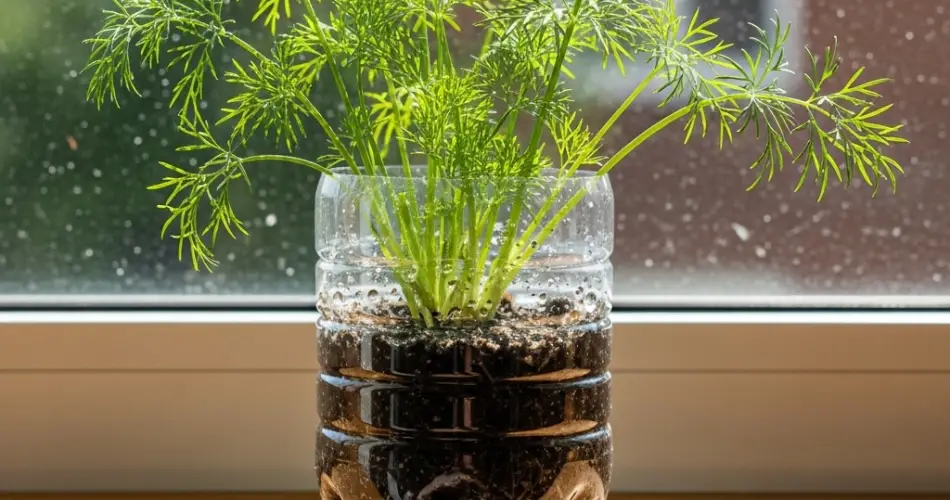
Step 2: Build Your Bottle Garden
Take your plastic bottle and cut it approximately one-third from the top. You’ll now have two parts: a bottom container to hold water and an upper part that can serve as a humidity dome.
Fill the bottom half with bottled or filtered water. Avoid using chlorinated tap water unless you’ve let it sit out overnight to allow the chlorine to evaporate.
Place the dill cutting into the water so that the bare stem (including at least one node) is submerged, while the leaves remain above the surface. You can use the bottle top as a lid or humidity dome by inverting it and loosely fitting it back onto the base. If needed, poke a small hole in the bottle cap to allow airflow.
Step 3: Placement and Light
Put your bottle garden in a bright area with indirect sunlight. A sunny windowsill or shaded balcony is ideal. Direct sunlight can cause overheating inside the bottle, especially if the lid is on.
Change the water every 2 to 3 days to keep it fresh and prevent bacterial buildup. If algae begin to form inside the bottle, clean it gently and replace the water.
Within 7 to 14 days, you should see fine roots emerging from the submerged nodes. Keep the humidity stable and ensure the bottle doesn’t dry out during this phase.
Step 4: Transplanting the Rooted Cutting
Once the dill cutting develops roots about 1 to 2 inches (2.5 to 5 cm) long, it’s time to move it into soil. Prepare a small pot with well-draining potting mix, ideally a blend of compost, sand, and coco coir or perlite. Dill prefers slightly acidic to neutral soil with good drainage.
Make a small hole in the soil, place the rooted stalk gently in the center, and press the soil around it. Water lightly to settle the soil.
Keep the pot in partial shade for the first few days to help the plant adjust, then gradually move it into full sunlight as it stabilizes.
Step 5: Caring for Your Dill Seedling
Dill thrives in full sun and needs about 6 hours of direct sunlight daily. Keep the soil consistently moist but not soggy. Once the seedling is well established, it requires little maintenance beyond occasional watering and a bit of pruning.
Avoid over-fertilizing, as dill grows best in modest conditions. Too much fertilizer may reduce the potency of its flavor.
You can start harvesting dill leaves once the plant reaches about 8 inches in height. Cut the outer stems first and allow the inner growth to continue maturing.
Tips for Success
-
Cuttings vs. seeds: Starting from cuttings allows for faster harvests and consistent plant quality.
-
Reusing bottles: You can grow multiple herbs this way by preparing several bottles at once.
-
Pest prevention: Keep your bottle garden clean and monitor for aphids or mildew. Dill is generally pest-resistant when kept healthy.
-
Succession planting: Take more cuttings every few weeks for a steady supply of fresh dill.
Final Thoughts
Growing dill in a plastic bottle garden is a smart, simple, and sustainable way to enjoy fresh herbs at home. This method gives you control over every stage of growth—from rooting the stalk to planting a thriving seedling. Whether you’re working with a balcony, a windowsill, or a tiny backyard, this approach lets you grow flavorful, aromatic dill with minimal space and effort.


